LG Washing Machine Repair Front-Load: Step-by-Step Guide
A comprehensive, step-by-step guide to diagnosing and repairing common LG front-load washers, with safety tips, essential tools, maintenance routines, and when to replace components.

By following this guide, you will learn how to safely diagnose and repair common LG front-load washer problems. The steps cover not draining, not spinning, leaks, and error codes, with emphasis on safety, proper tools, and clear testing procedures. This structured approach helps homeowners perform reliable, low-risk repairs or decide when to call a professional.
Why LG Front-Load Reliability Matters
LG front-load washers are a popular choice for households seeking efficiency and large capacity. When you encounter issues with an lg washing machine repair front load, the key is to understand the common failure points, apply a methodical diagnostic approach, and perform safe, effective repairs. This section explains why reliability matters, how LG’s engineering influences common faults, and what you can do to extend the life of your unit. Regular cleaning of the door seal, periodic filter maintenance, and correct installation practices reduce water leaks and downtime. As you read, you’ll see how to separate symptom from cause, how to verify fixes, and how to decide whether a repair is DIY-friendly or warrants a service call. The goal is to empower homeowners and maintenance professionals to minimize disturbances to daily laundry routines while protecting floors and electrical safety in the home. In the realm of lg washing machine repair front load, proactive care and timely interventions make a sizable difference over time.
Common Performance Issues with LG Front-Load Washers
Not draining, not spinning, leaks, and excessive vibration top the list of issues seen by homeowners and technicians working on lg washing machine repair front load models. Many symptoms originate from drainage faults, worn door boots, clogged filters, or sensor faults. Some errors are model-specific and require a quick lookup of the user manual or LG’s official support resources. Before you jump into repair steps, reproduce the symptom with a fresh cycle to confirm it’s reproducible. If the unit is leaking, trace the leak to door seal wear or hose connections. If spinning stops mid-cycle, check the drive motor, belt (for older direct-drive configurations), and the inverter. Each symptom narrows down the probable causes, guiding you toward safe, targeted fixes rather than broad guessing. The reader should be prepared with a calm, methodical approach to avoid further damage and to keep the repair feasible within a typical home workspace.
Safety First: Preparing for Diagnostics
Safety is non-negotiable when performing any appliance repair. Always unplug the washer before you open access panels or touch internal components. If the unit uses an external water supply, shut off the cold water valve to minimize leaks. Gather a dry, non-slip workspace, towels, a shallow tray or bucket to catch water, and a flashlight for dark corners behind the cabinet. Wear protective gloves to guard against sharp edges and hot surfaces. Clear the area of obstructions and ensure children or pets are away from the workspace. If you must move the machine, do so with care and avoid tipping, which can cause internal damage. For the task at hand, focus on accessible components first—drain hoses, lint filter, door seal, and the front panel—before tackling the more complex electronics. In the broader context of lg washing machine repair front load, safety reduces risk and makes troubleshooting more reliable.
Diagnostic Framework: Error Codes, Symptoms, and Checks
A structured diagnostic framework speeds up repairs and reduces guesswork. Start by identifying the visible symptom, then cross-check any error codes displayed by the control panel. Consult the model-specific manual or LG support site to interpret codes accurately. Next, inspect the drain path: drain hose for kinks, the pump inlet for debris, and the lint filter for clogs. If water remains in the drum, verify the drain pump operation by listening for the pump motor during a drain cycle or by manually testing the impeller with the service panel open. Inspect the door lock or lid switch—faulty locking can halt cycles and trigger not-spinning or not-draining symptoms. Finally, test essential sensors and the main control board only if you have the proper equipment and knowledge, since electronics work can present shock risks. This framework keeps the process safe and repeatable for lg washing machine repair front load scenarios.
Common Fixes for LG Front-Load: Drains, Seals, and Motors
Practical fixes often begin with the simple and extend to moderate maintenance tasks. Start by cleaning and clearing the drain pump and filter to restore proper drainage. Remove debris from the pump impeller and ensure the filter housing is free of lint and hair. Inspect the door boot seal for cracks or folds; a compromised seal is a frequent cause of leaks and mold growth. For seals, replacement is often straightforward with the right prying tools and a new gasket. If draining and sealing checks don’t resolve the issue, the pump motor or inverter module may be at fault; these components typically require component-specific instructions and, in some cases, professional service. When replacing parts, verify compatibility with your exact LG model and follow torque recommendations to avoid overtightening. Through methodical checks in lg washing machine repair front load, you can differentiate between quick fixes and more involved repairs.
Preventative Maintenance and Long-Term Care
Preventive care extends the life of LG front-load washers and reduces the frequency of repairs. Establish a routine for cleaning the door seal and gasket to prevent mold and odor buildup. Run a maintenance wash with occasional hot water and a washing machine cleaner or a vinegar solution (as recommended by your manual) to clear soap scum and mineral deposits. Keep the lint filter clean and inspect inlet hoses for wear every few months. Level the washer to minimize vibrations and displaced water, which helps with balance during high-spin cycles. Finally, document any recurring symptoms and service dates; this history helps with timely repairs and can improve resale value. Following these best practices for lg washing machine repair front load makes everyday use more reliable and cost-effective.
Authority sources
For safety guidelines and repair best practices, consult trusted sources. Here are a few authoritative resources that offer appliance-safe practices and consumer guidance:
- https://www.ftc.gov
- https://www.energy.gov
- https://www.osha.gov
Tools & Materials
- Screwdrivers (Phillips and flat-head)(Assorted sizes; essential for panel screws and fasteners)
- Multimeter(For testing continuity and voltage on electrical components)
- Needle-nose pliers(Grip hoses, gently pull fittings; avoid damaging plastic parts)
- Bucket(Catch residual water during pump inspection or hose removal)
- Towels or absorbent rags(Control spills and dry the work area)
- Flashlight(Improve visibility in front and back panels)
- Toweling or silicone grease(For seal fittings and to ease gasket removal/replacement)
- Replacement parts (optional but recommended)(Door seal, drain pump, or hoses—verify compatibility with model)
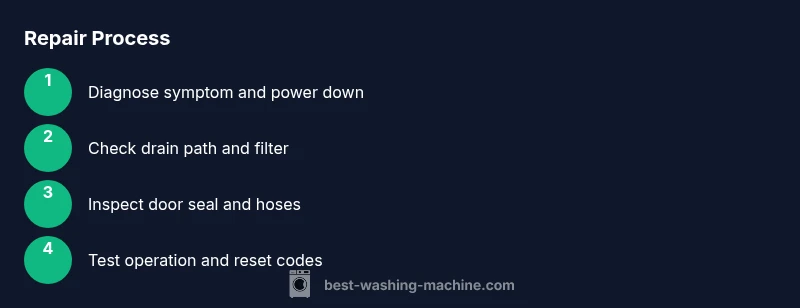
Steps
Estimated time: 45-60 minutes
- 1
Power down and gather tools
Unplug the washer from the wall outlet and turn off the cold water supply. Gather the essential tools listed above and place towels to absorb any residual water. This setup reduces the risk of shock and keeps the workspace organized.
Tip: Label screws and remove panels methodically to simplify reassembly. - 2
Access service panels and drain path
Remove the lower front panel to access the drain pump and filter housing. Lay a towel and bucket to capture any remaining water. Check for obvious kinks in hoses and ensure the drain path is clear before testing the pump.
Tip: Take photos before disassembly to reference reassembly steps. - 3
Inspect drain pump and filter
Remove the lint filter and inspect the pump inlet for debris. Clean the filter housing and remove obstructions from the impeller. Re-seat the pump connections if you notice loose hoses or corroded clamps.
Tip: Do not force fittings; if a component resists, re-evaluate fit and alignment. - 4
Check door lock and lid switch
With the panel open, verify the door lock mechanism engages correctly when a cycle starts. A faulty lock can halt cycles and trigger not-spinning or not-draining symptoms. If you detect wear, plan for a replacement.
Tip: Use the multimeter to test continuity across the lock switch per the service manual. - 5
Inspect hoses and fittings
Inspect all inlet and drain hoses for cracks, leaks, or mineral buildup. Replace any damaged hoses and secure clamps firmly to prevent future leaks. Confirm there are no clogs in the drain hose that lead to slow drainage.
Tip: Bleed air from hoses by tilting slightly to ensure smooth water flow. - 6
Test run and reset codes
Reconnect power and run a short diagnostic or test cycle to verify drainage, spinning, and water intake. If the display shows error codes, cross-check with the model manual and clear codes with a controlled reset if appropriate.
Tip: If error codes persist after a reset, document codes and model details before seeking professional help.
FAQ
What are common LG front-load washer errors and how should I troubleshoot them?
LG error codes vary by model, so start with the user manual. Common causes include drainage faults, worn door seals, or sensor faults. Use a controlled reset and verify basic components before deeper electronic testing.
Common LG errors usually point to drainage or door issues. Start with a reset and check the drain, door seal, and filters before moving on to electronics.
Is it safe to repair a LG washing machine front-load by myself?
Basic tasks like unplugging, clearing clogs, and cleaning filters are safe. More complex repairs involve mains electricity and can void warranties; seek professional help for electronics or motor issues.
DIY is okay for simple fixes, but for electronics or motor problems, get professional help.
How do I know when to replace instead of repair?
Consider the age of the machine, repair frequency, and total repair costs relative to a new unit. If frequent fixes are needed, replacement is often more economical.
If it keeps breaking down or repair costs pile up, replacement is usually wiser.
What tools are essential for LG front-load repair?
Keep a basic toolkit: screwdrivers, a multimeter, pliers, towels, and a bucket. Have replacement hoses or a door seal on hand if wear is evident.
The basics are screwdrivers, a multimeter, pliers, towels, and a bucket.
How long does a typical LG front-load repair take?
Most quick diagnostics and fixes take less time than a full service, while extensive component replacements can require more time. Start with the easiest checks first.
Short diagnostics are quick, but larger repairs can take longer; start with easy checks.
Watch Video
The Essentials
- Unplug before opening the cabinet
- Clear the drain path and inspect the door seal
- Use a methodical diagnostic framework
- Know when to replace vs. repair costly components
- Document steps and preserve safety throughout