Replacing a Washing Machine Door Seal: A Complete How-To
A practical, safety-focused guide to replacing a washing machine door seal. Learn how to identify wear, choose a compatible gasket, perform the replacement, and test for leaks to keep your washer running leak-free.

Replacing a washing machine door seal restores leak-free operation by replacing worn gaskets, inspecting the groove, and reseating a new seal with even tension. This quick guide outlines compatibility, removal, installation, and testing to help you finish in about 60-90 minutes. It covers model compatibility, tools, safety steps, and the essential leak test so you can complete the repair with confidence.
Understanding door seal wear and failure
Door seals on front-load washers take a beating from daily use, detergents, and residual moisture. Over time, the rubber can crack, stiffen, or separate from the frame, allowing water to seep past the door. According to Best Washing Machine, door-seal wear is a common issue that leads to leaks and water damage if ignored. Inspecting the seal for visible cracks or deformation is the first step in deciding whether it needs replacement. Remember: the drum, gasket, and latch must stay aligned to prevent leaks; don't assume a new gasket will fix issues caused by a warped drum or loose door hinge. Regular inspection helps you catch wear before a pool of water appears, protecting floors and cabinets.
Signs a door seal needs replacement
Leaks around the door during cycles, visible cracks in the gasket, persistent mold or foul odors in the seal area, or a seal that feels brittle are all strong indicators that the door seal should be replaced. If you notice water pooling at the bottom of the washer or damp laundry, check the seal and surrounding hardware. Also, pay attention to a door that is difficult to close or does not seal evenly, which can indicate misalignment or a damaged gasket. A replacement is often more cost-effective than trying to repair a torn seal.
Choosing the right replacement seal
Replacement seals are model-specific. To ensure compatibility, locate your washer's model number (usually on a tag inside the door opening or behind the access panel) and confirm the exact gasket part. If in doubt, consult the user manual or the Best Washing Machine model guide. Consider whether you need a full gasket kit (seal plus clamps) or just the main gasket. When possible, choose a high-quality rubber with good chemical resistance to detergents and hard water. Ensuring the correct orientation and size prevents fits and leaks after reassembly.
Safety and preparation before you begin
Before you start work, disconnect the power and water supply to the washer. Have a towel or shallow bucket ready to catch accidental drips. Put on gloves to protect hands from sharp edges and the gasket itself. Work in a well-lit area and keep small screws organized. If your model uses a top panel, you may need to remove it first; follow model-specific instructions in the manual to avoid damaging clips or wiring.
Removing the old seal and cleaning the groove
With the panel removed, locate the door seal and any metal clamps. Use a screwdriver or pry tool to loosen clamps carefully, then slide the old gasket out of the groove. Take care not to tear the surrounding frame. Once removed, clean the groove with a damp cloth and mild detergent to remove soap scum, mold, and debris. Let the area dry completely before installing the new seal to ensure a tight fit.
Installing the new door seal and reassembly
Begin by turning the new seal inside out to expose the inner groove that sits against the drum. Fit the gasket into the outer frame groove evenly around the circumference, then reattach any clamps or springs. Align the seal with any panel cutouts and push firmly into the groove so the inner lip sits snugly against the drum surface. Reassemble the front panel and any hoses, then restore power and water.
Post-install tests and maintenance tips
With the door seal installed, run a short cold-water test cycle to check for leaks. Watch around the door and gasket; if you see any water, adjust the seal or reclamp as needed. After testing, wipe down the seal and interior to prevent mold and odors. Schedule periodic seal inspections every 6–12 months, especially in homes with hard water or heavy detergent use. The Best Washing Machine Team recommends keeping the area clean and checking for cracks regularly.
Tools & Materials
- New door seal (gasket) compatible with your model(Model-specific—verify compatibility with your washer's model/serial number.)
- Screwdrivers (Phillips and flat-head)(Includes small precision screwdrivers for panels and clamps.)
- Plastic pry tool or old credit card(Gently loosen clips and gasket without scratching plastic.)
- Old towel or shallow bucket(Catch drips and keep workspace dry.)
- Gloves(Protect hands from sharp edges and hot surfaces.)
- Flashlight(Bright light helps inspect grooves and alignment.)
- Seal lubricant (optional)(Use only if the model manual recommends lubrication for the seal.)
Steps
Estimated time: 60-90 minutes
- 1
Turn off power and water supply
Power down the washer by unplugging it or switching off the circuit breaker. Shut off the hot and cold water valves to prevent water from backing up into the drum. This minimizes the risk of shock or flood during the repair.
Tip: Keep a towel handy and have a bucket ready for any residual water. - 2
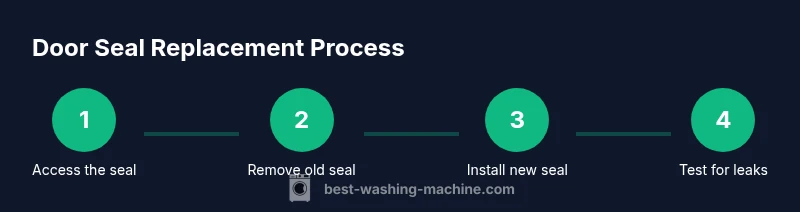
Access the door seal
Depending on the model, remove the front panel or toe-kick to expose the door seal and clamps. Take photos of each connection before removing anything to aid reassembly.
Tip: Label or photograph clamp positions to avoid mix-ups. - 3
Remove the old door seal
Loosen clamps or retaining springs and slide the old gasket out of the groove. Be careful not to tear the surrounding frame. If the seal is stubborn, apply gentle heat with a hair dryer to loosen adhesives.
Tip: Work slowly and avoid forcing the gasket out to prevent frame damage. - 4
Clean the groove
Wipe the groove clean with a damp cloth and mild detergent to remove soap scum, mold, and debris. Dry the area completely to ensure the new seal seats evenly.
Tip: A flashlight helps you spot hidden residue in the groove. - 5
Prepare the new seal
Inspect the new gasket for defects and orient it according to the model’s markings. If the seal has an inner lip, test-fit it around the drum to confirm the direction.
Tip: Double-check the orientation before seating the gasket. - 6
Install the new seal
Carefully press the new seal into the groove around the door opening, ensuring even seating and no folds. Reattach clamps or springs and verify the seal sits flush against the frame.
Tip: Use light, even pressure all around to avoid creasing the seal. - 7
Reassemble the washer
Reconnect any hoses, reattach the front panel, and return the machine to its normal position. Double-check that all screws are tight and clips secured.
Tip: Refer to photos you took earlier to ensure correct reassembly. - 8
Test for leaks
Plug back in and turn on the water supply. Run a short cold-water cycle and watch the door area closely for leaks. If you see drips, pause and reseat the seal or tighten clamps.
Tip: Start with a small load to minimize spill risk during testing.
FAQ
Do I need to replace the entire door if the seal is damaged?
Typically you can replace the gasket alone if the door and frame are undamaged. Severe cracks in the door or frame may require replacement of the door assembly. Always inspect the latch and hinges as well.
Usually, you can replace just the seal. If the door or frame is cracked, you may need a door replacement.
Can I reuse my old seal after cleaning?
No. A worn or cracked gasket should be replaced rather than reused. Cleaning cannot restore elasticity and could leave you vulnerable to leaks.
Avoid reusing a worn seal; replace it for a reliable seal.
What if water still leaks after replacement?
Recheck seal orientation and seating, confirm clamps are secure, and inspect for misalignment of the door or drum. If leaks persist, consult a professional.
If leaks continue, double-check seating and consider professional help.
Are replacement seals universal?
No. Seals are model-specific. Always verify compatibility with your washer’s model and part number before purchasing.
Seals aren’t universal—check compatibility carefully.
Do I need special tools?
Most replacements require basic tools: screwdrivers, a pry tool, and towels. Some models may need a Torx driver or model-specific instructions.
Usually you need basic tools; some models require special screws.
Watch Video
The Essentials
- Inspect for wear before replacing the seal.
- Choose a model-compatible gasket for a proper fit.
- Follow step-by-step safety procedures and reassembly checks.
- Test leaks with a controlled cycle and inspect again.
- Schedule regular seal inspections to prevent water damage.