Whirlpool Washing Machine Control Board Replacement: Step-by-Step Guide
A complete, beginner-friendly guide to replacing a Whirlpool washing machine control board, including diagnostics, compatibility checks, tools, step-by-step procedure, and testing tips. Learn best practices from Best Washing Machine to ensure a safe, reliable repair.

By the end of this guide you will be able to replace a Whirlpool washing machine control board safely and confidently. You’ll diagnose symptoms, source a compatible board, disconnect and install wiring harnesses correctly, and test the unit to confirm proper operation. This process emphasizes safety, model compatibility, and practical tips, with guidance from Best Washing Machine.
What is a Whirlpool washing machine control board?
The control board is the central processor of a modern Whirlpool washer. It coordinates cycles, motor speeds, water fill and drain, door latch, and user interface responses. In many Whirlpool models you’ll encounter a main control board, while older units may use a separate timer board. Replacement decisions hinge on model compatibility and revision matching. Understanding the board’s role helps you identify whether a replacement is worth pursuing and reduces the risk of chasing symptoms that point to other components.
According to Best Washing Machine analysis, recognizing the board’s function helps homeowners distinguish faults caused by the board from issues rooted in sensors, pumps, or wiring. This context saves time and guides you to the right replacement path.
Symptoms That Point to a Control Board Problem
Diagnosis begins with observing error codes, unresponsiveness, or unexpected cycling. Common signs include the washer not starting, display blanking, unchanging indicator lights, random cycle changes, or error codes that recur after resets. A failing board can also produce inconsistent agitation or improper water level sensing. Because many problems share symptoms with motor or sensor faults, verify the issue by testing related components and reviewing service manuals before replacing the board. If you see multiple symptoms that cluster around user interface control or cycle logic, a board issue is more likely.
Best Washing Machine notes that symptoms alone aren’t conclusive; cross-check model-specific wiring diagrams and confirm the fault with a controlled diagnostic approach.
Model compatibility and identifying the correct replacement
Whirlpool boards are model-specific, meaning a replacement must be listed as compatible with your washer’s exact model and revision. Start by locating the model and serial numbers on the unit, then reference the service documentation or vendor compatibility lists. When in doubt, choose a replacement identified for your model family and revision rather than a generic board. Mismatches can lead to wiring harness incompatibilities or miscommunication with sensors and the user interface.
Based on Best Washing Machine Analysis, 2026, always verify model compatibility before purchasing a replacement to avoid wasted time and parts.
Safety considerations and risk awareness
Working inside a washing machine involves electricity and water proximity. Always unplug the unit and disconnect the water supply before any service. Use an anti-static strap to protect electronics and work in a dry, well-lit area. Keep children and pets away, and avoid touching metal parts while connectors are live. If you are ever unsure, consult with a trained technician to prevent injury or further damage to the machine.
This section emphasizes the stakes and encourages safe, methodical work rather than rushed DIY.
Tools and materials you’ll need (overview)
Having the right tools reduces friction and protects components. Essential items include a compatible replacement control board, basic hand tools, a multimeter (optional but helpful for testing wiring continuity), an anti-static wrist strap, labeling supplies (tape and markers), and a service manual or wiring diagram for your model. Optional items include a helper, a small work light, and cable ties for neat routing. Preparing a clean workspace minimizes mislabeling and connector mix-ups.
A well-stocked toolkit helps you complete the task with confidence and fewer mistakes.
Sourcing a compatible control board: what to check
When buying a replacement, prioritize compatibility and seller reliability. Look for boards explicitly listed as compatible with your Whirlpool model and revision. Compare photographs of connectors and mounting points to your old board and confirm the correct orientation of power, communication, and sensor cables. Check return policies in case the part isn’t a perfect match. Avoid unverified third-party boards that don’t provide clear warranty terms or model cross-reference.
The best practice is to source from reputable appliance parts suppliers and verify the return policy before purchasing.
A high-level overview of the replacement process
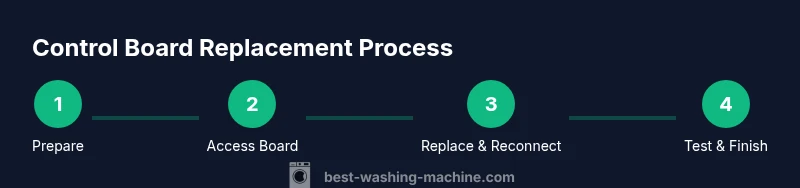
The replacement typically involves accessing the control board, disconnecting all harnesses, removing the old board, installing the new board in the same orientation, reconnecting harnesses, and performing preliminary power-on tests. You will likely need to re-seat connectors and verify that each cable is firmly attached. This block provides a narrative framework, while the step-by-step instructions below supply explicit actions and timing cues for a successful swap.
Testing after installation: what to look for
After installing the new board, reassemble any panels and connect water and power. Run a short diagnostic cycle to verify that basic functions—door lock, display, and motor control—respond correctly. Observe for error codes and ensure the unit advances through cycles as expected. If codes persist, recheck connections and consult the wiring diagram. Proper testing helps confirm the replacement resolved the original fault and that no new issues were introduced.
Maintenance tips to extend control board life
Dealing with a control board replacement is easier when you minimize stress on the electronics. Keep the washer in a dry, climate-controlled area, avoid power surges with a protective surge strip, and ensure waterproof seals remain intact to prevent moisture intrusion. Regularly inspect wiring harnesses for wear, and secure loose cables to prevent chafing. These practices help extend the life of your control board and improve overall reliability.
When to hire a professional vs DIY and cost considerations
DIY control board replacement can be rewarding when you have the right tools and model match, but some Whirlpool models require specialized procedures or diagnostic tools. If you lack confidence working with electrical components or if your model involves complex wiring, a professional repair may be more cost-effective in the long run. Costs vary by region, warranty status, and part availability; weigh the investment against the risk of incorrect installation.
Tools & Materials
- Replacement Whirlpool control board (model-compatible)(Must match your washer's exact model and revision)
- Phillips head screwdriver(Size #2; used for panel screws)
- Nut driver set(Helpful for back-panel fasteners)
- Torx screwdriver(Some models use Torx fasteners on panels)
- Anti-static wrist strap(Prevents electrostatic discharge from damaging the board)
- Multimeter (optional)(For basic continuity checks if needed)
- Electrical tape or cable ties(For securing and organizing harnesses)
- Service manual or wiring diagram(Model-specific diagrams help with connections)
- Work light(Good illumination for connectors and screws)
Steps
Estimated time: 60-90 minutes
- 1
Power down and prepare
Unplug the washer and shut off the water supply. Move the unit away from the wall to access the rear or top panels as needed. Ground yourself with an anti-static strap and keep the area dry to avoid shocks or short circuits.
Tip: Take a photo of the connectors before disconnecting anything to aid reassembly. - 2
Remove access panels to reach the control board
Use the appropriate screwdriver to remove the back or front access panels, depending on your model. Set screws aside and gently lift panels away to reveal the control board mounting area. Ensure the machine is stable and supported before touching internal components.
Tip: Work on a non-slip mat to prevent tools from slipping and to keep screws organized. - 3
Label and disconnect harnesses
Document each connector position using tape labels or a photo. Carefully release locking tabs and gently pull connectors straight out without twisting wires. Do not force any connector that feels stuck;
Tip: If a connector is stubborn, use a small flathead to help lift the locking tab evenly. - 4
Remove the old control board
Unscrew the mounting screws and lift the board away from its standoffs. Note the board’s orientation for installing the new unit. Keep screws with their corresponding location to simplify reassembly.
Tip: Handle the board by the edges to avoid touching electronic traces. - 5
Install the new control board
Place the new board on the standoffs in the same orientation as the old one. Secure it with the mounting screws, ensuring the board sits flat. Double-check that all connectors are accessible for reattachment.
Tip: If the board has a different mounting pattern, don’t force it—verify compatibility first. - 6
Reconnect all harnesses
Reconnect each connector to its matching port, guided by your reference photos or the service diagram. Ensure each connection click-locks and sits flush.
Tip: Double-check that any shields or ground connections are reattached as required by the diagram. - 7
Test power and run a diagnostic cycle
With panels still off, reconnect power and select a basic test cycle if the machine allows it. Observe for any odd behavior, abnormal odors, or error codes. If the machine passes the initial test, reassemble the cabinet.
Tip: If an error code appears, power down, recheck the connectors, and consult the wiring diagram again.
FAQ
What are the signs that my Whirlpool control board needs replacement?
Common signs include a nonresponsive display, cycles that won’t start, odd error codes, and intermittent operation. Remember, some symptoms can be caused by wiring or sensors, so verify with a wiring diagram and consider testing related components.
Watch for a nonresponsive display or cycles that won't start. If codes appear, check the wiring diagram before assuming the board is bad.
Can I replace the control board myself, or should I hire a technician?
DIY replacement is feasible for models with clear wiring diagrams and accessible boards. Some Whirlpool models require specialized tools or diagnostic procedures. If you’re unsure, a professional repair may save time and prevent mistakes.
DIY is possible for some models, but if you’re unsure, a pro can save time and reduce risk.
Will replacing the control board fix all error codes?
Replacing the board often resolves error codes tied to control logic, but codes caused by sensors, wiring, or drainage issues may persist. Always verify by testing and cross-checking against the service diagram.
Board replacement can fix board-related codes, but other faults may remain if sensors or drains are at fault.
How long does a Whirlpool control board replacement take?
A typical replacement can take under two hours for a novice with the right tools, but complexity varies by model and access to the board. Allow for extra time if you need to consult guides or verify compatibility.
Most replacements finish within a couple of hours, depending on model access and experience.
Are there common compatibility issues to watch for?
Mismatched part numbers or revisions can prevent the board from communicating with sensors or the user interface. Always confirm the replacement is listed as compatible with your exact model and revision.
Make sure the replacement matches your exact model and revision to avoid wiring or communication problems.
What should I do if the board doesn’t power on after replacement?
Double-check all harness connections, verify the main power supply, and inspect fuses or the control panel for any visible damage. If still dead, reconsult the wiring diagram and consider professional help.
If it won’t power on, recheck connectors and the main power. If it still fails, seek professional help.
Watch Video
The Essentials
- Verify model compatibility before purchase.
- Label connectors and photograph the wiring before disassembly.
- Test a diagnostic cycle before finishing the job to confirm success.
- Use anti-static protection to avoid damaging the new board.
- If uncertain, consult a professional to prevent costly mistakes.