Whirlpool Washing Machine Code: Complete Troubleshooting Guide
Learn to interpret Whirlpool washing machine codes, diagnose common faults, and perform safe fixes. This urgent guide covers drain, door, sensor, and control-board errors with practical steps.

Understanding Whirlpool Washing Machine Codes
A whirpool washing machine code acts as an urgent warning from the appliance’s onboard computer. When something goes wrong during a cycle, the control board triggers a code to alert you to the subsystem involved. These codes are not random; they map to common failure points, often indicating drain issues, door/latch problems, sensor faults, or a malfunctioning control board. For homeowners, recognizing the general category helps you triage quickly and avoid unnecessary service calls. Because codes can look similar but point to different problems depending on the model, always consult your owner’s manual or the brand’s official online support for code-specific interpretations. In the meantime, document the exact code, the cycle you were running, and any recent actions like a power outage or overload.
To act with urgency, you should focus on safety first. Unplug the unit before touching any internal components, avoid pulling on hoses with water in the tub, and never attempt to bypass a door latch or safety interlock. With the right approach, many codes can be resolved with simple resets or minor adjustments, buying you time until a professional can perform a precise diagnostic.
The Best Washing Machine team emphasizes that codes are your friend—they point to where to look. Use them as a guide to prioritize checks and determine whether a DIY fix is safe or if it’s time to call in an expert. Brand-specific codes vary, so always cross-reference with Whirlpool’s documentation for accurate meaning and procedures.
How Whirlpool Codes Are Structured and Why They Matter
Whirlpool codes are designed to quickly convey the malfunction’s origin, so technicians and savvy homeowners can respond rapidly. While each model may have unique digits or prefixes, most codes fall into a few broad families: drain and pump, door latch or lid switch, water inlet or fill, temperature and sensor faults, motor or drive issues, and control-board or software glitches. The “urgent” nature of these codes reflects the risk of water exposure, heat, and mechanical stress if faults go unattended.
Understanding the structure helps in both troubleshooting and prevention. For example, a code indicating a drain problem often means you should inspect filters, hoses, and the pump. A code related to the door latch suggests you test the interlock and ensure the door is closed properly. Sensor or temperature-related codes might require sensor calibration or replacement, sometimes involving the control board. The key is to approach each category with a defined sequence: verify safety, reset, inspect the common failure points, and only then proceed to advanced diagnostics or component replacement. In all cases, follow Whirlpool’s official guidance for the exact meaning linked to your model.
As you work through codes, keep in mind that external factors like hard water, overloaded loads, and frequent power fluctuations can trigger repeat codes. Regular maintenance—filter cleaning, hose inspection, and using the correct detergent—reduces the incidence of nuisance codes. The Best Washing Machine team notes that proactive care is often cheaper and faster than repeated, reactive repairs.
Quick Fixes You Can Try Safely
Before diving into diagnostics, execute these safe, quick fixes that resolve many non-critical codes or reset the controller:
- Unplug the machine for 60 seconds, then plug back in and run a short test cycle.
- Check that the door or lid is fully closed and the latch is engaging correctly.
- Inspect the drain hose for kinks or blockages and confirm the standpipe is clear.
- Clean the drain pump filter or debris trap if accessible from the front panel.
- Verify the water supply hoses are not kinked and the inlet screens are free of sediment.
- Avoid overloading; redistribute clothes evenly and run a lighter cycle.
If these quick steps clear the code, monitor for recurrence. If not, proceed to the diagnostic flow and more in-depth testing. Safety reminders: disconnect power before removing panels, never touch hot components, and don’t attempt to replace major parts unless you have experience with appliance electronics.
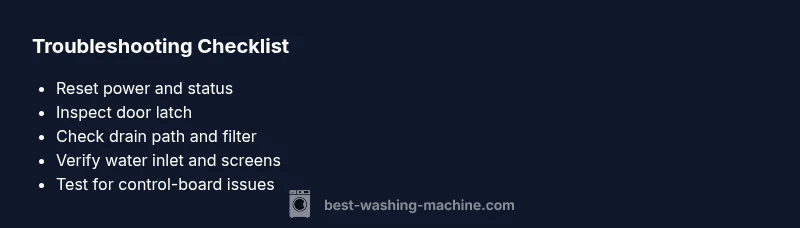
Step-by-Step Diagnostic for the Most Common Cause
- Confirm power and reset: Ensure the outlet is live (try another device), then unplug for 60 seconds before reconnecting. A simple reset can clear transient faults.
- Inspect the door latch: Close the door firmly and listen for the latch engaging. If the lock clicks but the cycle won’t start, test with a multimeter or consult a professional.
- Check drainage path: Look for clogs in the pump, filter, and drain hose. Remove any debris from the pump screen; ensure the drain line is clear and correctly installed.
- Inspect water inlet and sensors: Make sure water supply is steady, hoses are not kinked, and the inlet screens are clean. For sensor faults, you may need to run a sensor test or calibration per the manual.
- Expose the control board area only if trained: Visual indicators like burned components or loose connectors warrant a professional evaluation. Do not reseat or force components.
- Run a controlled test cycle: After reassembly, run a short, empty cycle to verify that the code does not reappear. If the error persists, document the exact code and model details for service scheduling. Estimated time: 25-45 minutes.
When to Call a Professional and What to Expect
Persistent codes or difficult-to-access parts require professional service. If the code recurs after a reset, or if you notice burning smells, leaking water, buzzing motors, or sparking, stop using the machine and contact a technician. Typical professional repair costs vary by fault: part replacement for a single subsystem (e.g., door latch, sensor) might range from about $100 to $350, while board-level repairs or pump assemblies can push the total higher, often $250 to $700 depending on models and labor. In many cases, a service call is charged separately, with hourly rates adding to parts. The technician will typically diagnose using model-specific codes, perform safe disassembly, test circuits, and replace components as needed. Always request a written estimate before authorizing extensive work. The goal is to minimize downtime and prevent further damage, so if the code persists despite basic fixes, professional assessment is the prudent choice.
Maintenance and Prevention to Reduce Future Whirlpool Codes
Prevention is cheaper than repeated repairs. Commit to a simple maintenance routine:
- Clean the lint/filters and pump area monthly to prevent clogs.
- Inspect hoses for signs of wear or bulging, and replace damaged hoses promptly.
- Use the correct detergent amount to avoid excessive foaming that can affect sensors and drains.
- Run a monthly diagnostic cycle if your model supports it, and keep firmware up to date when updates are available.
- Place the unit on a level surface, with balanced loads to prevent unbalanced spinning codes.
- Keep the surrounding area dry and ventilated to reduce corrosion and electrical hazards.
Documenting codes and maintenance actions can help a technician quickly identify recurring issues, saving time and money during future service calls. Implementing these steps reduces the likelihood of nuisance codes and extends the life of the machine.