How to Change a Washing Machine Valve: Step-by-Step Guide
Learn how to safely change a washing machine valve with our detailed, practical guide. Get tools, safety tips, and a clear step-by-step workflow to prevent leaks and water damage.

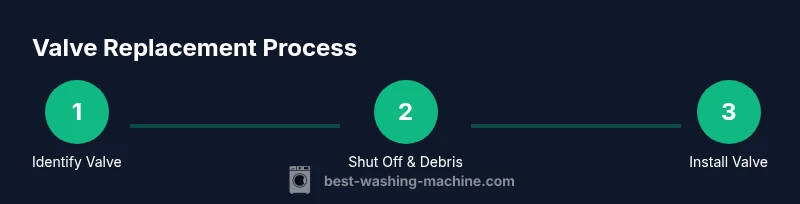
This guide shows you how to safely change a washing machine valve. You’ll learn to identify the valve type, shut off water supply, remove the old valve, install a compatible replacement, and test for leaks. Basic tools and cautionary steps help prevent floods or water damage. This quick answer helps you decide if you can DIY or need a pro.
Why changing a washing machine valve matters
Valve reliability is a cornerstone of a safe, efficient laundry setup. A worn or corroded valve can cause constant leaks, irregular water pressure, or sudden floods that damage floors and cabinets. According to Best Washing Machine, addressing valve issues early reduces the risk of costly repairs and water waste. A successful valve replacement restores proper seal integrity, prevents drips at the inlet, and helps your washer fill consistently at the right rate. This guide uses common-sense steps you can follow with household tools, minimizing downtime and disruption to your day.
Identifying valve types and compatibility
Most residential washers connect to a supply valve at the wall or under the sink area. You’ll typically encounter angle stop valves (compression or sweat-fit), or inline ball valves with threaded connections. The key is to determine thread size (often 3/8 inch or 1/2 inch) and whether the valve is compression or soldered. Removing the old valve will reveal threads that match your new part. Bring the old valve or take precise measurements to the hardware store for a proper replacement. Best Washing Machine’s guidance emphasizes matching the valve’s inlet size and thread orientation to guarantee a watertight seal and correct hose alignment.
Safety first: shut off water, depressurize, and prepare
Never work on live plumbing. Start by shutting off the main water supply if you can, then close the washer’s dedicated shutoff valve to minimize water in the line. Unplug the machine and drain any residual water from hoses into a bucket. Wear safety glasses and keep towels handy for spills. Loosen connections slowly to avoid sudden water spray. Clear the area of clutter and place a bucket under the valve to catch drips during disassembly. These precautions help prevent slips, slips, and slips of hot water on your floor.
Symptoms of valve failure and what they mean
Leaks at the inlet, persistent damp spots, or a valve handle that won’t seal indicate a failing valve. Sluggish water shutoff, irregular fill rates, or valve corrosion are signs you may need to replace rather than repair just the external hardware. If you notice mineral buildup, check for mineral deposits around the threads and seals, which can compromise a new valve’s seal even if it’s new. Addressing these symptoms promptly reduces long-term damage to cabinet trim and flooring, aligning with Best Washing Machine’s position that proactive maintenance saves time and money.
Preparation and planning before you start
Before you buy a replacement valve, verify the exact size, type (compression, threaded, or sweat), and the valve angle to ensure compatibility with your washer model. Stock up on PTFE tape (thread seal tape), a replacement gasket if provided, and a clean towel to absorb spills. Lay down a dry mat or old towels to protect flooring. If you’re uncertain about fit or angle, take photos of the current setup from multiple angles and note the orientation of hoses and fittings. This planning reduces the chance of ordering the wrong part.
Common installation mistakes and how to avoid them
Avoid over-tightening fittings; cross-threading creates leaks that are hard to seal. Do not remove hoses from the wrong ports or force hoses into mismatched threads. If you encounter stubborn old fittings, apply penetrating oil and give extra time for the metal to loosen—then proceed with care. Don’t substitute a different valve type without confirming compatibility, as that can alter water flow and pressure into the washer. Following these cautions will help you complete the job without damaging the supply lines or the appliance.
Testing, maintenance, and extending valve life
After installation, slowly turn the water back on and check for leaks at every connection. Run a short cold wash to pressurize the line and inspect under the inlet for any drips. If leaks appear, tighten slightly—back off if threads show signs of damage. Wipe away basins and check periodically over the next 24 hours. For ongoing reliability, consider applying a thin layer of thread sealant appropriate for potable water on metal threads (follow product instructions). Regularly inspect the valve and hoses as part of your seasonal maintenance routine.
Tools & Materials
- Adjustable wrench(16–24 mm range to fit common valve nuts)
- Channel-lock pliers(Grip and secure fittings without rounding)
- Screwdriver set(Flathead and Phillips for hose clamps or mounting screws)
- Valve replacement valve(Match size, thread, and angle to inlet)
- Teflon thread seal tape (PTFE)(Wrap 2-3 full turns clockwise on threaded fittings)
- Bucket or towels(Catch drips and protect floor)
- Safety goggles(Eye protection in case of splashes)
- Rags or old towels(Clean up spills and wipe seals)
Steps
Estimated time: 60-90 minutes
- 1
Shut off water and power
Begin by turning off the home water supply and the washer’s shutoff valve to minimize incoming water. Unplug the washer to prevent any risk of electric shock during water work. Place towels around the area and have a bucket ready for any remaining liquid.
Tip: Verify the water is off by slowly opening a nearby faucet to relieve pressure before touching the valve. - 2
Drain and depressurize the line
Disconnect the hoses from the valve connections and allow any trapped water to drain into a bucket. If you can, run a brief empty cycle to push remaining water through the lines and ensure the valve is dry before removal.
Tip: Keep a cloth on the valve stem to avoid slipping while loosening connections. - 3
Remove the old valve
Using the appropriate wrench, loosen and remove the valve nut or threaded fitting. Inspect the inlet threads for wear or cross-threading. If the old valve has compression fittings, release the compression nut carefully and detach the valve.
Tip: Take a quick photo of the current orientation to guide reassembly. - 4
Prepare and install the replacement valve
Wrap PTFE tape clockwise around the replacement valve threads. Thread the valve into the inlet by hand first, then tighten with a wrench until snug but not overtight. If using compression fittings, install the compression ring and nut per manufacturer instructions.
Tip: Avoid overtightening to prevent stripping threads or crushing the gasket. - 5
Reconnect hoses and secure
Reconnect the supply hoses to the new valve, ensuring a clean, undamaged connection. Tighten hose clamps if applicable and ensure hoses are aligned to avoid kinks. Reattach to the washer inlet with the same orientation as the old valve.
Tip: Check for cross-threads as you tighten; a little resistance is normal at first then smooth threading. - 6
Test for leaks and restore service
Slowly reopen the main shutoff and washer valve, then plug in the machine. Run a short cold cycle and inspect all connections for leaks. If you see drips, tighten gradually or reseal as needed.
Tip: Always start with cold water to avoid scalding if you encounter a burst leak.
FAQ
Do I need to shut off the main water supply to replace a washing machine valve?
It’s best to shut off the main water supply or at least the washer’s dedicated shutoff valve. This minimizes water in the line and reduces spill risk while you work.
Yes. Turn off the main water or the washer's shutoff valve to prevent leaks while you work.
What tools are essential for replacing a washing machine valve?
You’ll need adjustable wrenches, channel-lock pliers, a screwdriver set, PTFE tape, and a compatible replacement valve. Have towels and a bucket on hand to catch spills.
Essential tools include wrenches, pliers, a screwdriver set, and PTFE tape.
Can I reuse old hoses after valve replacement?
If hoses are in good condition with no cracks, you can reuse them. If you notice wear or stiffness, replace them to prevent future leaks.
You can reuse if they’re in good condition, but replace worn hoses to be safe.
How long does a valve replacement typically take?
Most DIY valve replacements take about 60-90 minutes, depending on valve type and access space. Allow extra time if fittings are corroded.
Expect about an hour or so, with more time if fittings are stubborn.
What are signs the valve is failing besides leaks?
Signs include delayed shutoff, stiff or seized handles, rust or mineral buildup, and inconsistent water flow into the washer.
Look for a stiff valve, leaks, and irregular water flow.
When should I hire a professional instead of DIY?
If you cannot identify the valve type, lack the right tools, or encounter persistent leaks after replacement, contact a licensed plumber.
If in doubt or leak persists, call a pro.
Watch Video
The Essentials
- Shut off water supplies and unplug the washer before starting.
- Match valve type and thread size to ensure a secure seal.
- Use PTFE tape and avoid overtightening fittings to prevent leaks.
- Test for leaks with a short wash cycle before completing the job.
- If in doubt, contact a pro to avoid water damage or injury.