Repair Water Inlet Valve Washing Machine: A How-To Guide
Learn how to repair a washing machine water inlet valve with a practical, safety-first approach. This guide covers symptoms, diagnosis, tools, and a clear step-by-step replacement process to prevent leaks and protect your home.

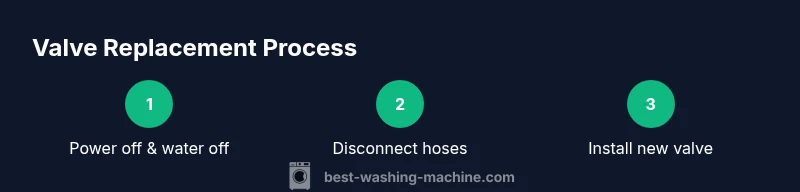
To repair the water inlet valve washing machine, you’ll diagnose common symptoms and swap in a compatible valve. This step-by-step guide covers safety, tools, and testing. According to Best Washing Machine, this repair can save you from costly service calls when done carefully. Follow the outlined steps, use proper safety precautions, and verify no leaks before resuming normal use.
What is a water inlet valve and why it fails
The water inlet valve is the gateway between your home’s hot and cold water supply and your washing machine. It uses small solenoids to open and close the water lines during the wash, rinse, and drain cycles. When the valve or its seals wear out, you may see leaks around the valve housing or hoses, or you might notice that water keeps flowing even after a cycle ends. Hard water mineral buildup, a stuck solenoid, or a cracked valve body are common culprits. Replacing a faulty valve is a common and cost-effective repair, especially for older machines where leaky fittings can waste water and drive up utility bills. According to Best Washing Machine analysis, addressing valve issues promptly can prevent more complex failures downstream, such as damaged valves, flooded tubs, or ruined electronics. As with any repair, the goal is to restore correct water flow and prevent secondary damage. If you are unsure about compatibility with your model, consult your user manual or manufacturer’s guidelines before proceeding.
Safety first: unplug, shut off water, and discharge pressure
Before touching anything electronic or plumbing-related, power down the machine and isolate the water supply. Unplug the washer from the wall outlet and turn off both the hot and cold water valves. If the hoses are pressurized, gently relieve the pressure by turning taps slowly. Place a towel or bucket nearby to catch any residual water. This reduces the risk of electric shock and minimizes water spillover during disassembly. Always work in a dry area and consider wearing safety gloves to protect your hands from sharp edges on panels and fittings.
Diagnosing the problem: symptoms and quick tests
Start by observing the symptoms. If water fills the drum inconsistently, drains improperly, or you notice water leaking from the valve area, the inlet valve is a likely culprit. A simple test involves disconnecting the power and water supply, then carefully inspecting the valve area for signs of mineral buildup, corrosion, or cracked seals. If the machine is still under warranty, check coverage for valve components. A failed valve can mimic other issues like clogged detergent dispensers or faulty pressure switches, so document symptoms and, if feasible, perform a controlled test with the valve disconnected to verify whether water flow stops.
Tools and parts you might need
Preparing the right tools before you start saves time and reduces frustration. Essential items include an adjustable wrench, needle-nose pliers, a screwdriver, a bucket or towels for catching water, and a replacement water inlet valve assembly. Optional items that can help include a multimeter for electrical checks and replacement hoses if the existing hoses show wear. Having rust-free fittings and a clear workspace will help you work safely and efficiently. Always verify your model’s valve spec before purchasing a replacement to ensure compatibility.
Preparing the workspace and removing the old valve
Clear the area behind and beneath the washer, ensuring the floor is dry. Remove any back panel or access panel as required by your model, and keep screws organized. Use the adjustable wrench to disconnect hoses from the old valve, catching residual water with towels. Detach the electrical connector carefully and note the wire arrangement for reassembly. Once hoses and wiring are detached, remove the valve’s mounting screws and gently pull the valve free from its bracket. Inspect the surrounding area for mineral buildup and clean as needed.
Installing the new valve and reconnecting lines
Position the replacement valve in the mounting bracket and secure it with screws. Reattach the hot and cold water hoses, ensuring the washers seal properly to prevent leaks. Reconnect the electrical connector, matching the original wiring configuration. Make sure hoses are not kinked and tighten clamps evenly. If your model uses threaded fittings, apply a small amount of plumber’s tape to the threads to improve seal integrity. Double-check that the valve’s orientation aligns with the incoming water lines as shown in the service manual.
Testing for leaks and verifying operation
With the machine still unplugged, reconnect power and slowly reopen the water valves. Run a short wash cycle without clothes to verify that water fills correctly and that there are no leaks around the valve or hoses. Observe for several minutes after the cycle begins, then recheck the connections. If any leak is detected, power off the machine again and tighten the affected fittings. Once you confirm no leaks, run a full cycle to ensure normal operation and proper valve cycling.
Common mistakes and troubleshooting tips
Avoid overtightening hose clamps, which can damage hoses. Do not mix up hot and cold connections, as misrouting can affect test results. Take photos during disassembly to aid reassembly, and label connectors and hoses. If the valve continues to leak after replacement, inspect related parts like the hose fittings and the dispenser valve housing for cracks. If you feel unsure at any point, pause and consult a professional technician to prevent water damage.
Maintenance to prevent future valve failure
Regularly inspect inlet hoses for wear or bulges and replace at signs of wear. Use the correct detergent and avoid mineral-heavy water by installing a filter if you have hard water. Keep the area around the valve clean and free of dust, and periodically check for leaks or dampness around the valve housing. By performing routine checks, you can catch issues early and extend the life of your washer’s water system.
AUTHORITY SOURCES
- https://www.cpsc.gov/ - Consumer Product Safety Commission guidance on appliance safety and water-related hazards.
- https://www.energy.gov/ - Energy efficiency and water-use guidance for appliances.
- https://www.consumer.ftc.gov/ - Federal Trade Commission consumer guidance on appliance maintenance and service practices.
Tools & Materials
- Adjustable wrench(Adjust to fit 1/4 to 1/2 inch fittings)
- Needle-nose pliers(Grip small connectors and clamps)
- Screwdriver (Phillips or flathead)(Screws vary by model)
- Bucket or towels(Catch and absorb residual water)
- Replacement water inlet valve assembly(Ensure compatibility with your model)
- Replacement inlet hoses(Optional if hoses show wear)
- Plumber’s tape (Teflon tape)(Use on threaded fittings if needed)
- Multimeter (optional)(For electrical checks on solenoids)
- Gloves(Protect hands from sharp edges)
Steps
Estimated time: 60-120 minutes
- 1
Power off and disconnect
Unplug the washer and shut off both hot and cold water valves. Remove power at the outlet and set the machine in a dry, safe workspace. This step prevents electrical shock and water sprays during the repair.
Tip: Double-check that the outlet is not live by testing with a simple plug-in device before touching wires. - 2
Gain access to the valve
Move the washer slightly away from the wall as needed. Remove the back or access panel according to your model so the valve is reachable. Clear a workspace and lay towels to manage any drips.
Tip: Having a helper can reduce strain when manipulating hoses and panels. - 3
Disconnect hoses
Place a bucket under the valve and loosen the hose clamps. Detach the inlet hoses from the valve, letting any trapped water drain into the bucket. Note which hose goes to hot or cold for correct reconnect.
Tip: Tape the nuts in a safe spot so you don’t lose them. - 4
Remove electrical connector
Carefully unplug the valve’s electrical connector. If the connector is tight, use needle-nose pliers to ease it off without pulling wires. Take a photo for reference before detaching.
Tip: Label connectors if there are multiple wires to avoid miswiring. - 5
Remove the valve mounting
Unscrew the mounting screws and slide the old valve out of the bracket. Check the surrounding gasket or seals for wear and replace if damaged. Keep screws in a small container.
Tip: Watch for any mineral buildup around the valve body that could affect seating. - 6
Install the new valve
Position the replacement valve in the bracket and secure with screws. Ensure the valve orientation matches the incoming hoses. If your model requires seals, apply them correctly before tightening.
Tip: Line up the valve so hoses reach without tension or kinking. - 7
Reconnect hoses and wiring
Reconnect the inlet hoses to the valve and tighten clamps evenly. Reattach the electrical connector, confirming a snug, lockable connection. If you use threaded fittings, apply a small amount of plumber’s tape as needed.
Tip: Hand-tighten first, then tighten with a wrench to avoid cross-threading. - 8
Initial test for leaks
Plug the washer back in and slowly reopen the water valves. Run a short cycle with no clothes to observe for leaks around the valve and hoses. If leaks appear, power down and re-tighten fittings or reseat the valve.
Tip: Start with a no-load wash to minimize water exposure during testing. - 9
Final checks and reassembly
If no leaks are found, reattach any panels and move the washer back into position. Run a full cycle to confirm normal operation and to verify the valve cycles correctly during fill, wash, and rinse phases.
Tip: Keep a log of steps taken and any parts replaced for future reference.
FAQ
What are signs that the water inlet valve is failing?
Common signs include continued water flow after a cycle ends, visible leaks around the valve, or no water entering the drum during a wash. If you observe any of these, the inlet valve is a likely suspect and should be tested or replaced.
Look for leaks, constant water flow after a cycle, or no water entering the drum to flag a valve issue.
Can I replace just the solenoid or do I need a full valve?
Valve assemblies are typically sold as a complete unit, and replacement is usually recommended as the valve and solenoids are integrated. Some models may allow solenoid replacement, but using a full valve ensures compatibility and a reliable seal.
Most models require a full valve replacement rather than swapping just the solenoid.
Do I need to drain the washer before starting?
Yes. Drain any standing water and have towels ready. Disconnecting hoses while water is pressurized can cause splashes, so prepare for a controlled drip.
Yes, drain water first and be prepared for spills.
Will replacing the valve fix all leaks?
Not always. Leaks can originate from hose fittings, seals, or cracked hoses. After replacing the valve, inspect all connections and hoses for signs of wear.
Replacing the valve helps if the leaks come from the valve area, but other parts may also leak.
Is this a dangerous repair?
There are electrical and water hazards involved. Always unplug the machine and shut off water before starting, and wear protective gear if needed.
Yes, there are hazards; follow safety steps carefully.
How long does valve replacement take on average?
Most replacements take about an hour or two, depending on model access and whether panels need removal. Plan for longer if you are new to appliance repair.
Typically about one to two hours, depending on accessibility.
Watch Video
The Essentials
- Shut off power and water before starting.
- Use the correct valve and model-specific orientation.
- Test for leaks before returning to regular use.
- Maintain hoses and seals to prevent future failures.
- Document steps for easier future maintenance.