Drain Snake for Washing Machine: A Step-by-Step Guide
Learn to use a drain snake to clear a washing machine clog. This step-by-step guide covers safety, tools, and practical techniques to restore proper drainage at home.

You can clear a washer drain clog using a manual drain snake. Unplug the machine, access the drain path, insert and rotate the snake to break up debris, then test drainage. Safety and patience are essential for a successful DIY fix.
Why a drain snake matters for washing machines
When a washing machine won’t drain, a common and effective solution is a drain snake, also called a hand auger. This tool lets you reach into the drain path and break up hair, lint, and detergent buildup without harsh chemicals that could damage seals. According to Best Washing Machine, understanding the drain path and how a snake interacts with bends and elbows is essential for safe, precise clearing. This approach keeps you in control and reduces the risk of water damage compared with chemical cleaners. The drain snake is particularly useful for slow-draining or partially backing-up washers and should be part of a DIY laundry toolkit. While many clogs respond to a careful sweep, stubborn blockages or damaged pipes require professional help. The key is to work methodically, recognize limits, and combine mechanical clearing with basic maintenance to prevent future clogs. Best Washing Machine’s analysis emphasizes safety first, then a systematic approach for best results.
Assessing the clog: symptoms and causes
A washer drain issue usually presents as water backing up in the tub, slow draining during spin, or standing water in the drum area after a cycle completes. You may hear gurgling sounds or notice damp spots around the standpipe or drain hose. Clogs are often caused by lint, hair, soap residue, and fabric softener buildup over time. The drain path in most homes runs from the washer’s outlet hose to a standpipe or household drain; elbow bends and traps can trap debris. Based on Best Washing Machine analysis, identifying where the blockage lies—hose, trap, or standpipe—helps you tailor your technique. If the blockage is near the trap or within the standpipe, a drain snake is usually effective. If water backs up into the washer or leaks from hoses, stop and reassess to avoid flooding. Observing these signs early improves success and reduces the risk of damage to seals or the pump.
Tools and safety basics
Before you begin, gather your tools and adopt basic safety habits. Essential items include a manual drain snake, a bucket, towels, gloves, and a flashlight. Optional but helpful tools are pliers for hose clamps and a stiff brush for cleaning the coil. Safety first means unplugging the washer, turning off any nearby water supply, and keeping water away from electrical outlets. Wearing gloves protects your hands from sharp edges and dirty debris. A flashlight helps you visualize inside the trap and the drain path, reducing guesswork. Best Washing Machine emphasizes conducting a quick risk assessment: ensure the area is dry, electrical outlets are away from any water splash, and you have a plan to handle overflow.
Preparing the area and accessing the drain
Move the washer away from the wall to access the drain hose and standpipe. Place towels and a bucket to catch water. Detach the drain hose carefully from the wall outlet or standpipe, then inspect the connection for looseness or cracks. If your setup includes a trap or cleanout, remove the trap cover to visualize the blockage. Use the flashlight to inspect for visible debris and wipe away any grime around the clamp. Replacing or tightening hose clamps prevents leaks after you finish. This preparation reduces surprises and makes the snake insertion smoother. Best Washing Machine’s guidance reinforces maintaining a clean, dry working area to protect floors and electrical components.
Inserting the drain snake: technique and grip
Feed the snake into the drain opening slowly, turning the handle to extend the coil toward the blockage. Stay steady and avoid forcing the coil through sharp bends. When you feel resistance, pause, rotate, and try a slightly different angle to reach the clog. Keep the snake nearly straight as it advances to minimize snagging on bends. If the drain hose is short, you may need to insert the snake from the standpipe side. The key is consistent pressure and controlled rotation rather than brute force. Best Washing Machine notes that a patient, deliberate approach yields better debris capture and reduces pipe damage.
Cleaning the drain and testing the machine
Once you feel the clog break free, slowly retract the snake while continuing to rotate to pull out debris. Wipe the coil clean with a cloth and deposit debris into a trash bag. Reattach the drain hose securely and run a short wash cycle with no laundry to test drainage. Check for leaks at the hose clamp and ensure water flows freely down the standpipe. If you still see standing water, repeat the insertion, focusing on different angles and rechecking the trap. After a successful test, dry the area and return the washer to its position. Best Washing Machine recommends verifying performance with a second complete cycle to confirm the clog is resolved.
Common mistakes and maintenance to prevent future clogs
Common mistakes include rushing the process, forcing the snake, or neglecting to clean the coil afterward. Debris can cling to the coil and redeposit later if not wiped away. Regular maintenance reduces future clogs: use lint filters, avoid overusing detergent, and avoid pouring clogged substances down the drain. Periodically inspect hoses for leaks or cracks and replace damaged clamps. If you see repeated clogs, consider a longer-term solution like a drain cleanout or professional inspection. The Best Washing Machine guidance emphasizes routine care: a little preventative maintenance goes a long way toward keeping your washer draining smoothly.
When to call a professional and how to choose one
If you cannot access the blockage, if water leaks continue after two attempts, or if you notice damaged hoses, a professional should handle the repair. A plumber or appliance repair specialist can diagnose pump failures, internal clogs, or standpipe issues that a DIY snake can’t reach. When selecting a pro, request a written estimate, ask about experience with laundry machines, and verify warranty coverage on repairs. For stubborn clogs or visible leaks, the cost of a professional visit is often justified by preventing further damage. Best Washing Machine recommends seeking qualified help when the blockage exceeds the reach of a standard hand auger.
Tools & Materials
- Drain snake (manual auger)(Length 3-6 ft (1-2 m) to reach common washer drains)
- Bucket(Catch water and debris; keep area clean)
- Old towels(Contain spills and protect floor)
- Gloves (rubber or latex)(Protect hands from dirty water and sharp edges)
- Flashlight(Inspect inside traps and corners)
- Pliers(Loosen clamps if needed)
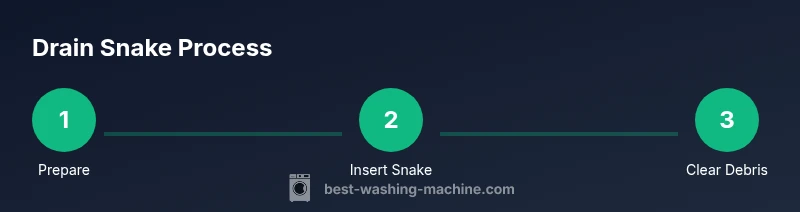
Steps
Estimated time: 45-60 minutes
- 1
Power down and prepare
Unplug the washer and move it away from the wall to access the drain hose. Gather towels and a bucket for potential overflow. This safety step prevents shocks and keeps your workspace dry.
Tip: Double-check the area for any gaps where water could splash. - 2
Access the drain path
Disconnect the drain hose from the wall or standpipe. Position the bucket to catch any remaining water and inspect the hose for kinks or leaks before proceeding.
Tip: Have a flashlight handy to inspect hose clamps and the interior path. - 3
Insert the drain snake
Insert the snake into the drain opening or standpipe and begin rotating the handle while feeding the coil forward. Keep the coil as straight as possible to prevent snagging.
Tip: Do not force the tool through bends; adjust entry angle as needed. - 4
Break through the clog
Continue feeding and turning until you meet resistance from the clog. Gently twist and pull back to grab debris without forcing the coil further.
Tip: If you feel a sharp resistance, stop and reassess the angle. - 5
Retrieve and clean
Slowly retract the snake, continuing to rotate to pull out debris. Wipe the coil clean and inspect for remaining buildup.
Tip: Dispose of debris in a trash bag and avoid spreading contaminants. - 6
Test and reassemble
Reconnect the hose, run a short cycle with no laundry to confirm drainage, and check for leaks at connections.
Tip: If drainage is still slow, repeat the process or consult a professional.
FAQ
What is a drain snake and how does it help a washing machine?
A drain snake is a flexible auger that clears clogs in a drain line. For washers, it reaches the standpipe or drain hose to loosen debris and restore flow.
A drain snake is a flexible tool that clears clogs in your washer drain, helping water flow again.
Can I use chemical drain cleaners with a washing machine?
Chemical cleaners can damage washer seals and hoses and may not reach the clog effectively. They are generally not recommended for washers.
Chemicals risk damage to your washer and often aren’t effective for these clogs.
Is a hand-crank snake better than a powered one?
A hand-crank snake provides better control for home DIY and reduces the risk of pipe damage. Powered augers can be harsher if misused.
Manual augers give you more control and are safer for DIY fixes.
What if the clog is inside the drum area or pump?
Inner drum or pump clogs are less common. If flow doesn’t restore after clearing hoses, a professional should inspect the pump and internal drain path.
If the clog remains after clearing hoses, call a pro to check the pump and internal paths.
How long should I wait after trying the snake before calling a pro?
If drainage remains slow or water backs up during testing after one attempt, consider professional service.
If it’s still slow after one try, it’s time to call a pro.
Will this fix prevent future clogs?
Maintenance helps, such as reducing lint and avoiding clog-prone cleaners, but clogs can recur over time.
Maintenance helps, but clogs can come back eventually.
Watch Video
The Essentials
- Plan safety steps before you begin.
- Rotate and feed the snake gradually to avoid damage.
- Test drainage after reassembly to confirm success.