How to Check Washing Machine Drain: Step-by-Step Guide
A comprehensive, practical guide to diagnosing and clearing washing machine drain issues, including hoses, filters, and pumps. Learn safety tips, quick checks, and when to call a professional.

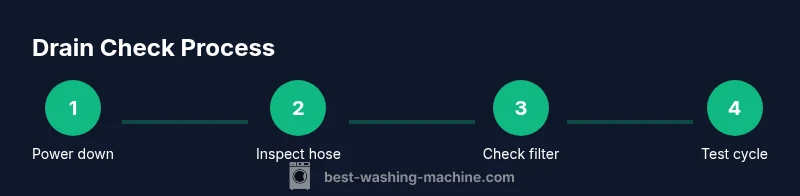
You can check a washing machine drain by unplugging the machine, locating the drain hose, inspecting for kinks, clearing blockages, and testing with a short wash cycle. If the pump or filter blocks are present, clean them, then recheck for drainage. Gather towels, a bucket, gloves, and a flashlight before starting.
Why drain checks matter
Drain problems are among the most common causes of washer malfunctions. If your washer finishes a cycle with standing water or refuses to drain, addressing the drain is the first step. According to Best Washing Machine, improper drainage is often the result of a clog, a kinked hose, or a blocked filter. A quick, careful inspection can save you from bigger damage and expensive repairs. This guide will walk you through a safe, methodical approach to inspecting the drain system, including hoses, standpipes, and pump components. You’ll learn what to look for, how to clean or clear blockages, and how to test drainage after each step. By following this process, homeowners, renters, and even small laundries can regain reliable drainage without unnecessary downtime. Best Washing Machine’s analysis shows that most drainage problems stem from clogs, kinks, or filters, rather than mechanical failures in the pump itself. With a calm, systematic approach, you can determine whether the problem lies in the hose, the filter, or the pump, and you’ll have a plan for remediation.
Drain system basics
Washing machine drain systems vary by design, but they share common components: a drain hose connected to a standpipe or household drain, a possible lint or pump filter accessible from the front panel, and the pump that moves water out of the tub. Some models route the hose through a U-bend or trap; others use a direct connection. A clogged filter or a blocked standpipe can cause water to back up or stop draining altogether. Kinks in the hose or a partially closed shut-off valve can impede flow. When diagnosing, it’s helpful to understand the flow path: water leaves the tub, enters the pump, passes through any filter, and exits via the drain hose. If you hear grinding or see water backing up in unexpected places, the problem may be deeper than a simple clog. This section provides a mental map of the system so you can interpret what you see during inspection and decide which component to target first. Remember, models differ in accessibility; always refer to your owner’s manual for exact locations and safety precautions. The goal is to identify whether the drain hose, the filter, or the pump is the bottleneck before disassembling anything more complex.
Safety and prep: getting ready to inspect
Before touching live electrical equipment or plumbing, take a few safety steps to protect yourself and your property. Unplug the washer from the wall and, if present, switch off the circuit at the breaker. If the machine shares a circuit with other devices, power it down completely to avoid shock. Shut off the cold water supply line to reduce the risk of leaks when you disconnect hoses. Move the washer away from the wall to gain room for hand access and to protect surrounding surfaces from splashes. Gather tools and materials you will need: towels, a bucket, flashlight, and basic hand tools. Clear the floor of any obstacles, and orient yourself so you can access the back or front panel as required by your model. If you’re dealing with standing water, place a towel nearby to absorb spills and keep dry hands while you work. Finally, inspect the area for potential hazards, such as a loose wall outlet or a wet floor that could cause slips. By taking these steps, you reduce risk and create a controlled workspace for drain inspection.
Step-by-step inspection overview
With safety checks completed, outline the inspection in small, logical tasks. Start by examining the drain hose route and connections at the back of the machine. Look for kinks, folds, or crushed sections that impede flow. Detach the hose from the standpipe or outlet if necessary, and inspect the interior for visible blockages. Next, check any external trap or standpipe to ensure it isn’t blocked by debris or lint. If the hose seems clear, move to the pump access panel (if your model has one). Open the panel and inspect for signs of a clogged pump filter or lint screen. Remove any debris with your fingers or a pair of needle-nose pliers. Re-install the filter and reattach all hoses securely, taking care to tighten clamps gradually. After reassembly, run a short test cycle with the drum empty and observe the drainage flow. If water drains away smoothly, you’ve likely resolved the issue. If water remains, re-check the hose route, seals, and filter position. Repeat as needed and consider a professional if the problem persists.
Clearing blockages in the hose and filter
Blockages often collect in the drain hose or filter. Start by disconnecting the hose from the standpipe and inspecting the interior with a flashlight. Remove visible debris with long-nose pliers or your gloved hand, and set aside in a bucket. If your model has a front-access pump filter, unscrew or pop out the filter, then rinse it under running water and scrub with a small brush to remove residue. Reassemble and test again. For stubborn clogs, you can gently push a flexible wire through the hose length or use a small plumber’s snake, taking care not to damage the hose or seals. If you meet resistance near the pump, stop and seek professional help rather than forcing the tool. Avoid chemical drain cleaners; they can damage seals and the pump.
Testing drainage and interpreting results
After reassembling, run a short, empty cycle to observe water movement through the system. If water drains within a minute or two, the problem is likely resolved. If slow drainage persists, re-check hinge points, hose clamps, and filter seating. Listen for unusual noises from the pump, which can indicate a foreign object or a failing impeller. If the cycle finishes with standing water, consider deeper checks or potential pump failure. Keep notes on the timing, noises, and leakage so a technician can diagnose quickly if needed. Regular maintenance reduces recurrence; for hard water or heavy lint, schedule periodic checks of filters and hoses.
When to call a professional and ongoing maintenance
If you cannot locate or fix the blockage, or if water leaks persist after your checks, it’s time to contact a licensed technician. If you are uncomfortable with disassembling front-access panels or handling electrical connections, professional service is the safest option. The Best Washing Machine team emphasizes safety and accuracy; incorrect disassembly can cause bigger problems. For ongoing prevention, clean filters regularly, inspect hoses for cracks, use proper hose management to avoid kinks, and keep the area dry after each load. With routine care, drainage performance remains stable and the risk of costly repairs drops.
Quick-reference troubleshooting cheat sheet
- Check for kinks in the drain hose and standpipe. Straighten any bends before other steps.
- Inspect and clean the pump filter or lint screen if accessible.
- Look for standing water in the tub after a cycle that should drain.
- If you still see issues after cleaning, testing, and reassembling, call a professional.
Tools & Materials
- Safety gloves(Heavy-duty, waterproof gloves)
- Bucket or basin(To catch water and debris)
- Absorbent towels or rags(For spills around the washer)
- Flashlight(Inspect dark hose/slots)
- Screwdrivers (Phillips and flat-head)(Open access panels and filter housing)
- Needle-nose pliers(Pull out lint, debris, and small objects)
- Flexible drain snake or wire(Use if there is a stubborn blockage)
Steps
Estimated time: 60-90 minutes
- 1
Power down and prep
Unplug the washer and switch off the circuit if possible. Shut off the cold water supply to reduce leaks. Clear the area around the machine and position yourself to access the drain area safely.
Tip: Keep a towel handy in case of drips; never work on a wet floor. - 2
Locate and inspect the drain hose
Find the drain hose at the back of the machine. Check for kinks, folds, or crushed sections that could block flow. If needed, detach the hose from the standpipe to inspect the interior.
Tip: Have a bucket ready to catch any residual water before detaching the hose. - 3
Access the pump filter or trap
Open the filter housing or access panel if your model has one. Remove the filter and inspect for lint, coins, or fabric fibers. Rinse the filter under running water and set aside to dry or wipe clean.
Tip: Place a towel beneath to catch water during filter removal. - 4
Clear external and internal blockages
Use pliers to pull out debris from the hose interior and the filter area. Reattach the hose securely and ensure clamps are snug but not overtightened.
Tip: Do not force objects through the hose; if resistance is felt, stop and reassess. - 5
Test drainage with a short cycle
Reconnect all parts, plug in the machine, and run a brief empty cycle to watch water flow. Confirm that water exits through the drain as expected.
Tip: Monitor for leaks at hose connections and seals. - 6
Evaluate results and plan next steps
If drainage is normal, you’re done. If not, repeat checks or consider deeper pump issues. Document findings for future reference or when calling a professional.
Tip: Take photos of any clogged areas or disconnections for reference.
FAQ
What tools do I need to check the drain?
A basic set of hand tools, towels, a bucket, flashlight, and gloves. Depending on your model, you may also access a filter or pump screen.
You'll need basic hand tools, towels, a bucket, flashlight, and gloves.
Why won't my washing machine drain?
Common causes include clogs in the drain hose, pump, or filter, a kinked hose, or a blocked standpipe. Inspect each component step by step to locate the blockage.
Common causes are clogs or hose kinks.
How do I access the pump filter?
Check your model’s manual; many front-loaders have a small panel near the bottom front. Some top-loaders access via an end panel.
Look for a small panel or hatch at the front bottom.
Is it safe to use a plunger on a washer drain?
Plungers are not recommended for washer drains; they can push debris into the pump. Instead, clean the hose and filter with appropriate tools.
Plungers aren’t recommended; use proper tools.
When should I call a professional?
If you cannot locate or fix the blockage, or if water leaks continue after attempts, it's time to contact a licensed technician.
If the issue persists after your checks, call a professional.
Can drain cleaners help washing machine drains?
Most washing machines should not be treated with chemical drain cleaners; they can damage components. Use mechanical clearing methods first.
Avoid store-bought cleaners; they can harm your washer.
Watch Video
The Essentials
- Power down before starting any inspection.
- Check the drain hose for kinks and standpipe for blockages.
- Clean or replace pump filters and lint screens as needed.
- Test with an empty cycle to confirm drainage.
- Call a professional if drainage remains poor after checks.