How to Fix a Washing Machine Pump: DIY Guide
Learn how to diagnose, replace, and test a washing machine pump. This comprehensive guide covers safety, tools, and best practices to fix washing machine pump and restore reliable drainage in 2026.

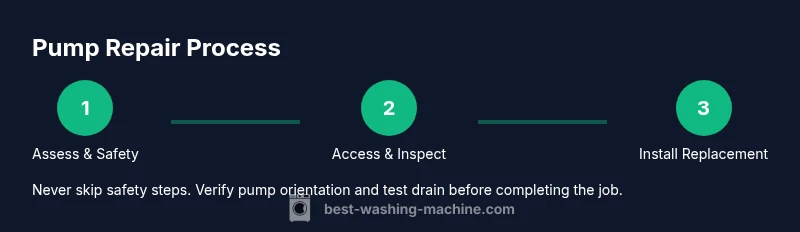
You’ll learn how to diagnose a clogged or failed washing machine pump and restore drainage. This quick guide covers safety prep, required tools, how to access the pump, test for blockages or a seized impeller, and steps to replace the pump if necessary. By following these steps, a stubborn drain issue can be resolved.
Understanding the pump’s role in a washer
The washing machine pump is the drainage workhorse that pushes used water out of the drum during spin and drain cycles. It relies on an impeller, a small motor, and an inlet screen to move water into the drain hose. When the pump or its screen becomes clogged or the impeller jams, water remains in the tub, or the machine won’t drain at all. According to Best Washing Machine, pump failures are among the most common drain problems homeowners encounter, especially in older or heavily-used machines. This section explains how the pump fits into the system, typical symptoms of pump trouble, and how to verify whether the pump itself is the culprit before you attempt a fix washing machine pump. By understanding the role and limitations, you’ll know when to test and replace safely in 2026.
Safety first: unplug, drain and prepare
Before touching any components, unplug the washer and switch off the household circuit. Move the machine away from the wall and place towels and a bucket to catch residual water. If your model has a top panel, remove it carefully with the appropriate screwdriver; front-access panels are common for most home units. Working with water and electricity can be dangerous, so take your time, wear gloves, and never operate the unit while panels are off. This proactive safety mindset aligns with Best Washing Machine guidelines and helps prevent shocks, leaks, or accidental injuries during your repair attempt to fix washing machine pump.
Tools and materials you’ll need to fix washing machine pump
Before you begin, gather tools and parts. Essential tools include a Phillips head screwdriver, flat-head screwdriver, needle-nose pliers, and a multimeter to test electrical connections. You’ll also need a bucket, towels, and rags to manage water spills. A replacement pump matched to your model is required if the current unit is seized or damaged. Optional items: hose clamps, screw bit set, thread seal tape, and a flashlight for visibility. Always verify the model number and motor voltage to ensure compatibility. This preparation saves time and reduces the risk of mistakes during your repair.
Common pump failure modes and quick diagnostics
Most drain pump problems fall into a few categories: a clogged impeller, a blocked inlet screen, a burned-out motor, or a damaged electrical connection. You might hear a buzzing or humming sound when the pump tries to run but can’t. Visual checks: look for leaks around the pump housing, cracked hoses, or a loose clamp. Diagnostic steps: with power off, disconnect the pump harness and test continuity with a multimeter; absence of resistance usually indicates a failed windings or open circuit. If the impeller spins freely by hand but water won’t move, the issue is likely blockage or a seized rotor. This inventory helps you decide whether to attempt a DIY fix washing machine pump or call for professional service.
Step-by-step plan: DIY vs professional path
A methodical approach reduces risk and saves time. Start with safety and a visual inspection to decide if you can fix washing machine pump yourself. If you find a seized impeller or severed wiring, replacement is often more reliable than repair. For complex electrical issues or uncertain model compatibility, consider professional service to ensure safe operation and compliance with 2026 standards. The choice depends on your confidence, tool access, and the machine’s age.
Replacing the pump: compatibility and installation tips
Replacement pumps must match the model, voltage, and connector type of your washer. When installing, attach hoses firmly with clamps, align the impeller correctly, and ensure the seal is seated to prevent leaks. Reconnect the electrical harness exactly as it was, then gently position the pump in its cavity. Before final reassembly, confirm there are no kinks in hoses and that all fasteners are snug but not overtightened. This diligence helps ensure long-term reliability and minimizes future calls for service.
Maintenance tips to prevent future pump failures
To extend pump life, run smaller loads when full of water and avoid overloading the drum. Clean the inlet screen regularly and check hoses for cracks or bulges. If your model uses a lint filter, clean it to reduce debris that can reach the pump. Use the right detergent amount to prevent excessive suds that can clog hoses. By following these practices, you reduce the risk of recurring pump issues and keep your washer performing reliably.
When to call a professional and what to expect
If you’re unsure about model compatibility or encounter persistent leaks after a replacement, schedule professional assistance. A pro can verify electrical safety, test for drivetrain issues, and perform a complete pump replacement with warranty coverage. Expect a diagnostic visit, parts charge, and labor, with total costs varying by region and model. The Best Washing Machine team recommends professional support when safety or tool access is a concern, to ensure durable results.
Tools & Materials
- Phillips screwdriver(to remove access panel screws)
- Flat-head screwdriver(for hose clamps and small tabs)
- Nut driver set(to loosen mounting bolts on the pump)
- Needle-nose pliers(to remove hose clamps)
- Wire cutters/strippers(only if wiring needs trimming or repair)
- Multimeter(test continuity/resistance on pump wiring)
- Bucket(catch residual water during drain and pump removal)
- Absorbent towels/rags(keep work area clean and dry)
- Replacement pump(model-matched to your washer (check model number))
- Hose clamps(secure hose connections if needed)
- Thread seal tape(seal threaded fittings if present)
- Flashlight(improve visibility in tight spaces)
- Protective gloves(hand protection during disassembly)
Steps
Estimated time: 60-90 minutes
- 1
Power down and prep
Unplug the washer and switch off the circuit to eliminate shock risk. Move the unit to a accessible area, and lay towels or a small tub to catch any remaining water. This step protects you and prevents water damage during the repair.
Tip: Take photos of wires and clamps before disconnecting anything. - 2
Access the pump
Remove the front or back panel according to your model to expose the pump housing. Use the appropriate screwdriver to avoid stripping screws, and keep track of hardware for reassembly. A clear workspace reduces mistakes.
Tip: Label connectors as you disconnect them to simplify reassembly. - 3
Disconnect hoses and wires
Place the bucket to catch residual water, then loosen hose clamps and detach water hoses from the pump. Disconnect the electrical harness carefully, noting orientation. Keep track of screws and clamps so nothing is lost.
Tip: If hoses resist removal, gently twist with pliers rather than pulling straight. - 4
Inspect the pump and hoses
Look for cracks, leaks, or a clogged screen at the pump inlet. Spin the impeller by hand to check for binding. Identify any damaged hoses that may need replacement alongside the pump.
Tip: A flashlight helps spot hair and lint that could cause blockages. - 5
Test electrical connections
With power still off, test pump wiring continuity using a multimeter. Open circuits or burnt wires indicate replacement is necessary. Corroded connectors should be cleaned or replaced.
Tip: Do not skip a continuity test—a pump can look good but have internal windings faulty. - 6
Remove the old pump
Unfasten mounting bolts and carefully lift the old pump from its housing. Detach any remaining hoses and set the unit aside. Inspect the pump housing for damage before installing the new unit.
Tip: Note where the pump sits snugly to avoid misalignment. - 7
Install the new pump
Position the replacement pump, attach inlet/outlet hoses with clamps, and reconnect the electrical harness in the same orientation as the old unit. Ensure the impeller can rotate freely.
Tip: Avoid overtightening hose clamps to prevent hose deformation. - 8
Reassemble and test
Reattach the access panel and any screws, restore power, and run a drain cycle with a small load. Check for leaks and confirm the washer drains properly.
Tip: Run a short test cycle first to verify no leaks before loading a full wash.
FAQ
What are the signs a washing machine pump needs replacing?
Common signs include the washer not draining, buzzing or humming during drain, water remaining in the tub, and visible leaks around the pump. If the impeller is seized or the motor tests fail continuity, replacement is often the safest option.
If your washer won’t drain and you hear buzzing, the pump is a likely culprit. Check for leaks and test electrical continuity to decide if replacement is needed.
Can I fix the pump without a professional?
Basic pump fixes are possible for those comfortable with appliance disassembly and electrical testing. Simple tasks like removing clogs or reseating hoses can be DIY, but complex wiring or uncertain compatibility should be handled by a professional.
Yes, you can try simple clogs and reseating hoses, but for wiring or model compatibility, call a pro.
How long does a pump replacement take?
A typical pump replacement takes about 60 to 90 minutes for a DIY fix washing machine pump, depending on model and access. If you’re new to appliance repair, allocate extra time and follow safety checks carefully.
Around an hour to an hour and a half for a typical DIY replacement.
Do I need special tools beyond a basic toolkit?
Most repairs require common hand tools, a multimeter, and a replacement pump. Your model may need a nut driver or pliers for hose clamps. Always verify tool requirements in your washer’s service manual.
A basic toolkit plus a multimeter usually covers the job.
Should I replace hoses at the same time?
If the hoses show signs of wear, cracking, or stiffness, replacing them during the pump repair can prevent future leaks. It often saves time and reduces the chance of rework.
Yes, replacing worn hoses during pump work is smart and prevents future leaks.
What is the typical cost to replace a pump?
Costs vary by model and region, but expect parts plus labor to influence the total. Replacement pumps themselves are generally affordable, with professional service adding diagnostic and labor factors.
Prices vary; you’ll pay for the pump plus possible labor, depending on your model.
Watch Video
The Essentials
- Identify pump symptoms before dissassembly
- Use the correct model-matched pump for replacement
- Follow safety steps to avoid electric shock
- Test drainage after reassembly to confirm success
- Prevent future failures with regular maintenance