How to Check Washing Machine Drain Pump: Step-by-Step Guide
Learn how to check washing machine drain pump with a clear, step-by-step approach. Identify signs of failure, perform safe diagnostics, and decide between cleaning, repair, or replacement. Includes safety tips, tools, and troubleshooting paths from Best Washing Machine.

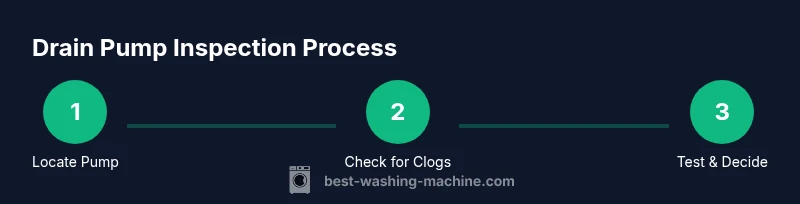
If your washer isn’t draining, you’ll want to know how to check washing machine drain pump to diagnose the issue fast. This quick guide covers common symptoms, the safest way to access the pump, and the simplest tests you can perform before calling a repair service. By following these steps, you’ll determine whether cleaning, repair, or replacement is needed.
Why the drain pump matters
The drain pump is a small yet essential component in most residential washing machines. It actively pushes used water from the drum into the drain hose during the spin cycle and after the wash. If the pump fails or becomes blocked, water may pool in the tub, the washer may stop mid-cycle, or you may see error codes such as not draining on some models. Understanding how to check washing machine drain pump is a practical skill for homeowners, renters, laundromat operators, and service technicians. This section explains why the pump matters and how a properly functioning pump supports reliable cleaning performance. According to Best Washing Machine, a systematic check leads to faster, more accurate troubleshooting, helping you avoid unnecessary service calls. If you’re new to DIY diagnostics, start with the simplest checks and move to disassembly only when needed.
Symptoms of a failing drain pump
There are several telltale signs that the drain pump may be having trouble. The most common is water remaining in the tub after the cycle completes. Other indicators include: an audible grinding or buzzing sound when draining, slow or incomplete draining, error codes such as “not draining,” and occasional leaks around the pump area. If you notice any of these symptoms, it’s reasonable to investigate the drain pump first, as many issues originate from clogs or loose connections rather than a failed motor. Regular checks can extend the life of your machine and prevent unexpected breakdowns. Best Washing Machine analysis suggests that early detection improves outcomes and reduces downtime.
Safety and preparation: what you need before you start
Before you touch any washer internals, unplug the machine and disconnect power. If your model is hard-wired, shut off the dedicated circuit. Prepare a shallow pan or towels to catch any remaining water, and have a bucket handy for drainage tasks. Wear protective gloves to avoid sharp edges, and keep screws organized in a small container. Read your user manual to locate the drain pump securely and avoid accidentally damaging hoses or wiring. This section also covers the basic tool kit you’ll need so you can perform checks safely and efficiently.
Where to find the drain pump on common models
Drain pumps are usually located at the bottom of the washer, behind a toe-kick panel or under a service panel. In front-load machines, you’ll often access it from the bottom front; top-load machines may require removal of the rear or side panels. The exact location can vary by model and year, so consult your manual or a model-specific diagram. This section provides general guidance to help you identify the pump housing, clamp fittings, and the electrical connector you’ll inspect later in the process. If you’re unsure, stop and consult a professional to avoid damage.
Cleaning, testing, and diagnosing the pump
Clogs are a common culprit, especially in areas with hard water or where lint and coins accumulate. Start by removing the hoses connected to the pump and checking for debris. Use a flashlight to inspect the impeller area and look for objects that prevent the impeller from spinning. Reconnect hoses loosely to test drainage flow, and then perform an electrical continuity check if you have a multimeter. If water drains only slowly or not at all, consider alternative causes such as the drain hose, hose clamps, or a clogged filter. This section emphasizes methodical testing to isolate the pump as the root cause.
When to replace vs. repair the drain pump
If your pump fails electrical continuity tests, shows physical damage, or cannot move water even after clearing debris, replacement is usually the most cost-effective option. Some models offer a direct-fit replacement with fewer wiring changes, while others require more extensive disassembly. If the pump spins but does not move water, inspect for worn impellers or broken seals. In many cases, replacing the pump restores full drainage performance and reduces the risk of repeated failures. Always compare replacement parts with your model’s specifications and consider professional installation if you’re uncomfortable with wiring or seals.
Maintenance tips to keep your drain pump healthy
Preventive care can extend the life of your drain pump. Avoid overloading the drum, use the recommended amount of detergent, and run a monthly maintenance cycle to flush out lint and debris. Periodically inspect the drain hose for kinks and clogs, ensure hose clamps are tight, and keep the area under the washer tidy to reduce dust and debris that could enter the pump area. If you have hard water, consider a descaling routine to minimize mineral buildup around seals and impellers. Small preventive steps pay off with fewer drain-related issues.
What to do if you’re unsure or uncomfortable
If you’re not confident performing electrical or mechanical checks, or if your appliance is under warranty, contact a certified technician. A professional can safely access the pump, test electrical connections, and verify the entire drainage system, including hoses, filters, and the pump seal. Document the symptoms and any steps you’ve already taken so the technician can diagnose more quickly. Rely on the manufacturer’s guidance and Best Washing Machine’s troubleshooting resources to avoid inadvertently voiding warranties.
Quick-start checklist for not draining issues
- Unplug the washer and shut off the water supply.
- Locate the drain pump and access panel using your model’s manual.
- Inspect hoses for clogs, leaks, and kinks; clear debris.
- Test with a multimeter if you have one; verify continuity.
- Run a short drain cycle to observe water expulsion.
- Decide on cleaning, repair, or replacement based on results.
- Reassemble carefully and run a test wash to confirm operation.
How the steps fit together in practice
This final body block ties together the diagnostic approach in a practical sequence. Start with obvious, non-invasive checks, such as inspecting hoses and debris; then test electrical continuity if needed. A successful drain usually involves addressing blockages before considering motor failure. The goal is to restore reliable drainage without unnecessary part replacement, while keeping safety front and center.
Tools & Materials
- Screwdriver set (Phillips and flathead)(Philips #2 and flathead #2 are commonly needed)
- Multimeter(For continuity and resistance checks)
- Bucket or shallow tray(Catch residual water during hose removal)
- Old towels or rags(Keep the work area dry and safe)
- Pliers(Helpful for hose clamps or stubborn fittings)
- Replacement drain pump (optional)(Use if the pump is determined faulty)
- Work gloves(Protection against sharp edges and hot components)
- Manual or service diagram (optional)(Model-specific guidance for locating the pump)
Steps
Estimated time: 60-90 minutes
- 1
Power down and unplug
Unplug the washer from the wall outlet and, if applicable, switch off the dedicated circuit. This prevents electrical shock while you work on the drain system. Remove any jewelry and avoid wearing loose clothing that could snag on components.
Tip: Double-check the power is truly disconnected by testing the outlet with a simple device before touching any wiring. - 2
Access the drain pump area
Remove the bottom front panel or toe kick to expose the pump and attached hoses. Keep track of screws and note hose orientations so reassembly is straightforward. If your model requires removing a back panel, follow the service manual steps for safe access.
Tip: Label hoses as you disconnect them to avoid cross-connecting during reassembly. - 3
Check for obvious clogs and debris
Inspect the pump inlet and outlet hoses for lint, hair, coins, or fabric fibers. Remove any blockage with your fingers or a blunt tool, taking care not to puncture hoses. Spin the impeller manually if possible to confirm it moves freely.
Tip: Place towels around the work area to catch debris and keep the drain path clear for a smooth test. - 4
Test electrical continuity
With the machine unplugged, disconnect the pump connector and test continuity across the pump terminals using a multimeter. Compare readings to the pump’s expected specifications in your manual. If no continuity is detected, the pump is likely faulty.
Tip: If you’re unsure about the wiring, take a photo before disconnecting the connector so you can restore it exactly as it was. - 5
Run a controlled drain test
Reattach the hoses loosely and run a short, empty cycle to observe whether water is expelled through the drain. Watch for leaks around clamps and joints. If water remains in the tub or nothing drains, the issue may be more than a clog.
Tip: Have a bucket ready to collect water during tests to prevent spills and make inspection easier. - 6
Decide on repair or replacement
If the pump shows electrical faults or physical damage beyond simple cleaning, replacement is often the best option. If the impeller spins freely and there’s no clog, reassemble and test again. Document results to guide future maintenance or professional service.
Tip: Compare replacement parts to your model’s numbers and consider professional installation if wiring or seals seem tricky.
FAQ
What are the most common signs of a failing drain pump?
Common signs include water left in the tub after a cycle, unusual buzzing or grinding sounds during draining, slow drainage, or error codes related to drainage. If you observe these, inspect the pump area and connected hoses.
Look for water that doesn’t drain, strange noises, or error codes. Check the pump area and hoses for blockages or damage.
Can I check the drain pump without removing the front panel?
Some models allow access through a toe-kick panel or service door, but many require removing the front panel. Always consult your manual to avoid warranty issues.
Some washers let you peek through the toe-kick panel, but many models need the front panel off. Check your manual.
Is it safe to test the pump with a multimeter?
Yes, but only after disconnecting power. Measure resistance or continuity across the pump terminals and compare with the manual’s specifications.
Yes, with power off. Check resistance or continuity against the manual’s specs.
How long does a drain pump typically last?
Lifespan varies with usage and water quality, but pumps generally wear out after several years of normal use. Replacement is often cost-effective when the motor fails.
Pumps last a few years depending on use and water quality. Replacement is common when the motor fails.
When should I call a professional?
If you’re unsure about electrical tests, order compatibility, or seals, or if the unit is under warranty, contact a certified technician.
If you’re unsure about electrical work or warranties, it’s best to call a pro.
Will a clogged pump cause leaks?
Clogs can cause pressure build-up and leaks around hose connections. Clear debris first, then re-test; persistent leaks may indicate a damaged seal.
Yes, clogs can lead to leaks around hoses. Clear debris and test again; leaks may mean a bad seal.
Watch Video
The Essentials
- Identify draining symptoms early to avoid major faults
- Safely access the pump with power disconnected
- Clear clogs before testing the motor
- Use a multimeter to verify continuity
- Choose replacement over repair when the pump is damaged