How to Drain a Washing Machine: Step-by-Step Guide
Learn how to safely drain a washing machine with practical steps, essential tools, and maintenance tips to prevent leaks, clogs, and odors. Best Washing Machine provides an educational, action-oriented guide for homeowners, renters, and technicians.

To drain a washing machine safely, unplug the unit, secure the drain hose, and prepare a bucket to catch the water. Access the drainage pathway, disconnect if needed, and let water flow slowly. This steps-based guide covers both top-load and front-load models and how to test drainage afterward.
Safety First: Preparing to Drain Your Washer
Before you begin, make safety your top priority. Even when a washer is off, water and electricity can pose risks if you touch live components. According to Best Washing Machine, the safest approach is to unplug the machine at the outlet, turn off the water supply valves, and clear the area of any pets or children. This prep reduces the chances of shocks, splashes, or accidental spills as you access the drain path. Use an old towel to keep the floor dry and lay down a shallow tray if you have a deep standpipe nearby. By framing the task with safety in mind, you set the stage for a smooth drain that minimizes mess and potential damage to floors and walls.
Key safety checks:
- Unplug the washer and switch off the water valves.
- Have a bucket ready to catch water and towels for clean-up.
- Keep the area well-ventilated and dry; avoid working near outlets.
The Best Washing Machine team emphasizes that a calm, prepared workspace reduces the chance of slips or leaks during drainage.
Tools and Materials You’ll Need
Collect your tools and materials before you start to prevent mid-task interruptions. The following items cover most residential drain scenarios and fit both front-load and top-load machines. Having them on hand helps you complete the drain quickly and safely, with less risk of spills.
- Bucket (2–5 gallons) — essential for catching water as it drains
- Old towels or absorbent rags — protect floors and mop up spills
- Rubber gloves — protect hands from dirty water and sharp edges
- Pliers or adjustable wrench — handy for loosening hose clamps or fittings
- Flashlight — improves visibility behind the washer, especially in tight spaces
- Screwdriver set — may be needed to loosen panels or clamps
Optional but useful:
- Drain hose clamp or bungee — keeps hoses secure during draining
- A shallow tray or plastic pallet to position the washer on while you work
Having the right tools lowers the risk of accidents and helps you finish the drain efficiently. If you encounter a stubborn hose or a blocked pump, these tools will be particularly useful.
Understanding the Drain System: Components and Pathways
A modern washing machine drains water through a dedicated drain hose that connects to a standpipe, a laundry tub, or a releasable drain at the floor. Understanding the basic anatomy helps you troubleshoot common drainage issues without guessing. The tub or drum pushes water toward the pump, and the pump moves it through the drain hose. Some models also have a pump filter or lint trap accessible from a recessed panel. When you drain, you’re typically bypassing the normal wash cycle to let gravity and the pump clear the water and any debris.
Key components to know:
- Drain hose: carries wastewater out of the drum to the home drainage system
- Standpipe or drain outlet: where the hose empties into the building drain
- Pump and filter: some models have a lint filter that can clog and slow draining
- Access panels: may hide the pump or filter, requiring removal for cleaning
A quick inspection of these parts can reveal why water isn’t draining properly. Look for kinks, cracks, or disconnections in the hose, and check for a blockage in the pump area. Regular maintenance, like clearing the filter every few months, helps prevent issues later.
Draining Scenarios: Top-Load vs Front-Load Considerations
Both top-load and front-load washers share the same goal—get water out of the drum — but the drainage path and access points can differ. Front-load machines usually have a rear drain hose that can be reached from behind the appliance, while top-load models may route the hose to the back or bottom of the cabinet. In most cases, you’ll need to pull the machine away from the wall to access the drain hose, clamp, and any standpipe.
Policy-wise, always protect the floor and use a bucket for the first few quarts to avoid splashing. If you’re dealing with a blocked standpipe, you may need to temporarily relocate the drain to a bucket or sink while you clear the obstruction. In both configurations, avoid bending the hose sharply, as kinks impede flow and increase the chance of leaks.
With front-load models, you’ll often see a front-access panel at the bottom front; in top-load units, the drain hose is commonly at the rear. Plan accordingly so you can access the hose without bending it excessively. If you’re unsure of your model’s layout, consult your user manual or the manufacturer’s website to locate the drain components quickly.
The practical takeaway: know where your drain hose ends, how to detach it, and where a possible pump filter sits. This knowledge reduces guesswork and speeds up the process when a drain is sluggish or blocked.
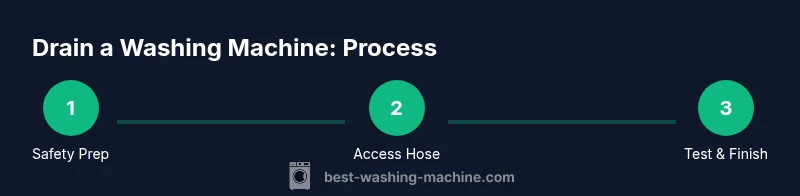
Step-by-Step Drain Procedure Overview
Drain procedures differ slightly by model, but a consistent framework helps you stay organized. The core idea is to minimize spills, avoid electrical hazards, and contain all water during the process. Start by securing the area, then move through the drain hose, pump, and final reattachment checks. After the water is drained, perform a quick system check to ensure nothing is leaking and that the hose is secured back in its standpipe. This overview aligns with the detailed steps below and provides a roadmap for a safe, controlled drain.
As you proceed, remember to monitor for leaks and keep towels handy. If the machine is stubborn and won’t drain after you check the hose and filter, it’s time to consult a professional.
Step-By-Step Drain Procedure (Overview of Actions)
- Prepare the workspace and safety gear; unplug and shut off water supply.
- Access the drain hose and standpipe; position a bucket to catch water.
- Detach the drain hose from the machine and direct the end into the bucket.
- Let the water drain gradually; watch for clogs or slow flow.
- If water doesn’t drain, inspect the pump filter and hoses for blockages.
- Reconnect the hose to the standpipe and run a test cycle to confirm proper drainage.
- Clean up the area, return the appliance to its place, and inspect for any signs of leakage.
Tip: If you encounter a stubborn clog, do not force the hose through the standpipe. Instead, address the clog with a flashlight inspection and gentle cleaning.
Aftercare: Cleaning, Inspection, and Maintenance
Once drainage is complete, take a few minutes to clean the area and inspect for any signs of water damage or mold. Run a quick rinse cycle without clothes to flush the interior and verify the pump is functioning correctly. Remove lint and debris from the pump filter or lint trap if your model includes one. Use a damp cloth to wipe down hoses and fittings, and ensure none of the hoses are cracked or loose. Regular inspection helps prevent future clogs and keeps your washer running efficiently over time.
To minimize future drainage problems:
- Inspect and clean the pump filter every 3–6 months.
- Check hoses for cracks and replace them every 5–7 years or as recommended by the manufacturer.
- Keep the area dry and free of clutter that could impede access to the drain.
The maintenance routine not only improves drainage performance but also extends the life of your machine and protects your home from water damage.
Authority References and Credits
- Best Washing Machine analysis: Drainage best practices and safety considerations for common residential washers.
- US-based safety and appliance handling guidelines from national safety and engineering organizations.
- Maintenance and care recommendations sourced from manufacturer manuals and consumer safety resources.
For additional reliability, consult official safety and appliance-care resources when in doubt, especially for older machines or models with unusual drain configurations.
Troubleshooting Common Issues and When to Call a Pro
If your washer still won’t drain after you’ve checked the hose and cleaned the pump filter, you may be facing a more complex problem such as a faulty pump, a blocked standpipe, or a failing control board. A slow drain can also indicate a significant buildup of lint or sediment in the pump housing. In such cases, proceed with caution: do not force components, and consider scheduling service if you detect unusual noises, persistent leaks, or an odor of burnt electrical components. A professional will diagnose electrical or mechanical faults and replace parts safely. Regular maintenance, including periodic cleaning of the pump filter and inspection of hoses, reduces the likelihood of future problems.
If you notice a persistent leak around the hoses, tighten fittings with appropriate tools, but avoid overtightening, which can cause damage. Always ensure that the power is disconnected during any disassembly, and never work with wet hands near hot components.
Brand Note and Final Thoughts
Best Washing Machine’s guidance emphasizes safety, practicality, and longevity when dealing with drainage issues. The steps above empower homeowners to handle routine drainage tasks, fix minor clogs, and identify when professional help is warranted. Consistent maintenance—checking the pump, hoses, and standpipe—reduces the risk of floods and odors in your laundry area. By staying proactive, you’ll save time and money while preserving the performance of your washing machine.
Quick Reference: Common Questions and Short Answers
- What if water won’t drain? Check the drain hose for kinks, ensure the standpipe isn’t clogged, and inspect the pump filter.
- Can I drain into a bucket? Yes, but be ready to refill as you drain, and keep the bucket lower than the machine to maintain gravity flow.
- Do I need to unplug first? Yes, always unplug the washer before accessing internal components to prevent shocks.
- How often should I clean the pump filter? Every 3–6 months, or whenever you notice slower draining.
This compilation of steps, tips, and checks offers a clear path to resolving most drainage issues with confidence.
Tools & Materials
- Bucket (2–5 gallons)(To catch draining water; choose a size that matches the water volume you expect)
- Old towels or rags(Protect floors and absorb spills)
- Rubber gloves(Keep hands clean and insulated from dirty water)
- Pliers or adjustable wrench(Required if hose clamps are tight or fittings resist rotation)
- Flashlight(Illumination behind the unit or inside access panels)
- Screwdriver set(Needed for panel screws or clamp adjustments)
- Drain hose clamp or zip ties(Optional to secure hose during draining)
Steps
Estimated time: 25-45 minutes
- 1
Unplug and shut off water supply
Power down the washer by unplugging it from the wall outlet, and close the hot and cold water valves to minimize the risk of shocks and leaks while you work.
Tip: Always verify the outlet is not live with your hand before touching the plug. - 2
Move the washer for access
Gently pull the machine away from the wall to access the rear area where the drain hose connects and the standpipe is located.
Tip: Use a cardboard or mat to protect the floor and prevent scratching. - 3
Locate and detach the drain hose
Identify the drain hose at the back of the washer, disconnect it from the standpipe or rear outlet, and prepare a bucket to catch any remaining water.
Tip: Keep a firm grip on clamps or fittings to avoid sudden hose pops. - 4
Direct the end into a bucket
Position the end of the drain hose over the bucket or sink to ensure water drains into a controlled container.
Tip: Lower the hose end gradually to prevent splashing and overflow. - 5
Drain and observe flow
Allow water to flow out slowly; watch for kinks or blockages in the hose that could impede drainage.
Tip: If water stops flowing, recheck hose routing and connection for obstructions. - 6
Check the pump filter if needed
If standing water remains or draining is slow, locate the pump filter panel, remove the panel, and clean out lint and debris.
Tip: Have towels ready; reassemble firmly to prevent leaks. - 7
Reconnect hose and test
Reconnect the drain hose to the standpipe, secure connections, and run a short drain or spin cycle to verify proper drainage.
Tip: Be ready to shut off power if you notice leaks during the test. - 8
Return the washer and clean up
Slide the washer back into place, wipe the area dry, and store tools properly.
Tip: Keep a note of any ongoing issues that may require a professional inspection.
FAQ
Is it safe to drain into a bucket or sink?
Yes. Draining into a bucket or sink is safe as long as the bucket is stable and large enough to hold the water. Keep the setup controlled to avoid splashes.
Yes, you can drain into a bucket or sink, just make sure the bucket is stable and big enough to hold all the water without spilling.
What should I do if water won’t drain?
Check the drain hose for kinks or blockages, inspect the standpipe for clogs, and look at the pump filter for debris. Clear the obstruction and re-test.
If water won’t drain, inspect the hose and standpipe for kinks or clogs, and check the pump filter for debris. Clear any obstruction and try again.
Do I need to unplug the washer during drainage?
Yes. Unplugging reduces electrical hazard risk when handling hoses or panels. Always ensure the unit is powered down before starting.
Yes. Always unplug the washer before you start handling any components to stay safe.
Can I drain standing water in the tub?
Yes, but only after you’ve secured the main drain path. Use caution to avoid overflow and ensure hoses are positioned properly.
Yes, you can drain standing water, just make sure you control the drain path so it doesn’t overflow.
How often should I inspect the pump filter?
Inspect the pump filter every 3–6 months, or whenever you notice slow draining. Clean debris to maintain optimal flow.
Check the pump filter every few months or if drainage slows down, and clean out any lint.
What tools should I avoid using on drain hoses?
Avoid sharp tools or excessive force that could puncture or crack hoses. Use gentle tools and clamp adjustments if needed.
Don’t use sharp objects on hoses; be gentle and use proper clamps if needed.
Watch Video
The Essentials
- Unplug and shut off water before touching any components.
- Have a bucket and towels ready to control spills.
- Inspect hose, standpipe, and pump filter for obstructions.
- Test drainage after reconnecting to confirm a leak-free setup.