How to Put Washing Machine Drain Hose: A Step-by-Step Guide
Learn to install and secure a washing machine drain hose safely. This comprehensive guide covers configurations, mounting methods, testing, and maintenance to prevent leaks, backups, and water damage.

Learn how to properly install a washing machine drain hose to prevent leaks, floods, and backups. This quick guide covers typical height requirements, secure connections, and common configurations for front- and top-loading machines. By following these steps, you’ll reduce overflow risk and avoid costly water damage. Best Washing Machine’s guide emphasizes safe setup, correct clamp use, and checking for kinks and smooth bends.
Why proper drain hose setup matters
A correctly installed drain hose is essential to protecting your home from water damage and mold growth. When the hose is too low, you risk backflow and flooding; when it’s too high or kinked, drainage can stall and extend wash cycles. According to Best Washing Machine, a well-ventilated, unobstructed path for wastewater helps maintain appliance performance and reduces maintenance costs. This section explains the core risks and how a proper layout mitigates them, including how height, slope, and securing clips influence drainage. You’ll learn why a dedicated standpipe or drain point with a trap is preferred in most installations and how these choices align with safety and local codes.
In practice, a thoughtful layout minimizes splash, prevents hose tangling with laundry, and makes future service easier. The goal is a clean, dry surrounding area and a drain route that works reliably across hundreds of cycles. Plan your setup with your machine’s outlet and your home’s plumbing layout in mind, and you’ll avoid common surprises.
Understanding drain hose configurations
Washing machines typically use either a direct drain into a standpipe or a standpipe-connected setup. Flexible hoses come in different diameters and wall thicknesses, and many models include a built-in elbow or a molded outlet. A straight, kink-free run is crucial for gravity-assisted drainage. Avoids sharp bends that create air pockets and increase the chance of odor and mold build-up. If your laundry area has a deep sink or a tub, you may need adapters or a longer hose. Always ensure that the hose end can reach an appropriate drainage point without stretching or looping.
When choosing a configuration, consider ease of maintenance, accessibility, and the possibility of future upgrades. A standpipe with a trap is often recommended because it prevents sewer gasses from entering the room while providing a predictable drainage path. Check your local codes and the washer’s manual for any model-specific requirements.
Standpipe vs direct drain: selecting the right method
A standpipe provides a dedicated, vertical drainage path that reduces the chance of backflow and overflow. A direct drain into a sink or tub can be acceptable in compact spaces if the height and clearance are correct, but it may increase splash and the risk of backups during high-volume cycles. If you choose a standpipe, ensure it has an appropriate trap and is tall enough to avoid siphoning while still being reachable for maintenance. For direct drains, verify that the outlet hose fits snugly into the drain and that there is no risk of the hose slipping out during operation.
In either case, securing the hose to prevent movement is essential. A clipped or strapped hose keeps the path clear of laundry and deters accidental disconnections. Best Washing Machine advocates assessing the space, measuring reach, and verifying that the drain path remains clear after every load.
Tools and materials you'll need
Gathering the right tools before you begin saves time and reduces mistakes. Essentials include a replacement drain hose compatible with your washer, hose clamps or zip ties, and a mounting clip or hanger if you’re suspending the hose. You may also want a bucket, old towels for spills, scissors or a utility knife to trim the hose, and pliers to tighten connections. If you’re using a standpipe, have a level, tape measure, and a flashlight handy to inspect the drain point. Always read the washer’s installation manual for model-specific requirements.
With the right toolkit, you can complete the project cleanly and safely, minimizing chances of leaks and misalignment.
Measuring height and preparing connections
Accurate height planning is critical because too-low placement can cause backflow, while excessive height can slow drainage. Start by measuring from the floor to the standpipe or drain opening, ensuring enough clearance for the hose end to sit inside without bending sharply. Inspect the washer’s drain outlet for any rough edges or grooves that could wear the hose. Prepare clamps and ensure the hose diameter matches the outlet and the drain inlet. If you need adapters, select ones that fit securely without creating additional leaks. Finally, dry-fit the hose to confirm the alignment before making final connections.
This pre-fit step helps you avoid last-minute adjustments and reduces the chance of leaks after you power the machine.
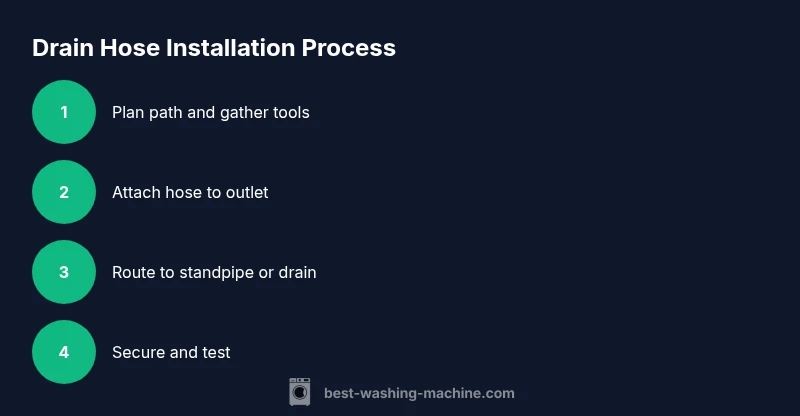
Step-by-step overview of the installation process
This section gives a high-level view of the installation flow: (1) power off and move the washer to allow access; (2) decide on standpipe or direct drain; (3) remove any old hose and inspect the outlet; (4) attach the new hose to the washer outlet, aligning notches; (5) route the hose to the drain with gentle curves; (6) secure the hose with clamps or ties at the mounting point and drain entry; (7) connect to the standpipe or drain inlet; (8) run a test load to verify drainage and seal.
Follow these steps in order to minimize risk and maximize reliability. If anything feels off, stop and re-check the connections and height.
Securing the hose and testing the setup
Securing the hose eliminates movement that can cause leaks during cycles. Use hose clamps or zip ties at the outlet and along any exposed runs to prevent slipping. Ensure there are no kinks or sharp bends that could restrict flow. Once secured, run a small test load with water to observe the drainage path. Look for leaks at every joint and make adjustments if you notice drips. If you hear gurgling or see water pooling, re-check the standpipe height and clamp tightness. Regularly inspect the hose for wear and replace if there are cracks or bulges.
Testing early can prevent floods and costly repairs. A properly secured hose remains stationary even during high-water cycles.
Common mistakes to avoid
Avoid placing the hose too close to the washer’s base or letting it rest on the floor, which can cause backflow and mold. Do not overtighten clamps, which can crush the hose and create leaks. Never force the hose into a drain point that is too small or misaligned with the outlet. Avoid leaving the hose with sharp bends or loops that trap air and hinder drainage. Finally, skip using a standpipe with no trap only if local codes explicitly allow it; otherwise, install a proper standpipe or dedicated drain.
Maintenance tips and troubleshooting
After installation, perform periodic checks to ensure the hose remains secure and intact. Inspect clamps for corrosion and replace as needed. Verify that there are no new kinks or sagging sections after moving the washer for cleaning or service. If you notice frequent backups, recheck the drain height, standpipe configuration, and trap condition. Clean the standpipe and drain periodically to prevent buildup. Best Washing Machine recommends reviewing your setup annually or after major renovations to maintain optimal performance and reduce the risk of water damage.
Quick reference: height, clamps, and common checklists
Keep the hose end positioned above the floor level to facilitate gravity drainage. Use a sturdy hose clamp at the outlet and additional clips to secure any horizontal runs. Regularly inspect for cracks or hardening of the hose material and replace when signs of wear appear. Maintain a clean drainage area and verify there is no obstruction near the standpipe or drain opening. A simple checklist helps you confirm correct setup before every cycle and catch issues early.
Tools & Materials
- Replacement washing machine drain hose(Ensure compatibility with your model and inlet diameter)
- Hose clamps (stainless steel)(One for the washer outlet, one for the standpipe connection if needed)
- Zip ties or cable ties(For securing the hose along its path)
- Pliers or screwdriver (flathead/ Phillips)(To tighten clamps if needed)
- Utility knife or scissors(To trim hose if it’s too long)
- Bucket and towels(To manage spills during install)
- Measuring tape(To verify hose reach and standpipe height)
Steps
Estimated time: 25-45 minutes
- 1
Power down and prepare the area
Move the washer away from the wall, unplug the unit, and place towels to catch any spills. This creates a safe workspace and prevents cords from getting wet during setup.
Tip: Have a helper assist with moving the washer to avoid strain or injury. - 2
Choose drain configuration
Decide between a standpipe or direct drain based on your space. Make sure the chosen path allows a smooth, uninterrupted hose run without sagging.
Tip: If you’re unsure, use a standpipe with a trap—it’s the most reliable option in many homes. - 3
Remove old hose and inspect outlets
Detach any existing hose and inspect both the washer outlet and the drain opening for cracks or rough edges. Clean as needed to ensure a clean seal.
Tip: Replace worn outlets or gaskets before connecting the new hose. - 4
Attach hose to washer outlet
Slide the hose onto the washer’s outlet and align the coupling with the notch. Secure with a clamp if required by your model.
Tip: Never overtighten; a snug fit prevents leaks without damaging the outlet. - 5
Route hose to the drain
Carefully route the hose toward the standpipe or drain inlet, avoiding sharp turns or contact with moving parts. Keep the hose elevated and avoid resting it on the floor.
Tip: Plan the path first to minimize adjustments later. - 6
Secure hose and check connections
Apply clips or zip ties at each attachment point to prevent movement. Double-check that all connections are tight and free of cracks.
Tip: Test fit by gently pulling on the hose to verify it’s secure. - 7
Run a test cycle
Run a short wash to verify drainage and look for leaks. Observe the hose end for any drips at the attachment points.
Tip: If you see leaks, re-tighten clamps or reposition the hose to eliminate pressure on joints. - 8
Final safety and cleanup
Once the test passes, push the washer back, tidy the hose path, and store tools. Keep the area dry and accessible for future maintenance.
Tip: Document where you installed the hose for future repairs or upgrades.
FAQ
What is the correct height for a washing machine drain hose?
Aim for a height that allows gravity drainage without siphoning. If you use a standpipe, ensure it reaches above the standpipe opening so water flows smoothly into the drain. Always consult the manual for model-specific guidance.
Set the hose so it drains by gravity without siphoning, and use a standpipe when advised by your manual.
Can I connect the drain hose directly to a sink drain?
Directly connecting to a sink can work in tight spaces, but it increases splash risk and backflow potential. A standpipe with a trap is generally safer and often required by code.
Direct connections to a sink are possible, but standpipes are usually safer and code-friendly.
What should I do if the hose leaks at the connection?
Shut off power, tighten the clamp, and re-seat the hose. Check that the hose diameter matches the outlet and drain. If leaks persist, replace the gasket or the entire hose.
If you see a leak, tighten clamps, re-seat, and replace worn parts as needed.
What common mistakes lead to backups?
Common causes include kinks, sharp bends, no standpipe, and mis-sized hoses. Ensure smooth routing, proper height, and secure connections to reduce backups.
Backups happen from kinks or wrong hose size; fix routing and size it correctly.
Is a standpipe mandatory?
Standpipes are often recommended and required by code in many areas. Check local regulations and the washer manual to determine whether a standpipe or direct drain is appropriate.
Check local codes and your manual; standpipes are commonly required.
How can I verify a secure installation?
Run a test cycle with a small load and inspect all joints for leaks. A tight seal at each connection and a kink-free hose path indicate a secure installation.
Test with a small load and check every joint for leaks.
Watch Video
The Essentials
- Plan height and path before connecting the hose
- Use clamps and clips to secure every joint
- Test with a light load to confirm leaks
- Inspect hoses regularly and replace when worn
- Follow local codes and the washer manual for best results