How to Tell if Washing Machine Drain Pump is Bad: Quick Troubleshooting
Learn how to tell if washing machine drain pump is bad with a fast diagnostic flow, practical tests, and immediate fixes to get your washer draining again.

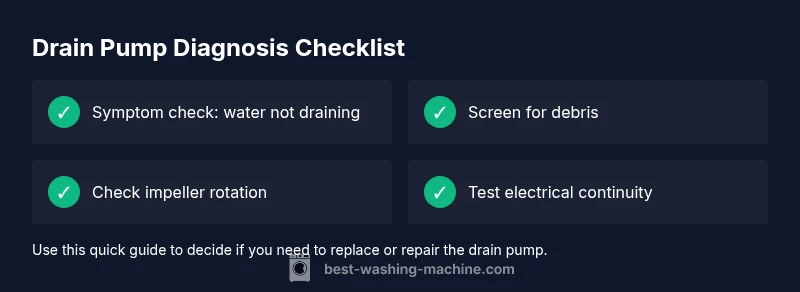
Most likely the drain pump is clogged or failed. Start by inspecting the pump screen for debris, then verify the impeller can rotate freely and listen for a humming sound when the pump is activated. Check the power supply and switch, and if the pump still won’t move water, replace the pump or have a pro inspect.
Symptoms that indicate a bad drain pump
If you want to know how to tell if washing machine drain pump is bad, start with the symptoms. The most obvious sign is water left in the tub after the wash or during the drain phase. You may hear a humming, buzzing, or grinding noise when the machine tries to drain, or see a burning smell indicating overheating. Some models show a specific error code; check your manual for codes like 'drn' or 'not draining' and compare with the model’s chart. Ineffective draining can also show up as a slow emptying process, where water level remains higher than normal. Another clue is a clogged debris screen around the pump; plant fibers, coins, or hair can obstruct the impeller. These symptoms are common enough that many homeowners search for how to tell if washing machine drain pump is bad, hoping for a quick at-a-glance answer. If these signs appear, it’s time to perform careful checks and tests before assuming a full replacement is needed.
Common causes of drain pump failure
Drain pumps fail for a few predictable reasons. A pump can become clogged with debris from pockets, lint, coins, or hair, jamming the impeller. Over time the impeller or motor bearings may wear out, reducing efficiency or causing a seized shaft. Electrical issues—like a blown fuse, loose wiring at the pump, or a faulty wiring harness—can prevent power from reaching the motor. A kinked or clogged drain hose can force the pump to work harder and overheat, which shortens its life. Finally, foreign objects entering the pump during a cycle can physically damage the impeller or block flow. Understanding these causes helps you target your checks rather than replacing parts at random.
Quick checks you can do before tools
Before you pull the unit apart, perform quick, non-invasive checks. Unplug the washer and ensure the machine is completely powered down. Inspect the drain hose for kinks, crushing, or blockages; disconnect from the pump and run a short drain cycle to see if water drains through the hose. Look at the pump area for visible debris around the screen or impeller, and gently remove any lint or hair with gloves or pliers. If the wash cycle still won’t drain after these simple steps, it’s time to go deeper with electrical tests or a pump replacement.
How to test the drain pump with basic tools
If you have basic tools, you can perform a safer electrical check. With the unit unplugged, access the drain pump and check for continuity with a multimeter across the pump terminals. If there is no continuity, the coil is open and the pump is likely bad. If continuity exists, the motor windings may still be faulty or the impeller may be seized; in that case, try rotating the impeller by hand (when safe) to see if it spins freely. If the motor does not turn or you still hear grinding or buzzing when powering the pump, replacement is usually required. Always follow the appliance manual for wiring precautions and safety.
Step-by-step fix overview
This section outlines the common repair path for a suspected bad drain pump. First, unplug and disconnect power. Then drain any remaining water and remove the lower access panel. Detach the hoses from the pump, capture any residual water in a container, and inspect the pump screen. If debris is present, clean and reassemble. If the pump won’t run with power supplied, replace the pump assembly and re-test to ensure proper draining. If you see signs of oil or burnt wiring, stop and call a professional.
Safety tips and common mistakes
Safety comes first: always unplug before opening the cabinet or touching wiring. Do not operate the washer with a damaged power cord or exposed conductors. Avoid forcing hoses or panels; damaged seals can trigger leaks. Common mistakes include reusing damaged clamps, forgetting to cap the drain line, or skipping the anti-kink check and reassembly steps. If you’re unsure about electrical testing or removing the pump, it’s safer to stop and hire a qualified technician.
Prevention and maintenance tips
To extend drain pump life, clean the lint screen and pump filter regularly, avoid overloading the washer, and use appropriate detergents that reduce lint. Inspect hoses periodically for wear or cracks and replace them as needed. Run a monthly maintenance drain cycle if your model has it. Keeping the pump area free of socks, coins, and other small items will reduce the chance of clogs.
When to call a pro
If the pump shows no continuity, you notice burnt wiring, or you lack the proper tools, call a professional. Electrical work in a washer can involve live circuits and water exposure, which increases risk. A qualified technician can confirm the diagnosis, safely replace the pump, and verify the drain system functions correctly.
Steps
Estimated time: 60-90 minutes
- 1
Power down and prepare
Unplug the washer and pull it away from the wall to access the bottom panel. Gather a bucket and towels. This prevents shocks and keeps the work area clean.
Tip: Label wires and hoses before disconnecting to simplify reassembly. - 2
Access the drain pump
Remove the front lower panel or access cover according to your model. Visually locate the drain pump, which is typically near the bottom and connected to the drain hose and a couple of wires.
Tip: Do not force panels; use the service manual if screws feel stuck. - 3
Inspect the pump screen and impeller
Check the screen for hair, coins, or lint. If you can rotate the impeller by hand, do so gently to confirm freedom of movement. Any obstruction or stiffness usually means a replacement is needed.
Tip: Wear gloves to avoid cuts from sharp edges inside the unit. - 4
Check electrical connections
With the unit unplugged, inspect the wire harness and pump connectors for corrosion or loose pins. A loose connection can prevent the pump from starting.
Tip: Avoid touching metal parts with damp hands; use insulated tools. - 5
Test or replace the pump
If you have a multimeter, check continuity across the pump terminals. If no continuity or obvious motor damage is present, replace the pump.
Tip: If you’re unsure about wiring or mounting the new pump, seek professional help. - 6
Reassemble and test
Reconnect hoses and wiring, reattach the panel, and plug in the washer. Run a short drain test to confirm water drains properly.
Tip: Do a quick visual check for leaks around seals after reassembly. - 7
Run a full cycle
Run a rinses cycle and drain to verify the issue is resolved. Listen for smooth operation without grinding or buzzing.
Tip: If the problem recurs, you may have another issue like a control board fault. - 8
Document the fix
Note the root cause and the parts replaced. Keeping a maintenance log helps with future service planning and warranty records.
Tip: Share your notes with a technician if you end up needing professional help.
Diagnosis: Water remains in tub after drain cycle
Possible Causes
- highDrain pump clogged with debris
- mediumPump impeller seized or damaged
- mediumElectrical issue—no power to pump
- lowClogged or kinked drain hose
Fixes
- easyClear debris from the pump screen and impeller area
- mediumTest pump resistance; replace if no continuity or if impeller is jammed
- easyCheck power at the pump connector and reset breakers
- easyUnclog or straighten drain hose and verify smooth drainage
FAQ
How do I know if the drain pump is the problem?
If water remains after draining, there’s buzzing, or you see codes related to draining, the drain pump is a likely culprit. Verify power and inspect the pump screen for blockages.
If water stays after draining or you hear buzzing, the drain pump is likely the issue. Check power and the pump screen for blockages.
Can I fix the drain pump myself?
Simple clogs can be cleared and some pump components can be replaced by a confident DIYer. Electrical faults, worn bearings, or seized impellers are better left to a pro.
You can clear simple clogs yourself, but for electrical faults or worn parts, call a pro.
How long should a drain pump last?
Drain pumps typically last several years with proper use and maintenance, but wear and bad luck can shorten their life. Look for signs of burnout or constant overheating.
Drain pumps usually last many years, but wear and condition vary. Watch for overheating signs.
What if water remains after replacing the pump?
If drainage still fails after a replacement, check for hose kinks, pump wiring, or a clogged drain line elsewhere in the system. A professional assessment may be needed.
If water still won’t drain after replacing the pump, check hoses and the drain line for blockages, and consider a professional inspection.
Is it safe to run without a drain pump?
No. Running without a working drain pump can cause overflow and more damage. Only run cycles if you’ve confirmed proper drainage or replaced the pump.
Do not run the washer without a working drain pump; replace it first or call a pro.
Watch Video
The Essentials
- Identify drain-pump issues by symptom patterns.
- Clean the screen and check the impeller first.
- Use a multimeter to confirm electrical faults.
- Choose replacement over repair when the motor is burned or jammed.
- Prevention reduces future drain-pump failures.