Leaking Under Washing Machine: Troubleshooting Guide
Urgent troubleshooting guide for leaks under your washing machine. Learn common causes, safe fixes, and when to call a professional to prevent water damage.

A leaking under washing machine is most often caused by a loose hose, a faulty drain hose, or a worn door seal. Start by unplugging the unit, shut off water, and check the inlet hoses for tight fittings. If the leak persists, inspect the drain hose and tub seal for cracks and replace as needed.
Understanding the Symptoms of a Leak
If you notice pooling water near the washer or damp trails on the floor, you’re likely dealing with a leak. Leaks can appear during or after cycles and may travel away from the drain pan or base. In many cases, the issue is a simple fix you can handle safely, especially when the problem is a leaking under washing machine caused by hoses, clamps, or seals. According to Best Washing Machine, these early signs help homeowners prioritize a quick inspection to prevent more extensive water damage. In 2026, homeowners who monitor the area around their washer report fewer flood-related damages because they catch drips early and address them promptly. This article is designed for homeowners, renters, and small-business laundries facing a wet floor issue and needing fast direction on next steps.
Common Causes at a Glance
Leaks under a washer can arise from several sources. The most frequent culprits are: loose inlet hoses or clamps; a cracked drain hose; a worn or damaged door seal (front-load models); a deteriorating tub seal; and, less commonly, overloading or detergent drawer overflows. The drain pan and surrounding flooring can also mislead you into thinking the machine itself is leaking when the water originates from plumbing connections elsewhere. Regular inspection of hoses, seals, and connections is key to early detection and prevention.
Safety First: Shutoffs and Precautions
Before poking around, unplug the washer and shut off the hot and cold water supply. If your laundry area is on a concrete floor, place towels or a shallow pan to catch drips. Never work with live electrical components when water is present. If you smell gas, observe sizzling odors, or see scorching marks, evacuate and call professionals. Keeping the area dry and powered down reduces the risk of electric shock and water damage to surrounding cabinets or flooring.
How to Identify the Source of the Leak
Begin by inspecting the most common offenders: the inlet hoses at the back of the machine for tight fittings and cracks; the drain hose and its clamps for wear or disconnections; and the door seal or tub seal for visible damage. Run a quick test: with the machine unplugged, lightly press around the base while running a brief cycle to see if the water emerges from a specific area. Using a flashlight helps you spot hairline cracks or pooled moisture. If you can’t locate the source after these checks, you may be dealing with a more complex leak.
Do-It-Yourself Fixes (Easy to Moderate)
Try these fixes in order of likelihood. First, tighten any loose inlet hose connections and replace worn clamps. Next, inspect and replace a cracked drain hose or loose drain hose clamp. If the base remains wet, inspect the door seal (for front-load models) or tub seal for tears and replace as needed. After each fix, run a short cycle with a dry towel around the base to confirm the leak has stopped. Document the parts you replaced for future maintenance. These steps are aligned with best practices from Best Washing Machine to minimize risk and maximize success.
When to Call a Professional
If water continues to pool after checking hoses, seals, and the drain system, or if you suspect a faulty tub seal or a cracked frame, contact a licensed technician. Complex leaks involving the tub, inner drum, or structural wear require specialized tools and expertise. Do not attempt to repair refrigerant-style valves or electrical components beyond basic unplugging—safety must come first.
Maintenance to Prevent Future Leaks
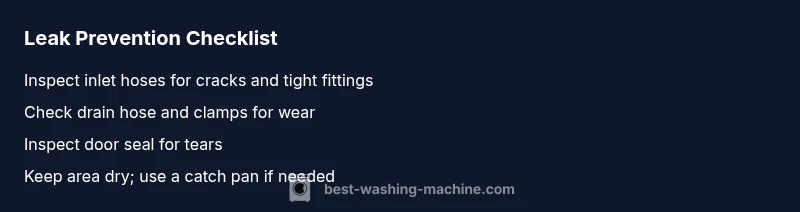
Regular maintenance reduces the chance of future leaks. Schedule monthly checks of inlet hoses for cracks and tightness, keep clamps secure, and run a quick visual inspection of the door seal after each cycle. Use the correct detergent quantity and switch to high-quality hoses if you detect aging. By sticking to a routine, you cut the odds of a sudden leak and protect floors, cabinets, and basements.
Realistic Timeline and Costs (What to Expect)
Most simple fixes, like tightening hoses or replacing a damaged drain hose, can be completed in under an hour if you have the right tools. More involved repairs, such as replacing a tub seal or door seal, may require two to three hours and possibly a professional appointment. Since prices vary by region and parts, expect a broad range of costs if you hire a pro. Regardless of cost, addressing leaks quickly saves water, reduces damage, and preserves appliance lifespan.
Steps
Estimated time: 2-3 hours
- 1
Power down and isolate
Unplug the machine and shut off both hot and cold water supplies. Move the unit slightly to access hoses without straining pipes. This minimizes the risk of electrical shock and water exposure.
Tip: Have towels ready and wear rubber-soled shoes. - 2
Inspect inlet hoses
Check both the hot and cold water inlet hoses for cracks, bulges, or looseness at the fittings. Tighten hand-tight and use pliers if needed, but avoid overtightening.
Tip: Replace hoses that feel stiff or show discoloration. - 3
Check drain hose and clamps
Locate the drain hose and ensure clamps are secure and hoses are not kinked or crushed. If you see cracks or splits, replace the hose.
Tip: Ensure the drain hose is routed above flood level and not inserted too far into the standpipe. - 4
Inspect seals from inside (if accessible)
Look at the door seal on front-load models for tears or missing portions. For top-load models, inspect the tub seal from the back panel. Replace if compromised.
Tip: Use a flashlight to spot hairline cracks that are easy to miss. - 5
Run a test cycle
Reconnect power, run a short cycle with no laundry and observe for leaks. Have towels ready to capture any water that escapes.
Tip: Do not run a full wash until you’re confident the leak source is fixed. - 6
Advanced fixes if needed
If leak persists after these checks, replace the implicated seal or consider professional service for tub or frame issues.
Tip: Document part numbers and keep receipts for future maintenance. - 7
Final check and cleanup
Wipe dry and reinstall any panels. Confirm the area remains dry after a full cycle, then resume normal use with routine monitoring.
Tip: Keep a small waterproof mat under the washer as a precaution.
Diagnosis: Water pooling around the base or visible leaks during/after a wash cycle
Possible Causes
- highLoose inlet hose connections
- highCracked or misconnected drain hose
- mediumWorn or torn door seal (front-load) or tub seal
- lowDetergent drawer overflow or improper soap usage
Fixes
- easyTighten inlet hoses and clamps; replace if cracked
- easyReplace damaged drain hose or clamps and reseal connection
- hardReplace door seal or tub seal if damaged
- easyClear detergent drawer overflow and adjust detergent amount
FAQ
What are the first signs a washer is leaking?
The first signs are damp flooring, a pooled puddle near the machine, and visible moisture around hoses or the base. Early detection helps prevent water damage and guides quick fixes.
Watch for puddles near the washer and moisture near hoses; early detection makes repairs simpler.
Can a loose inlet hose cause a leak?
Yes. A loose or cracked inlet hose is a very common cause of leaks. Tighten or replace hoses and clamps to stop the leak.
Loose inlet hoses are a common leak source; tighten or replace them to stop the drip.
When should I call a professional for a leak?
If the leak persists after basic hose checks, or if you suspect a tub or door seal is damaged, a professional repair is recommended to prevent electrical hazards and further damage.
If it still leaks after checks, call a pro to avoid electrical risk and costly damage.
Are dispenser leaks common and fixable at home?
Dispenser leaks occur when detergent drawers overflow or seal joints fail. Reducing detergent quantity and cleaning the dispenser can reduce leaks, but watch for persistent drips from the dispenser area.
Dispenser leaks happen; reduce detergent and clean the drawer, but persistent drips may require professional help.
How can I prevent leaks in the future?
Regularly inspect hoses, seals, and clamps, use the correct detergent, and keep the washer on a level surface. A simple monthly check can catch wear before it becomes a leak.
Check hoses and seals monthly and keep the machine level to prevent leaks.
What should I do to locate a hidden leak?
Place paper or a dry towel around likely leak sources and run a cycle. Look for moisture patterns far from obvious connections to identify hidden drips.
Use towels and look for water patterns to locate hidden leaks.
Watch Video
The Essentials
- Tighten hoses and clamps first; most leaks are hose-related
- Unplug and shut off water before any inspection
- Identify the leak origin before replacing parts
- Prevent future leaks with routine hose/seal checks
- Call a pro for tub/dryer frame or electrical concerns