Why Would a Washing Machine Leak from Underneath?
Learn why a washing machine leaks from underneath and follow a practical, safety-first troubleshooting guide to stop leaks fast, protect your home, and prevent future issues.

Most under-machine leaks are due to a loose drain hose, a cracked hose, or a worn pump seal. Start with simple steps: unplug the unit, tighten the drain hose clamps, inspect for cracks, and run a brief fill test with a small load. If water remains underneath, stop using it and seek professional help.
Why would a washing machine leak from underneath
If you’re asking why would a washing machine leak from underneath, the quick answer is that most leaks originate from easily fixable places. According to Best Washing Machine, the problem is rarely a mysterious plumbing fault in your walls. More often, water escapes from the back or bottom due to a loose connection, a damaged hose, or a failing seal. The good news is that many leaks you can diagnose and fix with common tools and careful safety practices. This guide uses a practical, solutions-focused approach so you can identify the source, stop the leak, and minimize damage to your floor and cabinet. The leakage can occur after a cycle, during filling, or while draining, and the symptoms may guide you toward the most likely culprit. A calm, methodical check is your best defense against costly water damage.
Common causes of underside leaks
Leaking from underneath a washing machine can stem from several familiar culprits. Start with the simplest checks and move toward more complex components if needed:
- Loose or damaged drain hose at the back of the machine, including clamps and the hose connection to the drain.
- Cracked or kinked drain hose that allows water to escape during pumping or draining.
- Worn or damaged tub seal or main tub-to-base seal, which can let water seep out around the drum area.
- Leaking pump housing or pump hoses, especially where they connect to the tub or motor.
- Front-load boot or door seal wear (if your model is a front-loader), which can spill water down the cabinet and appear beneath the machine.
- Inlet valve leaks or cracked hoses from the water supply to the fill valve, which may show up as a slow drip under the cabinet.
- Loose rear access panel screws that allow water to pool behind the machine.
Identifying the exact source requires a step-by-step approach. The leak may be intermittent, so observe after a cycle and note when the water appears. Take photos of any puddles and the back of the unit to help with part replacement later.
Safety-first checks you can perform quickly
Safety should be your first priority when troubleshooting a leak. Before touching any components, unplug the washer and shut off the water supply valves. Make sure the area around the machine is dry and clear to avoid slips. Move the washer carefully to access the back panel or drain hose. Use a flashlight to inspect connections and hoses for cracks or looseness. If you see obvious damage, don’t force clamps or bend hoses; replace the affected part instead. If you need to reach into tight spaces, use a pair of pliers or a rag to protect yourself and the parts. Remember: never operate a washer with exposed electrical components or with the power cord wet or damaged.
Diagnostic flow: symptom → diagnosis → solutions
To systematically identify the source of a bottom leak, follow a simple diagnostic path:
- Symptom: Water pooling under the machine after or during a cycle.
- Possible causes: drain hose issue, tub seal, pump leak, or inlet valve drip.
- Preliminary checks: inspect drain hose and clamps, look for water around the pump connections, and wipe down the area to observe any fresh dampness after a test cycle.
If the puddle persists after checking hoses and obvious external seals, the leak is more likely coming from internal components such as the tub seal or pump. In that case, more involved repairs or component replacement may be necessary. Always consider safety and call a professional if you’re unsure about hidden seals or internal parts.
Step-by-step fixes for the most common causes
This section walks you through practical, at-home fixes for the most common underside leaks. Start with the easiest adjustments and progress to more involved repairs if needed. Keep a towel handy and a shallow pan to catch drips during tests.
-
Tighten and test the drain hose connections. Ensure the hose is firmly connected to the drain and to the wall or standpipe. Replace any damaged clamps and cut any kinked sections if necessary. After tightening, run a short wash cycle with a small amount of water to see if the leak reappears.
-
Inspect the drain hose for cracks. If you find a crack or worn area, replace the hose entirely to prevent future leaks.
-
Check the pump area for moisture or loose hoses. Ensure pump hoses are secure and not cracked. If moisture appears near the pump, consider replacing the pump or the hose assembly.
-
Examine the tub seal from the outside. If you notice water around the outer drum or base with a line of dampness, the seal may be worn and require professional replacement.
-
Inspect inlet valves and supply hoses. Look for drips at the fill valve or supply connections. Tighten fittings and replace damaged hoses if needed.
-
After any repair, perform a controlled test: run a small load without detergent and watch for leaks. Dry the area and observe for at least one full cycle to ensure the fix holds. If leaks return, escalate to replacement of internal components or a service call.
Tips, warnings, and maintenance to prevent future leaks
- Regular inspections of hoses, clamps, and the pump can catch wear before it becomes a leak.
- Use the correct hose size and avoid over-tightening clamps, which can damage fittings.
- When replacing a tub seal or pump, follow manufacturer instructions or consult a service manual to ensure proper alignment and torque.
- Always keep the area around the washer dry to prevent mold and wood damage from any leaks.
- If your model uses a front-load boot, inspect the bellows-style door seal for tears and replace as needed.
- If you smell burning insulation or see scorch marks near the motor or pump, stop using the machine and seek professional service immediately.
When to call a professional and what to expect
If you diagnose a leak from a tub seal, bottom frame crack, or pump housing, these repairs typically require disassembly and specialized tools. A trained technician can confirm the source with a dye test or pressure test and replace seals, gaskets, or pumps as needed. Before scheduling service, gather your model number, approximate leak time, and a photo of the back panel and any visible damage. A professional visit often includes a diagnostic fee and a cost estimate for parts and labor. For safety and warranty reasons, avoid attempting complex seal replacements without proper instructions.
Steps
Estimated time: 1.5-2 hours
- 1
Power down and safety check
Unplug the machine and shut off the water supply. Move the washer away from the wall to access the back and inspect for obvious leaks or puddles.
Tip: Take a photo of hose connections before removing any clamps. - 2
Inspect drain hose and clamps
Look for kinks, cracks, or loose clamps at both ends of the drain hose. Tighten clamps or replace if damaged.
Tip: Use a flashlight to spot hairline cracks that aren’t obvious from afar. - 3
Check pump area
Remove the back panel to inspect pump hoses and the pump housing for signs of moisture or seepage. Ensure hose connections are snug.
Tip: Be mindful of hot surfaces and sharp edges when removing panels. - 4
Inspect tub/pump seals visually
If you see dampness around the drum edge or base, the tub seal may be failing. Inspect for wear or tears along the seal line.
Tip: A dye test or professional check may be needed to confirm tub seal wear. - 5
Test with a controlled cycle
Reassemble safely and run a short wash with a small load to verify leaks don’t recur. Check underneath after the cycle completes.
Tip: Place towels or a shallow tray to catch drips during testing. - 6
Decide on repair path
If leakage persists after hose/pump checks, consider replacing seals or pumps, or scheduling service.
Tip: Label parts needed and check warranty coverage if applicable.
Diagnosis: Water pooling under washer after or during a cycle
Possible Causes
- highLoose or damaged drain hose or clamps
- highWorn tub seal or door boot (on front-load)
- mediumLeaking pump housing or hoses
- lowInlet valve or supply hose leak
Fixes
- easyTighten clamps and replace damaged drain hose
- hardReplace worn tub seal or door boot if visible dampness around drum
- mediumReplace pump housing/hoses if moisture found at pump connections
- mediumReplace faulty inlet valve or supply hose as needed
FAQ
What is the most common cause of a leak under a washing machine?
The most common sources are loose or damaged drain hoses and worn door boots or tub seals. Start by checking the drain connections and seals around the drum. If the leak continues, inspect the pump and inlet valves.
Most leaks come from hoses or drum seals. Start with the drain connections and drum seals, then check the pump if needed.
Can I fix a tub seal myself?
Replacing a tub seal is a moderately difficult repair that usually requires disassembly and careful alignment. If you’re comfortable with appliance repair, you can follow a manufacturer guide; otherwise, hire a professional.
Replacing a tub seal is tricky—best left to a pro unless you have appliance repair experience.
How do I tell if the drain hose is the leak?
A quick check is to unplug, remove the back panel, and run a short test cycle while watching the hose area. If water appears at the hose clamps or along the hose, the leak is likely from the drain hose or connections.
Watch the drain hose area during a test cycle to see if water leaks from clamps or hose.
Should I use a professional for every leak?
Not every leak requires a professional. Start with simple hose and pump checks; however, leaks from tub seals or pump failure usually need expert service.
Not every leak needs a pro. Start with simple checks, but tub seals or pump issues usually require one.
What safety steps protect me from shock or water damage?
Always unplug the machine and shut off water valves before inspecting. Dry the area and avoid touching electrical components with wet hands.
Unplug, shut off water, dry the area, and avoid touching wet electrical parts.
When should I replace parts instead of patching them?
If a hose is cracked, a seal is worn, or the pump shows signs of leakage, replacement is safer and more reliable than patching.
If hoses or seals are worn or cracked, replace them rather than patching.
Watch Video
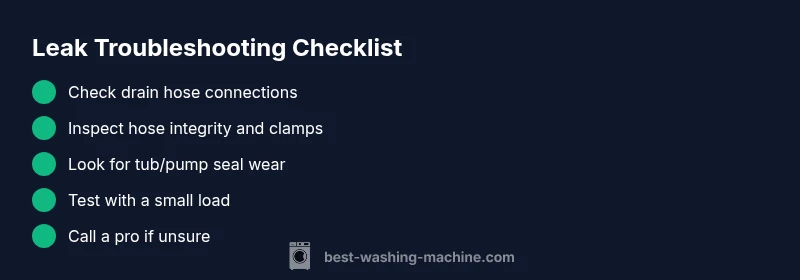
The Essentials
- Inspect hoses and clamps first
- Check tub seals and pump for wear
- Test with small loads after repairs
- Call a pro for complex seal failures