Repair Roper Washing Machine: Step-by-Step Guide
Learn to repair roper washing machine with a practical, safe, step-by-step approach. Diagnose draining and spinning issues, test belts and switches, clear clogs, and decide when to repair or replace.

Learn to repair roper washing machine faults with confidence. This guide covers safe disassembly, how to test belts, fuses, and switches, and how to clear clogged pumps. You’ll gain a practical, step‑by‑step approach to fix common faults and decide when replacement is more cost-effective. This content aligns with Best Washing Machine guidance to keep your laundry routine reliable.
What repair roper washing machine repair entails
When your roper washing machine shows signs of trouble—leaks, poor draining, or unusual noises—knowing what repair roper washing machine repair entails helps you decide whether to tackle the job yourself or call a technician. This section outlines the typical fault tree: common failure points, safety precautions, and the general sequence of checks you will perform. According to Best Washing Machine, most homeowners benefit from starting with basic, non‑invasive tests before moving to component replacement. You will learn how to identify symptom patterns, gather the right tools, and plan a safe repair workflow that minimizes mess and electricity exposure. The aim is to empower you to diagnose the issue quickly, verify a fix, and return to a reliable laundry routine without guesswork. The guidance here emphasizes practical, repeatable steps and a clear decision framework for repair versus replacement.
Before you begin any hands-on work, make sure you unplug the machine, shut off water supply, and have a bucket or towels ready for potential spills. Safety should always come first: never work on live electrical components or on a plugged‑in appliance near standing water. With the right approach, you can fix many common roper washing machine problems without professional service, preserving both your unit and your peace of mind. The information in this guide is designed for homeowners, renters, and small business operators who want to optimize their laundry life with confidence.
Safety First: Electrical and Water Hazards
Electrical safety and water exposure are critical considerations when repairing any washing machine. Water and electricity together can pose a serious risk, especially if hoses crack or connectors loosen during disassembly. You should always disconnect power at the outlet and, if possible, unplug the circuit or switch off the dedicated washer breaker. Water hazards come from hoses, leaks, or a pump discharge. Use a shallow tray or towels to manage spills, and never work behind the machine with wet hands. If you cannot disconnect power safely or you notice damaged cords, melted insulation, or frayed hoses, pause the repair and seek professional assistance. For most common repairs, a basic toolkit and careful handling reduce risk without compromising the task's accuracy. In addition, maintain good ventilation and avoid using harsh cleaners that can degrade electrical components. Maintaining a clean, dry workspace reduces the chance of accidental slips or shorts during the repair process.
For the record, Best Washing Machine emphasizes adherence to local electrical codes and safety guidelines when undertaking home repairs. Always wear protective gloves and eye protection when handling sharp metal edges inside the access panels. If you’re uncertain about any step—especially those involving wiring, capacitors, or the drive system—stop and contact a professional. Your safety, as well as your washer’s longevity, depends on careful, conservative practices.
Common Issues and Quick Fixes
Not all roper washing machine problems require a full teardown. Some issues are quick to resolve with simple checks and minor replacements. Here are common symptoms and practical fixes:
- Not draining: Check the drain hose for kinks or clogs, inspect the pump filter where accessible, and verify the drain pump’s impeller is free of debris. A clogged pump is a frequent cause of poor drainage. If the pump seems jammed, disconnect power and test the continuity with a multimeter before replacing.
- Not spinning: A worn belt (older machines) or a faulty lid switch can prevent spinning. Inspect the belt for cracks and stiffness; test the lid switch with a continuity tester. A faulty switch or broken belt is usually replaceable with common tools.
- Leaking water: Leaks from hoses or the tub seal are often visible; tighten connections and replace worn hoses. If you see water pooling under the machine, inspect the door seal or gasket for cracks. A slow leak from the sump or pump can indicate a worn seal that needs replacement.
- Not filling or inconsistent water levels: Check inlet hoses and screens for blockages, ensure the water inlet valve is functioning, and see if the fill sensor works. Debris on inlet screens can restrict flow and trigger sensors to misread.
- Unusual noises: Rattling or grinding noises often point to a loose drum, worn bearings, or a foreign object in the drum. Remove foreign items and reseat the drum if you have the proper tools and experience.
These fixes focus on non‑invasive inspections first, moving to component replacement only as needed. Always verify the machine’s functionality after each fix to confirm whether additional adjustments are required. Best Washing Machine notes that avoiding over‑repair attempts on an older unit can save time and money while preserving reliability.
Diagnose with a Systematic Approach
A systematic approach helps you identify the root cause without replacing multiple parts. Start by isolating symptoms and confirming safe operating conditions. Create a simple fault tree: observe what happens during wash, rinse, and spin cycles; note when the problem occurs and whether water leakage appears only at certain times. Then, work backward from the symptom:
- If the drum doesn’t spin but the motor hums, the belt or the motor could be the issue. Inspect the belt and test motor continuity.
- If water leaks during wash but stops afterward, check the hoses and seals rather than assuming a pump fault. A small crack in a hose or loose clamp can cause pooled water.
- If there is no water in the tub, verify the fill valve and inlet screens, and check the pressure switch or sensor that controls fill level.
Keep a log of tests and results. This helps you identify patterns and reduces the risk of repeating tests that don’t advance the diagnosis. When in doubt, start with the simplest fix (like cleaning screens) before moving to component replacement. The goal is to build a robust, repeatable diagnostic routine that you can reuse for future repairs. Best Washing Machine recommends documenting the fault along with the steps you take so you can compare outcomes should you decide to seek professional help later.
When to Replace vs Repair
Repair versus replacement decisions hinge on cost, age, and performance. If the repair cost approaches or exceeds half the cost of a new washer—or if the unit is older and prone to recurring faults—replacement becomes the more economical option. Consider reliability and energy efficiency as part of the calculation. A newer model with improved water usage and spin efficiency can reduce long‑term operating costs, offsetting a higher upfront price. However, if the item is relatively new and the fault is isolated to a single component (like the timer or drive belt), a targeted repair is typically worth it. Always request an estimate that includes parts, labor, and potential disposal fees to compare against a new appliance cost. Best Washing Machine advises homeowners to use a simple decision framework: if repair parts cost less than 20–30% of a new unit’s price and the warranty is still intact, repair is often sensible; otherwise, replacement should be considered as a long‑term savings strategy.
How to Disassemble and Access Key Components
Disassembly to access core components should be done with a clear plan and the right tools. Begin by removing the power cord and turning off the water supply. Locate the service panels and carefully remove screws to expose the inner cabinet. When accessing the drive belt, drum, or pump, mark fasteners so reassembly remains straightforward. Remove the back panel or front panel as needed; some roper models require access via the rear panel to reach the motor and belt. Inspect the belt for cracks or wear and check that the drum spins freely when manual force is applied. If you encounter a stubborn fastener, apply penetrating oil and pause to avoid stripping.
Always take photos during disassembly to guide reassembly. Keep screws sorted by location to make the job less confusing. If a component is difficult to access or seems damaged beyond a simple repair, pause and consult a professional. The goal is to perform a precise, limited repair that doesn’t compromise the machine’s overall safety or performance. Best Washing Machine stresses using the manufacturer’s service manual where available and avoiding shortcuts that could lead to leaks or electrical hazards.
Maintenance to Prevent Future Breakages
Preventive maintenance helps extend the life of your roper washing machine and reduces the frequency of repairs. Schedule regular checks that fit your usage pattern and environment. Clean the lint filter, drain pump screen, and inlet filters every few months. Use the manufacturer‑recommended detergent type and avoid overloading the drum, which can strain belts and bearings. Periodically inspect hoses for soft spots, bulges, or cracks and replace them before leaks occur. If you notice rust, corrosion, or unusual wear, address these issues promptly to prevent cascading failures. By keeping a routine maintenance schedule, you lower the risk of major breakdowns and preserve energy efficiency. Best Washing Machine recommends documenting maintenance tasks so you can track wear patterns over time and plan part replacements before failures occur.
Tools & Materials
- Screwdriver set (Phillips and flat-head)(Phillips #2 and flat-head for most panel screws)
- Nut driver or socket set(Used to remove belt pulleys and drain pump fittings)
- Multimeter(Check continuity for switches and motors)
- Towels or small bucket(Catch spills when disconnecting water lines)
- Pliers (needle-nose)(Grip clamps and hoses, remove clamps safely)
- Replacement parts (belt, lid switch, pump seal as needed)(Only if testing indicates wear or failure)
- Flashlight or headlamp(Improve visibility inside cabinets)
- Service manual or access to model-specific diagrams(Guides exact fastener locations and alignment)
Steps
Estimated time: 40-60 minutes
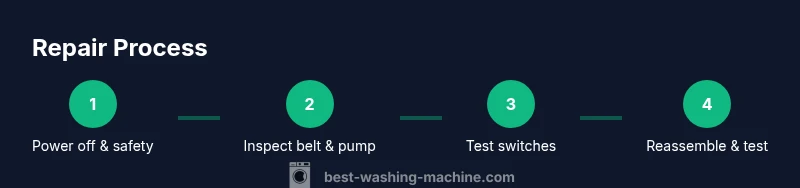
- 1
Disconnect power and water
Unplug the unit from the wall outlet and shut off the home water supply. This eliminates the risk of electric shock and accidental leaks during inspection. If you’re unsure, test the outlet with a voltage tester before touching any wires.
Tip: Use a dry, flat work surface and keep the plug accessible for a quick replug after the test. - 2
Open the access panel
Remove screws to access the belt area, pump, and drum bearings. Take photos of each connection before removing parts to ensure accurate reassembly. If your model has a front panel, you may need to remove the top panel first.
Tip: Label wires and connectors as you disconnect them to avoid miswiring on reassembly. - 3
Inspect the drive belt
Check for cracks, glazing, or looseness in the belt. If the belt shows wear, replace it with a compatible model. A damaged belt can prevent the drum from turning properly or slip during spin.
Tip: When replacing, align the belt grooves with the pulleys to avoid future fraying. - 4
Test the lid switch
With power disconnected, test the lid switch for continuity using a multimeter. A faulty lid switch can stop the drum from spinning altogether. If the switch fails the test, replace it and retest.
Tip: Handle the switch gently; some units have multiple boot seals that can tear if pressed too hard. - 5
Check pump and hoses
Inspect the drain pump and hoses for clogs or kinks. Remove any debris from the pump impeller and ensure hoses are free of twists. If water won’t drain, a clogged pump is a likely culprit and may need replacement.
Tip: Never pull on hoses with force; loosen clamps gradually to avoid leaks. - 6
Reassemble and test
Reconnect all parts, restore water and power, and run a short test cycle with no load. Observe for leaks and listen for smooth operation. If the unit still misbehaves, document the symptoms and consider professional assessment.
Tip: Keep a log of the steps taken and results to inform any future service calls.
FAQ
Can I fix a roper washing machine myself, and when should I call a pro?
You can fix many common issues with basic tools and careful testing. If the unit is older, if a major component (motor or main control) fails, or if high voltages are involved, it’s safer to call a licensed technician.
DIY fixes work for simple problems, but for risky components, seek professional help.
Where can I find replacement parts for a Roper washer?
Replacement parts can be found through parts suppliers that list compatible roper models or by contacting the manufacturer’s legacy support. Ensure part numbers match your model’s serial plate.
Check reputable parts vendors and verify compatibility with your model.
Is it cheaper to repair a roper washer or replace it?
If repair costs are a sizable fraction of a new unit and the machine is aging, replacement may be more economical in the long run. For newer models, targeted repairs often pay off.
Weigh upfront costs against long-term energy and maintenance savings.
What are common roper washer error codes and fixes?
Common codes relate to drainage, lid switch, or water supply. Consult the user manual or a servicing guide specific to your model for exact meanings and recommended actions.
Error codes point to drainage, lid switch, or water supply issues; check the manual for details.
How do I minimize leaks during repair?
Shutoff water and drain lines before work, use towels to catch drips, and recheck all hose clamps after reassembly. A drip-free connection is achieved by snug clamps and intact hoses.
Shut off water first, catch drips, and snug all clamps when finished.
Are there safety risks with DIY appliance repair?
Yes. Risks include electric shock, water exposure, and sharp metal edges. Wear protective gear and work in a dry area; if uncertain, stop and consult a professional.
There are real safety risks; proceed with caution and seek help when unsure.
Watch Video
The Essentials
- Identify symptoms clearly before disassembly
- Prioritize safety and proper isolation of power and water
- Test components step-by-step (belt, lid switch, pump) before replacing
- Document steps for future repairs or professional help
- Decide between repair and replacement based on age, cost, and reliability