Washing Machine Box Installation: A Complete How-To
Learn how to install a recessed washing machine box correctly. This guide covers planning, components, safety, testing, and maintenance to ensure a reliable, leak-free setup for any laundry room.

This guide teaches you how to perform a washing machine box installation, including planning, mounting a recessed box, connecting water supply lines, installing a standpipe drain, and testing for leaks. Follow the code suggestions, gather the right materials, and work carefully to prevent water damage.
Understanding the washing machine box installation and why it matters
Washing machine box installation is a practical approach to housing a washer’s water supply valves and drain in a single, accessible unit. The box typically sits within a recessed laundry niche or wall cavity and provides shut-off valves, a standpipe or drain connection, and a clean, finished surface for easier maintenance. The importance extends beyond cosmetics: a well-installed box minimizes leaks, reduces drift and moisture on floors, and simplifies future servicing. According to Best Washing Machine, a correctly installed box aligns with standard mounting heights, ensures proper drainage slope, and uses materials chosen for residential use. For homeowners and renters, investing a bit of time in the planning phase saves headaches during busy laundry days and helps protect cabinetry and flooring from water damage. This section sets the foundation: what the box includes, how it integrates with the washer, and how to verify compatibility with your space and local code requirements.
Planning to install a washing machine box: space, height, and code considerations
Successful installation begins with a clear plan. Measure the laundry space to confirm the box can be mounted at a height that matches the washer’s fill hoses and the standpipe’s height. Check local plumbing codes for requirements on box dimensions, venting if needed, and permissible materials. Accessibility is essential: you’ll need room to access shut-off valves and to service the drain if a clog or leak occurs. Consider the proximity to the washer, the path of the drain line, and whether the box will be flush with finished walls or behind a panel. Best practices include ensuring a straight, accessible path for the drain, avoiding sharp bends in hoses or pipes, and leaving enough clearance for a future replacement washer. Also plan for adequate sealing around the box to prevent air leaks and moisture intrusions that could lead to mold growth or damage over time. This planning phase is the best time to review your home’s structural framing and confirm you have the right tools and materials for a clean, code-compliant install.
Key components and features you’ll encounter in a washing machine box
A typical washing machine box consists of a metal or plastic housing, integrated shut-off valves for hot and cold water, a standpipe or drain connection, and a knock-out for the drain hose. Some boxes include a cleanout access, a built-in siphon, and a small access door for maintenance. The drain outlet should connect to a waste line with the appropriate trap and slope to prevent sewer gases from escaping. It’s important to verify the box’s dimensions fit your wall cavity and that the standpipe height aligns with your washer’s discharge hose in a way that minimizes kinking. Look for corrosion-resistant fittings, durable hose connections, and compatibility with common household pipe materials in your region. Choosing a box with robust mounting features and tested seals reduces the risk of leaks and simplifies future service.
Selecting the right box materials and mounting method
Material choice affects durability and maintenance. Plastic boxes are lightweight and corrosion-resistant, while metal boxes offer greater rigidity for heavy-duty use. Whichever material you choose, ensure the box is rated for residential use and has a secure mounting system that can handle the washer’s vibration. When mounting, locate studs or use appropriate anchors to create a solid base. Use silicone sealant where the box meets the wall to prevent moisture intrusion, and ensure any gaps are sealed after installation. If your space includes a tiled or finished wall, plan for a clean finishing approach that keeps the box accessible while preserving aesthetics. Always follow manufacturer recommendations for fasteners, sealants, and compatible pipe sizes. By selecting the right box and mounting approach, you’ll support long-term reliability and easy maintenance.
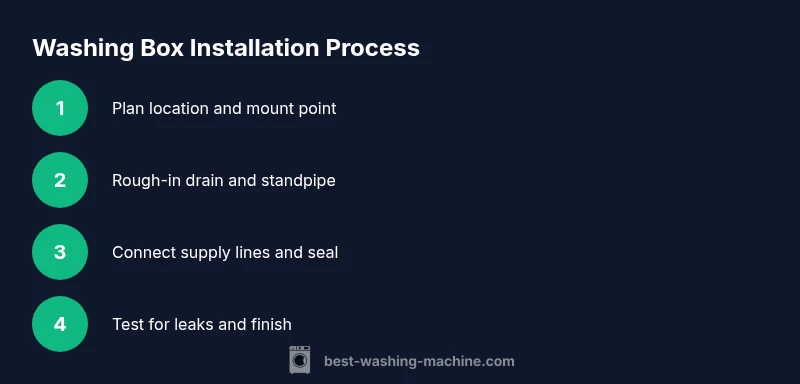
A practical, step-by-step overview of the installation process
The process involves planning the location, shutting off utilities, securing a sturdy mounting surface, installing the box, rough-in for the drain and standpipe, connecting water supply lines, and performing a leak test. While this overview gives the sequence, the separate STEP-BY-STEP block covers each action in detail with explicit steps, timing, and tips to avoid common errors. Keeping each action orderly helps prevent mistakes such as misaligned hoses, inadequate slope on the drain, or loose fittings that can lead to leaks. After installation, tidy the work area and test the system with water and air to confirm everything seals and drains properly.
Safety, testing, and leak prevention practices
Safety is paramount when working with plumbing and water. Always shut off the main water supply before disconnecting any lines, use protective gear, and ensure the work area is dry to prevent slips. Use a level to verify the box is plumb, and confirm all connections are tight but not over-tightened. After mounting, perform a pressure test and a slow-fill test to check for leaks at the valves, drain connections, and hose fittings. If you detect a leak, dry the area, tighten fittings gradually, and re-test. Document the results for code inspections or future maintenance. Routine checks should occur after every major laundry load to catch issues early and maintain a dry, safe space.
Common mistakes to avoid and how to correct them
Common missteps include mounting the box too high or too low, placing it in a location with poor access to shut-offs, using undersized drain pipes, or failing to seal the interface between the box and wall. These errors can cause leaks, slow drains, or mold growth. To correct, re-check the height against the washer’s hoses, ensure the drain line has at least a 1/4 inch per foot slope, replace any damaged hoses, and reseal with an appropriate sealant. If the wall structure requires cutting and re-framing, approach with care and consider consulting a professional for structural changes. Correcting mistakes early saves time and reduces the risk of expensive damage.
Maintenance and long-term care after installation
Once installed, periodic maintenance should include inspecting hose connections for wear, testing shut-off valves for ease of operation, and checking for any signs of moisture around the box. Clean drains and remove lint build-up from the standpipe to prevent clogs. Keep the surrounding area dry and consider installing a moisture alarm as an added safety measure. Regular checks after heavy-duty laundry cycles reinforce reliability and can extend the lifespan of both the box and the washer.
When to hire a professional
If you face uncertain code requirements, structural modifications, or repeated leaks despite adjustments, it’s wise to hire a licensed plumber or contractor. A professional can verify code compliance, ensure proper venting where required, and guarantee the installation won’t void warranties or cause costly water damage. Even if you start as a DIY project, having a professional review the final setup can prevent future issues and give you peace of mind.
Tools & Materials
- Washing machine box (recessed laundry box) with shut-off valves and drain(Check dimensions: typical 20x24 inches or 24x24 inches; ensure valve size matches supply hoses and drain size matches local plumbing)
- Adjustable wrench(Used to tighten hose fittings and valve nuts)
- Pipe wrench or pliers(For stubborn fittings and PVC/ABS connections)
- Drill with masonry bits(Needed if mounting into masonry or tile walls)
- Silicone sealant or plumber’s putty(Seal around wall interface to prevent moisture intrusion)
- Teflon tape(Wrap threads on metal fittings to prevent leaks)
- Level(Ensure the box is plumb and the washer sits evenly)
- Hose clamps(Secure hoses if needed for vibration or long runs)
- Leak-detecting moisture alarm (optional)(Adds early warning for moisture behind or below the box)
- Water supply hoses rated for washers(Diameter typically 3/4 inch; replace old hoses to prevent burst risk)
Steps
Estimated time: 2-3 hours
- 1
Plan and mark location
Identify a location that aligns with the washer and provides easy access for valve operation. Mark the studs or mounting points and ensure there is a clear path for drainage.
Tip: Use a level and a straight edge to ensure the box will be square with the wall surface. - 2
Shut off water and drain
Turn off the main water supply and disconnect any existing lines to prevent spills. If you have a drain line nearby, ensure it is clear before proceeding.
Tip: Verify cold and hot lines are labeled and that you have towels ready for any residual water. - 3
Prepare mounting surface
If mounting into drywall, confirm stud placement or install appropriate anchors. Create a clean flat plane for the box to sit flush with the wall.
Tip: Avoid mounting on thin plaster or hollow sections that might crack under load. - 4
Mount the box
Attach the washing machine box to studs or anchors using corrosion-resistant screws. Check that it is level and firmly anchored.
Tip: Double-check the plane around the box to prevent gaps that trap moisture. - 5
Rough-in drainage
Install the standpipe and connect to the waste line with the proper trap and slope. Ensure there are no sharp bends that could cause clogs.
Tip: Aim for at least 1/4 inch per foot slope to promote steady drainage. - 6
Connect water supply lines
Attach hot and cold hoses to the box’s shut-off valves, using Teflon tape on threads if required. Tighten fittings firmly but avoid overtightening.
Tip: Use hoses with a protective sleeve to reduce wear at bends. - 7
Seal and protect the interface
Apply silicone sealant around the box-face to seal against moisture intrusion. Allow sealant to cure per product guidance.
Tip: Leave a small gap at the bottom to permit drainage if water seeps behind the wall. - 8
Insert drain hose and test
Place the washer’s drain hose into the standpipe and secure as needed. Slowly turn on water and fill to check for leaks.
Tip: Watch both connections and the standpipe for misting or drips. - 9
Leak test and adjustments
Run a full cycle test and inspect all joints. If leaks appear, tighten fittings and re-test before placing a panel or cover.
Tip: Document any issues and re-test after corrections. - 10
Finalize and tidy
Replace any wall panels, add finishing trim, and store spare parts for future maintenance. Ensure access remains unobstructed.
Tip: Keep a simple maintenance log for valve checks and hose replacements.
FAQ
What is a washing machine box and what does it include?
A washing machine box is a recessed enclosure that houses the washer’s water shut-off valves and drain. It provides a tidy, accessible point for connections and helps prevent leaks by keeping fittings protected inside a dedicated box.
A washing machine box is a recessed housing for the washer’s water valves and drain, designed for safety and easy maintenance.
Do I need a washing machine box to install a washer?
Not every installation requires a recessed box, but it is highly recommended in homes with built-in laundry areas. A box organizes connections, reduces splash, and helps with code compliance.
A recessed box isn’t always required, but it’s recommended for organization, leak prevention, and code-friendly setups.
What height should the box be installed at?
Install the box so that the shut-off valves line up with your washing machine’s hoses and the standpipe doesn’t exceed the washer’s drain height. A typical height is around the level of the washer’s top edge, but verify with your model’s specifications.
Aim for box height to align with the washer’s hoses and ensure the standpipe matches your drain height.
Can I install a washing machine box myself if I’m not a pro?
Yes, with careful planning, the right tools, and adherence to local codes. If you encounter complex plumbing or structural work, consider hiring a licensed professional to prevent leaks and ensure code compliance.
You can DIY, but don’t hesitate to call a pro if you hit plumbing code questions or structural issues.
What are common signs of a failing box installation?
Look for slow leaks, damp walls, or musty odors near the box. Loose hoses, dripping fittings, or standing water are immediate red flags that require prompt inspection and tightening or replacement.
Watch for leaks, damp walls, or odors near the box; tight fittings and hose condition matter.
How often should I test the box after installation?
Test after installation and again after every major laundry load for the first few weeks. Periodic checks every few months help catch issues early and maintain long-term reliability.
Test it after installation and after big loads for a few weeks, then check periodically.
Watch Video
The Essentials
- Plan location carefully to align with hoses and standpipe.
- Use proper box material and secure mounting to prevent movement.
- Seal interfaces to protect against moisture and mold.
- Test thoroughly for leaks before finishing.
- Maintain valves and hoses regularly for long-term reliability.