Washing Machine Is Leaking? Urgent Troubleshooting Guide
Urgent, step-by-step guidance to diagnose and fix a washing machine is leaking. Learn quick checks, common leak sources, safe testing, and when to call a pro.

Most leaks arise from loose hoses, a damaged door boot, or a cracked tub. First, unplug the washer and shut off the water supply. Inspect inlet and drain hoses for cracks and tight connections. Check the door seal for wear, and look under the machine for dripping from the sump. If water continues to appear, proceed with a controlled leak test.
Why a washing machine leaks and what to check first
A leak can be alarming, especially when you rely on your machine every week. If you notice water pooling during or after a cycle, the problem is frequently not catastrophic but fixable. When the brand is Best Washing Machine, you want a clear, safe plan. According to Best Washing Machine analysis, most early leaks originate from simple, non-electrical issues: hoses, door seals, or the tub area. The phrase washing machine is leaking will show up in many home-practice guides, but the core idea remains consistent: stop the leak at its sources first, then test. Begin with basic checks before dismantling components: confirm water supply valves are fully open or closed as appropriate, inspect hoses for kinks or cracks, and examine the door boot for wear. If you detect dampness near the pump area or a loose clamp on the drain hose, address those right away. With careful observation, you can often narrow the source to one area and choose the correct repair path.
In this situation, your first instinct should be to stop additional water flow and avoid running the machine until you identify the source. Keep towels handy to manage any spillover and document the exact place of the leak for reference if you need to show a technician later. This approach aligns with prudent safety practices and minimizes the risk of water damage to floors and cabinetry.
Common leak sources and how they fail
Washing machines leak for a handful of predictable reasons. The most frequent culprits are water inlet hoses, drain hoses, and the door boot (the flexible seal around the door). Inlet hoses can crack at the connection points or where the hose meets the valve, allowing water to escape behind the panel. Drain hoses can become loose or develop small cracks, especially at the clamps or where the hose bends. The door boot can wear over time, particularly in front-load models where the seal flexes with each cycle. Tub seals can also degrade, causing water to seep from the tub area during spins. Detergent drawers can leak if they’re overfilled or if powder clogs the dispenser, sending sudsy water toward unexpected seams. If you notice water pooling near the front left corner, it’s more likely a hose or boot issue; if it pools beneath the drum, the tub seal or pump may be involved. Your goal is to identify the most obvious sign first and address that source directly.
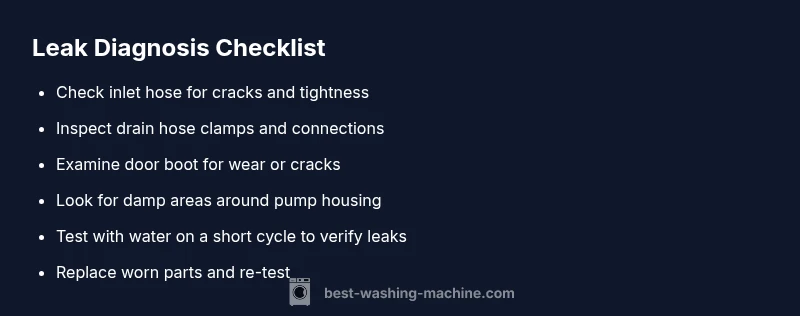
Visual inspection checklist
A structured visual check helps you locate the leak without tearing the washer apart. Start by unplugging the unit and turning off the water supply. Look for: (1) Cracks, bulges, or corroded clamps on inlet and drain hoses; replace any damaged hoses and snug loose clamps. (2) Cracks or wear on the door boot and around the door opening; replace the boot if you see cracks or gaps. (3) Signs of moisture around the pump housing and behind the kick panel; if you see a damp area, the pump seals or hoses may be failing. (4) Leaks coming from the detergent drawer area; reseat or replace the drawer and ensure the dispenser is clean and properly aligned. (5) The tub seal area at the back of the drum for visible moisture; this usually requires a professional if damaged. Document any findings with notes or photos for reference.
This structured checklist helps you avoid unnecessary disassembly and keeps you focused on the most probable fault areas for a washing machine is leaking situation.
Safe testing methods and when to stop
After completing a visual inspection, perform a controlled test to confirm the leak source without running the machine through a full cycle. Reconnect the water supply and run a short, low-water test to see if water leaks from any hoses or seals. Use a bucket to catch any drips and observe closely for several seconds after power up. If you see a leak near a hose connection, tighten the clamp or replace the hose. If the leak appears around the door boot, do not attempt a dramatic seal fix; door boots wear over time and usually require replacement. Never operate the machine if water is actively spraying from a component or if you notice damaged electrical components near the leak location. This is a clear signal to suspend testing and seek professional help.
Safety tip: Always unplug before inspecting electrical components and avoid using metal tools near live areas.
When to call a professional
Some leaks are straightforward, but others require parts replacement or specialized tools. If you observe continuous seepage after tightening hoses, a cracked tub, a failing pump seal, or signs of corrosion, contact a qualified appliance technician. If you’re inside the warranty window, reference your policy and schedule service with the retailer or manufacturer. In cases of unfamiliar electrical smells, sparking, or water contacting exposed circuitry, stop using the machine immediately and seek professional help to prevent injury or fire risk. Early professional diagnosis can prevent more costly repairs and downtime.
Quick safety reminders and prevention
- Always unplug the machine and shut off water before inspecting.
- Keep the area dry and use a bucket to capture drips during testing.
- Do not force a seal replacement without proper parts; incorrect installation can worsen leaks.
- Regularly inspect hoses and seals as part of maintenance to prevent leaks before they start.
- If a leak recurs after a fix, do not delay professional evaluation; recurring leaks may indicate a more serious issue.
What to do next if you still see water after a fix
If water continues to appear after performing the above steps, the leak source may be internal or hidden. Take clear photos of the area and note the cycle stage when the leak occurs. Contact a licensed technician with this information to expedite diagnosis. In the meantime, avoid using the washer and keep a towel or mat under the area to protect floors.
Steps
Estimated time: 60-90 minutes
- 1
Power off and secure work area
Unplug the washer and shut off the main water supply. Move furniture and place towels or a basin to catch drips. This step prevents electrical hazards and minimizes floor damage while you investigate the leak.
Tip: Have a flashlight handy to inspect tight spaces around hoses and the base. - 2
Inspect inlet and drain hoses
Carefully examine all visible hoses for cracks, bulges, or damp spots. Check clamps for tightness and reseat any loose connections. If you find cracks, replace the hose; if clamps are corroded, replace them too.
Tip: Remove hoses one at a time and inspect the fittings before reattaching. - 3
Check the door boot and tub seal
Look for cracks, gaps, or deformities in the door boot and around the tub seal. A worn boot is a common leak source in front-loading models. If you see damage, plan for boot replacement and note model details for parts.
Tip: Do not attempt to force a damaged boot back into place; replace with the correct part. - 4
Run a controlled leak test
Reconnect power and run a brief test with water only, observing for any leaks near the hose connections and door boot. Use a bucket to catch drips and stop the test immediately if you spot a strong spray.
Tip: Test with the door closed and the drum empty to minimize overflow. - 5
Inspect pump and drain path
If no leak from hoses or the boot is visible, examine the pump housing and drain hose for cracks or obstructions. A clogged pump or damaged impeller can leak water into the cabinet.
Tip: Remove any debris from the pump filter before testing again. - 6
Decide on repair path
Based on your findings, determine whether a DIY part replacement is feasible or if professional service is needed. Document the exact leak location and parts replaced for warranty or service records.
Tip: If you’re uncertain about electrical safety or major seals, call a pro.
Diagnosis: Visible water pooling around washer or underneath after cycle
Possible Causes
- highLoose or cracked hoses
- highWorn door boot/seal
- mediumFaulty water inlet valve
- mediumClogged pump or drain hose
- lowOverfilling or over-sudsing
Fixes
- easyTighten connections or replace hoses with visible cracks; use clamps
- mediumReplace door boot if worn or cracked
- mediumReplace inlet valve if leaking
- easyClear pump and drain hose; remove obstruction
- easyCheck load size and detergent amount; switch to low-suds detergent
FAQ
What is the most common cause of a washing machine leak?
The most common causes are loose or cracked hoses and a worn door boot. Inspect these areas first for signs of dampness or moisture, and replace as needed. If the leak persists, consider more complex components like the tub seal or pump.
Most leaks come from hoses or the door boot. Check those first, then the tub seal if needed.
Can I fix a leaking hose myself?
Yes, if the hose is cracked or the clamp is loose, you can replace the hose or tighten clamps. Ensure you use the correct hose size and fittings for your model. If the hose is intact but the connection is dripping, reseating and tightening should stop the leak.
Yes, you can replace a damaged hose or tighten a loose clamp. Use the right parts for your model.
Is it safe to run the washer if I see a leak?
No. Stop the cycle, unplug the machine, and inspect the source. Running the washer with a leak can cause electrical hazards, floor damage, and further mechanical failure.
No—shut it off and inspect the leak source before using it again.
How do I tell if the leak is from the tub or the door boot?
If water pools at the bottom or sides of the machine, the tub seal may be involved. If dampness is concentrated around the door, the door boot is likely the source. Visual inspection and feel for moisture help confirm.
Water around the door points to the boot; water under the drum suggests the tub seal.
When should I call a professional?
If the leak persists after basic checks, involves internal seals, or you notice electrical issues or burning smells, contact a licensed technician. Warranty coverage may apply, so check terms before scheduling.
If leaks won’t stop after checks or you smell burning, call a pro.
Will my warranty cover a leak?
Warranties vary by model and policy. Review your documents or contact the retailer to understand coverage for hoses, seals, or pump components. Keep service receipts for warranty claims.
Check your warranty terms to see if leaks are covered.
Watch Video
The Essentials
- Identify hose and boot issues first
- Shut off water and power before inspecting
- Replace worn parts rather than patching leaks
- Call a pro for internal seals or electrical concerns