Why Is My Washing Machine Leaking From the Bottom? A Practical Troubleshooting Guide
Stop a bottom-leaking washer fast with clear checks, safe fixes, and steps to decide when to call a pro. Learn sources, prevention, and maintenance.

Most bottom leaks come from loose hoses, a worn door boot, or a degraded tub seal. Start with the simplest checks: unplug the washer, inspect and tighten drain and supply hoses, and make sure the appliance sits level. If water still pools at the base after these checks, inspect the door boot seal and pump for cracks or failure.
Why Leaks Happen From the Bottom: Understanding the Culprits
If you're wondering why is my washing machine leaking from the bottom, you’re not alone. Bottom leaks are usually not a mysterious phenomenon; they’re most often caused by a handful of wear-and-tear factors that crop up with use. Common culprits include loose or cracked drain hoses that spray water at the base, a torn or stretched door boot (especially in front-load models), or a failing outer tub seal that lets water seep into the base area during or after cycles. Detergent residue buildup can also mask leaks by accelerating wear on seals and gaskets. In some cases, a small crack in the drum or tub can create a slow drip that becomes noticeable as a steady pool under the machine. The key is to identify whether the water is coming from a fitting, a gasket path, or a structural seam, then address it directly.
Takeaway for homeowners: treat leaks as a systems issue—don’t assume one single part is the culprit. Each washer layout has its own water pathways, and a bottom-leak symptom is often the result of multiple small problems adding up over time. This guide helps you trace the issue with practical checks and safe fixes, so you can protect your floor and extend your washer’s life.
Quick Checks You Can Do Safely Today
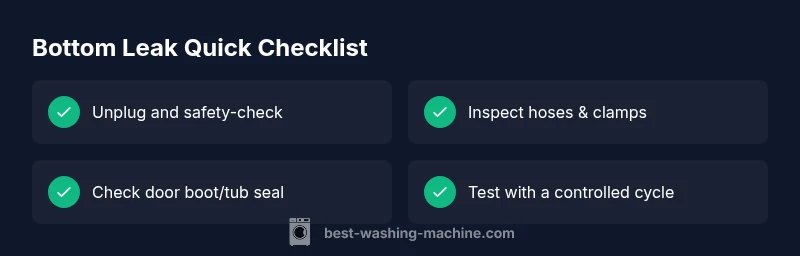
Before you call for help, run through a concise, safe checklist to rule out the easiest causes. Start by unplugging the unit and shutting off water supply valves if you need to handle hoses. Then inspect: (1) Both drain and hot/cold water hoses for kinks, cracks, or brittle plastic that could shatter at clamps; tighten or replace as needed. (2) Hose clamps—ensure they’re snug and not corroded. (3) The washer’s level: tilt slightly in all directions to confirm it doesn’t rock. If the machine sits unevenly, relevel it with adjustable legs or a rubber mat. (4) The drain hose’s routing: make sure it’s not inserted too far into the drain or kinked under the base, which can force water out at the bottom. (5) The door boot (front-load) or tub seal (top-load) for tears or wear. A torn boot is a common hidden leak source that should be replaced promptly.
These steps cover the most likely root causes and are the safest place to start. If you see visible cracks or you can’t identify the leak source after this quick pass, it’s time to move to a more detailed diagnostic flow or contact a technician for repair. Safety reminder: never touch electrical components with wet hands, and avoid running the machine while you’re inspecting parts around the base.
How Water Finds Its Way to the Bottom: Diagnostic Pathways
Water can travel in surprising ways inside a washer. A loose hose can spray water directly toward the base; a torn boot allows water to spill where the base meets the cabinet; a failing outer tub seal can cause a slow drip that pools underneath. In front-loading machines, the most common bottom-leak sources are the door boot and the tub seal. In top-loaders, the tub-to-basket seal and impeller area can contribute to leaks that appear at the bottom after a cycle ends. When you observe water intermittently pooling after cycles, it’s a clue that the leak isn’t a steady constant stream but is related to where the pump or valve directs water. Also watch for water pooling only during filling or spinning—both patterns point to different failure points. The goal is to narrow the possibilities by checking each area in turn and noting when the moisture appears.
If you can identify the specific time water appears (during fill, wash, or spin), you’ll click into the likely culprit—making a repair plan faster and reducing trial-and-error. The practical approach is to test each component’s integrity with simple, controlled inspections rather than disassembling vast sections of the washer at once.
Steps
Estimated time: 30-60 minutes
- 1
Power down and safety check
Unplug the washer and, if possible, switch off the water supply valves. Move the machine enough to access the back and underside. This step prevents shocks and makes it safe to inspect hoses, clamps, and the base area.
Tip: Always test for power with a non-contact voltage tester before reaching behind the unit. - 2
Inspect drain and water supply hoses
Look for kinks, cracks, or loose clamps on both the drain hose and the hot/cold water lines. Tighten clamps securely and replace any hose that shows signs of wear. Re-route the drain hose so it cannot rub against the base.
Tip: If you replace hoses, use stainless-steel clamps for a longer-lasting seal. - 3
Check door boot and tub area
For front-loaders, closely inspect the door boot for tears or gaps where water could escape. For top-loaders, inspect the tub seal and the area around the drum. Replace worn gaskets and ensure the area is clean of soap scum.
Tip: Take photos before disassembly to guide reassembly later. - 4
Run a controlled test
Plug the unit back in, set a short wash cycle with no laundry, and place a towel under the base. Watch closely for any leaks from the hose connections, door boot, or seals. If no leak appears, gradually add a small amount of water to test the system.
Tip: Keep a log of findings and times of any leaks to help a tech diagnose if needed.
Diagnosis: Water leaking from the bottom of the washer while or after the cycle
Possible Causes
- highLoose or damaged drain hose connection
- highWorn door boot/agitator seal around drum
- mediumFaulty outer tub seal or tub crack
- lowClogged pump or lint filter causing overflow at base
- lowDamaged water inlet hoses or supply connections
Fixes
- easyTighten and reseat the drain hose clamps; replace hoses if cracked or brittle
- easyInspect and replace torn door boot seal (front-load) or tub seal (top-load) as needed
- mediumInspect outer tub seal for leaks; if damaged, plan a professional service
- easyClear the pump and trap of debris; ensure the impeller can rotate freely
- easyInspect inlet hoses; replace if cracked and ensure proper water pressure
FAQ
What are the most common causes of a washing machine leaking from the bottom?
The most common causes are loose or damaged drain hoses, a torn door boot (front-load), or a failing tub seal. Detergent buildup can also accelerate wear on seals. Identifying the specific source is key to an effective fix.
Most leaks come from hoses or worn seals. Start by checking hoses and the door boot, then inspect the tub seal if needed.
Can a clogged pump cause water to leak from the bottom?
Yes. A clogged pump can cause water to back up and escape at the base, especially if the pump housing or filter is blocked. Clear the trap and verify the pump spins freely after cleaning.
A clogged pump can push water to leak at the bottom; cleaning the pump area often resolves it.
Is a leaking bottom always a major problem?
Not always. Some leaks are minor and related to seals that can be replaced. However, persistent leaks or water near electrical components require professional assessment to prevent safety hazards.
Not every leak is a major disaster, but persistent leaks require careful checking or a pro.
Does detergent residue cause leaks at the bottom?
Yes, especially with excessive or improper detergent usage. Residue can corrode seals or create buildup that directs water toward seams. Clean with appropriate cleaners and use correct detergent amounts.
Detergent buildup can contribute to leaks by wearing seals. Clean and use the right amount.
When should I call a professional?
If basic checks fail to locate the leak, if you hear unusual noises, or if you must disassemble the tub or seals, it’s safer to hire a technician. A pro can diagnose tub seals, suspensions, or cracks.
Call a pro if leaks persist after basic checks or if you need disassembly beyond your comfort level.
Watch Video
The Essentials
- Identify the leak source first with a structured check
- Tighten or replace simple hose and gasket parts before complex fixes
- If the leak continues after basic checks, call a professional
- Regular maintenance reduces future bottom leaks