Washing Machine Not Draining Water: Quick Troubleshooting Guide
If your washing machine is not draining water, use this urgent guide to diagnose common drains, clear clogs, and restore proper drainage quickly.

If your washing machine is not draining water, start with the simplest checks. Ensure the door is fully closed, the cycle is set to drain or spin, and the drain hose is unobstructed. Clean the lint filter and pump screen, then run a drain test. If water still won’t drain, proceed to more advanced steps or call a repair technician.
Why the washing machine is not draining water
When a washer won’t drain, especially when the washing machine is not draining water, it’s an urgent issue that traps dirty water in the tub and can lead to mold or foul odors. The primary culprits are clogs and failed pumping. Start by inspecting the path water takes from the tub to the drain: the lint filter or pump screen, the pump itself, and the drain hose. In many cases, blockages are the simple reason the machine is not draining water. Debris such as coins, hair, thread, or buttons can accumulate in the pump housing or inlet, especially in high-use homes. If your model relies on a rear or bottom-mounted pump, check there for obstruction, as a stuck impeller or jam can prevent draining entirely. If you notice an unusual odor or water remains after the cycle, suspect a blockage or a failing pump. The sooner you identify the blockage, the faster you can restore normal draining and prevent water damage.
Quick checks you can perform before taking it apart
Before you pull panels, run through these quick checks. Confirm the machine is powered off and unplugged. Ensure you selected a drain or spin cycle; some cycles won’t drain unless the lid is locked. Inspect the drain hose at the back for kinks or crushing; lay it on the floor flat and remove any blockages. Check the exterior lint filter or pump screen if your model has one, and clean away lint or hair. If the tub still holds water after running a drain/spin cycle, measure the drain hose height—too high or too low can cause siphoning or poor drainage. Finally, reset the washer by unplugging for a minute or using a reset combination described in your user guide. If none of these steps resolves the issue, move to the next diagnostic steps.
Inspecting the drain hose and pump filter
This step-by-step focuses on exterior components that you can access safely. Unplug the unit and pull it away from the wall. Detach the drain hose from the back of the machine and inspect for kinks, crushing, or sharp bends. Rinse the hose and look for clogs with a flashlight. If possible, detach the hose from the standpipe and run water through to check flow. Locate and remove the pump filter or lint screen—many models have a small access door near the bottom front. Clear any trapped hair, threads, or coins, then reassemble. Reconnect the hose and run a drain test with an empty load. If water still doesn’t drain, proceed to pump diagnosis. Do not run the pump with the filter removed for safety.
Diagnosing the pump and impeller
If the draining problem persists, the pump or impeller is a common faulty part. Listen for a humming sound when the drain cycle starts; humming without movement often means a seized impeller or a blocked impeller. Check for visible debris inside the pump housing, but never force items through the opening. With the power still off, you can try turning the pump impeller by hand to feel for resistance. If the impeller spins freely but water still won’t drain, the pump motor may be weak or its windings damaged. In that case, you’ll likely need a replacement pump assembly. Some models require a service call to access the pump inside the main bath.
When to replace vs repair: cost considerations (no prices)
Drainage issues can be cheaper to repair if caught early, but some failures require replacement. If the pump impeller is cracked or the motor hums but won’t start, a replacement pump is usually the right fix. If multiple seals leak and there’s water intrusion into the control board, replacement may be more cost-effective than a complex repair. Consider the age of the washer, the cost to obtain a genuine replacement pump or assembly, and the value of the machine. For older units, a full replacement can be more economical than ongoing repairs. Always weigh the labor cost and the likelihood of recurring issues when deciding between repair and replacement.
Prevention and maintenance to avoid future drainage problems
Prevention is the best cure. Schedule monthly checks of the drain path and filter, and keep lint traps clean. Use the correct type and amount of detergent to reduce suds that can clog hoses. Do not overload the washer, which can push debris toward the pump. Inspect hoses for wear and replace any that show cracks. Run a maintenance cycle or hot wash with a cleaning product recommended by the manufacturer to clear soap scum that can affect drainage. Keep the area behind the machine dry and free of obstructions to allow airflow and reduce mold buildup.
Safety reminders and when to call a pro
Safety should come first. Always unplug the machine before any inspection, never bypass safety interlocks, and keep children away from exposed components. If you see signs of water exposure near electrical outlets, turn off the power at the main breaker and call a licensed technician. If the problem involves the main control board or there are multiple electrical symptoms, professional service is advised. Drain issues can sometimes be resolved with simple parts replacement, but a professional diagnosis protects you from electrical hazards and ensures the repair is performed correctly.
Steps
Estimated time: 60-90 minutes
- 1
Power down and unplug the washer
Unplug the machine and switch off the water supply to prevent leaks. Move the washer away from the wall to access the back and bottom areas. Prepare towels or a shallow pan for any residual water.
Tip: Keep track of screws and parts in a container. - 2
Access the drain path safely
Place a towel under the area and disconnect the drain hose carefully. Inspect for kinks, crushes, or obstructions along the hose path. Clear any visible blockages and straighten the hose.
Tip: Do not pull too hard on hoses; they may detach fittings. - 3
Check and clean the pump filter
Open the front filter panel or access door and remove the pump filter. Rinse out lint, hair, coins, and other debris. Reinstall securely before testing.
Tip: Use a flashlight to check for fine debris. - 4
Test the drain path with an empty load
With the hose reconnected, run a drain or spin cycle on an empty tray. Watch the flow and listen for the pump. Look for clear drainage instead of standing water.
Tip: Have a towel ready for any splash. - 5
Inspect the pump and impeller
If water still won’t drain, remove access to the pump and rotate the impeller by hand. Look for resistance or obvious damage. Do not force; a seized pump may need replacement.
Tip: Only handle components when powered off. - 6
Decide on repair vs replacement
If the motor hums but won’t start, or the impeller is damaged, plan for a replacement pump. If multiple seals leak or the control board is implicated, evaluate overall machine value and repair costs.
Tip: Consider warranty coverage or long-term costs. - 7
Reassemble and run a final test
Reattach all hoses securely, reinsert filters, and run a full cycle with a small load to confirm proper drainage. Check for leaks around fittings.
Tip: Double-check hose clamps for tightness. - 8
Call a professional if uncertain
If you encounter electrical wiring, a damaged control board, or persistent drainage issues, contact a licensed technician to avoid safety hazards.
Tip: When in doubt, prioritize safety over fixes.
Diagnosis: Machine won't drain water
Possible Causes
- highClogged drain pump filter
- highKinked or blocked drain hose
- mediumFaulty pump motor or impeller
- lowBlocked debris in tub or impeller chamber
- lowControl board or programming issue
Fixes
- easyUnblock and straighten the drain hose; remove blockages
- easyRemove and clean the pump filter or lint screen
- mediumInspect and test the pump and impeller for jam or resistance
- hardReplace the drain pump assembly if the motor or impeller is faulty
FAQ
What is the most common cause of a washing machine not draining water?
The most common cause is a clog in the drain pump filter or drain hose. Debris from fabrics and lint can accumulate and block flow, especially if the filter hasn’t been cleaned regularly.
Most drain problems come from a clog in the pump filter or hose. Clean the filter and hose to restore drainage.
Why is my washer draining slowly?
Slow drainage often indicates partial blockages in hoses or the pump filter. Inspect and clean the filter, straighten or replace hoses, and test again after a full cycle.
Slow drainage usually means a partial blockage in the hose or filter. Clean them and test again.
Can I fix this myself at home?
Yes for basic clogs and filter cleaning. For pump replacement or electrical issues, follow manufacturer instructions and consider professional service to avoid hazards.
You can fix simple clogs at home, but for pump or electrical issues, it’s safer to contact a technician.
How do I tell if the pump is faulty?
A humming sound without water movement often signals a seized or blocked pump. If the impeller spins freely but no drainage occurs, the pump may be faulty and require replacement.
A humming sound with no drainage usually means the pump is blocked or faulty.
Is it safe to unplug while the drain hose is detached?
Always unplug first, then detach any hoses. Never work with live electrical components or water leaking near outlets.
Unplug first and then detach hoses. Don’t work with water near electricals.
Would replacing the pump be expensive?
Costs vary by model and labor. Replacing a faulty pump can be worthwhile on older machines, but compare with the machine’s value and repair costs.
Pump replacement costs depend on your model and labor; weigh against your machine’s value.
Watch Video
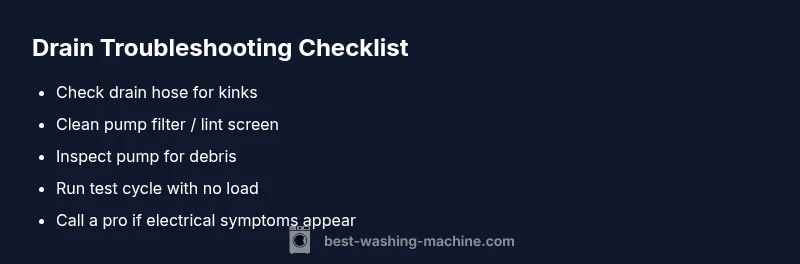
The Essentials
- Unplug and inspect staples of the drain path first
- Clear the drain hose and pump filter to restore flow
- Test with an empty load before deciding on parts
- Call a pro if electrical components are involved