Washing Machine Keeps Draining: Quick Fix & Safety Tips
Urgent troubleshooting guide to fix a washing machine that keeps draining water. Learn common causes, safe checks, and prevention tips from Best Washing Machine.

Most likely cause is a clogged pump filter or blocked drain hose that lets water escape and keep draining. Start by unplugging the washer, then inspect the drain hose for kinks or air gaps and remove any visible clogs. Next, check the pump filter and clean it if accessible. If water still drains, test the lid switch and look for leaks.
Why a Washing Machine Keeps Draining
Experiencing a washing machine that keeps draining can be alarming, especially when you expect a simple rinse-and-spin cycle. In most homes, the culprit is a combination of simple, addressable issues rather than a failing pump. A common scenario is water escaping through a blocked path due to a clogged pump filter or a kinked drain hose. The symptom “washing machine keeps draining” often points to a situation where the normal drain path is compromised, causing water to flow continuously or out of the tub after cycles end. The model and age of the machine matter, but even newer units can exhibit this behavior if routine maintenance hasn’t kept the pump filter and hoses clear. Start with safe, low-effort checks that don’t require removing major panels. If basic checks don’t resolve the issue, you’ll move to a more systematic diagnostic flow and potential fixes. This guide follows Best Washing Machine’s approach to diagnose quietly and safely.
Key takeaway: start with accessible components (filters, hoses) before delving into internal parts.
Immediate Checks You Can Do Now
If you’re facing a washing machine that keeps draining, begin with the simplest, safest checks first. Unplug the machine before touching any components to avoid electric shock. Inspect the drain hose for kinks, air gaps, or a loose connection at the standpipe. A crushed or elevated hose can create a siphon effect that makes water drain continuously. Next, locate the pump access panel and remove the filter or screen. Hair, lint, coins, and small debris commonly clog these openings, causing backflow or continuous drainage. Clear any obstruction you find and rinse the area with clean water. Look for visible leaks around the hose connections or the pump housing—these may indicate a worn seal or cracked hose needing replacement. If your machine has a lid or door switch, verify it clicks properly when closed; a faulty switch can interrupt the machine’s sensing, leading to erroneous drainage behavior.
Pro-tip: take photos of hose connections before disconnecting anything so you can reassemble accurately.
Diagnostic Flow: Symptom to Diagnosis
When the symptom is ongoing drainage, follow a structured diagnostic flow to isolate the cause. Start with the drain path: is the drain hose free of kinks and properly inserted into a standpipe or disposer? If yes, move to the pump filter: is the filter clogged or difficult to remove? A clogged pump filter is the most common culprit for continuous drainage. If the hose and filter check out, test the lid switch; a faulty switch can trigger unexpected drainage signals to the control board. If all of these pass, inspect the pump and hoses for wear or cracks, and verify there are no external leaks that could mimic a drainage issue. If you discover a damaged component, replacement is usually necessary. Finally, consider whether the drain path could be siphoning due to a high water level or improper standpipe height.
Even small issues matter: minor hose deformities or a loose clamp can cause problems that feel dramatic.
Common Fixes for the Most Likely Cause
The most frequent fix targets a clogged pump filter and a blocked drain hose. Start by unplugging the machine and removing any panels required to access the pump and filter. Carefully unscrew the filter, remove debris, rinse the filter and housing, and reinstall securely. Next, detach the drain hose and flush it with running water to remove buildup; check that the hose is not kinked and that the standpipe is properly positioned to avoid air gaps. If a lid switch is suspected, test for continuity with a multimeter or replace it if the switch does not click when the lid closes. Finally, inspect the drain pump and hoses for cracks or loose clamps—replace damaged parts and reseal connections. If the issue persists after these steps, you may be dealing with a failing pump or a more complex control issue requiring a professional inspection.
Note: addressing the simplest causes first saves time and reduces the risk of secondary damage.
Safety, Common Mistakes, and When to Call a Pro
Safety is non-negotiable when troubleshooting a washing machine. Always unplug the unit before touching any internal components. If there’s visible water on the floor, place towels or a basin to catch spills and prevent slips. Avoid using excessive force when removing filters or hoses; plastic components can crack. Common mistakes include running the washer with a disconnected hose, ignoring a small leak that becomes large, and attempting electrical tests without proper precautions. If the problem persists after basic checks—especially if you hear grinding noises, see burning smells, or notice scorched plastic—call a professional. A licensed technician can diagnose issues like a failing drain pump or control board fault that requires specialized tools.
Bottom line: some drainage problems demand professional evaluation to ensure safety and proper repair.
Steps
Estimated time: 25-45 minutes
- 1
Power down and access the pump filter
Unplug the washer and move to a dry area. Remove any access panel to reach the pump filter. Place a shallow tray underneath, then unscrew the filter housing and slowly withdraw the filter. Remove debris and rinse the housing. Reinsert the filter and securely fasten the housing.
Tip: Keep a towel handy for spills and photograph connections before removing parts. - 2
Check drain hose for kinks and proper routing
Inspect the drain hose for crimps, kinks, or sharp bends. Detach the hose from the standpipe and gently straighten it. Rinse the hose with water to clear any internal blockages. Reconnect ensuring a tight, secure fit with no air gaps.
Tip: Ensure the hose outlet is above the floor level to prevent siphoning. - 3
Test the pump and look for blockages
With the machine still unplugged, remove the pump to inspect the impeller area for hair, lint, or foreign objects. Clear obstructions carefully without damaging the impeller. Reassemble and run a short cycle with no load to observe drainage behavior.
Tip: Avoid forcing items through the filter; use a long brush to dislodge stubborn debris. - 4
Check the lid switch and door latch
Close the lid and listen for the switch click. If there’s no audible click or the switch feels loose, test continuity with a multimeter or replace the switch. A faulty switch can falsely signal the machine to drain continuously.
Tip: Always disconnect power before testing electrical components. - 5
Run a test cycle and observe
Run a small test wash to monitor drainage. Check for unexpected drips, leaks, or continued draining after the cycle ends. If water drains abnormally, recheck hose connections and pump seals before proceeding to more advanced repairs.
Tip: Take note of the cycle type and any leaks for the technician if needed. - 6
When to call a professional
If drainage problems persist after basic fixes or you notice burning smells, odd noises, or visible damage, contact a licensed technician. Electrical components, pumps, and control boards require professional handling.
Tip: Document symptoms and steps you’ve tried to help the technician diagnose faster.
Diagnosis: Washing machine keeps draining
Possible Causes
- highClogged or blocked pump filter
- highBlocked drain hose or air gap
- mediumLid switch fault
- lowDamaged drain pump or hose
Fixes
- easyUnplug the machine and remove the access panel to locate and clean the pump filter
- easyInspect and clear kinks in the drain hose and ensure the air gap is clear
- mediumTest and replace the lid switch if faulty
- hardReplace a damaged pump or cracked hoses; call a pro for electrical issues
FAQ
Why does my washing machine keep draining after the cycle ends?
This typically points to a blocked pump filter, a kinked drain hose, or a faulty lid switch causing miscommunication with the control board. Start with the simplest checks first to identify the culprit.
If your washer keeps draining after a cycle, start with the drain hose and filter, then check the lid switch before calling a pro.
How do I inspect and clean the pump filter?
Access the pump filter through the front kick panel or bottom panel, remove the filter, and clean out hair, lint, and debris. Rinse with warm water and reassemble securely.
Open the panel, remove and rinse the filter, then reinstall snugly.
Can a bad lid switch cause continuous drainage?
Yes. A faulty lid switch can fail to signal the control board that the washer door is closed, triggering improper drainage or continuous pumping.
A bad lid switch can confuse the machine's controls and cause drainage problems.
Is it safe to run the washer if the drain hose is leaking?
No. A leaking or cracked drain hose can lead to water damage and electrical hazards. Replace the hose before operating the unit.
Don’t run the washer if the drain hose leaks; replace it first.
What if none of the basic fixes work?
If the issue persists after removing clogs and checking the lid switch, the pump or control board may be faulty. A professional diagnosis is recommended.
If nothing works, get a pro to check the pump and control board.
How can I prevent drainage problems in the future?
Regularly clean the pump filter, avoid overloading, and ensure hoses are properly routed and secured. Periodic inspection helps prevent clogs and leaks.
Keep up with regular maintenance to avoid future drainage issues.
Watch Video
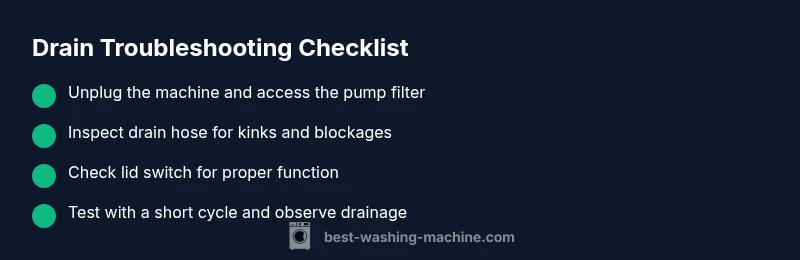
The Essentials
- Unclog filters & hoses first
- Test lid switch if drainage persists
- Inspect for leaks and pump damage
- Call a pro for electrical concerns or persistent issues