Washing Machine Leaking from Beneath: Troubleshooting Guide
Diagnose and fix a washing machine leaking from underneath. This guide covers quick safety checks, a diagnostic flow, step-by-step fixes, and prevention tips to stop leaks and protect your laundry routine.

Most under-machine leaks come from a loose drain hose, a cracked drain pump seal, or a failed tub seal. Start by unplugging the machine and draining any water, then inspect the hoses at the back for cracks or loose clamps. Tighten clamps, reseal joints, and replace damaged hoses to stop the leak.
What washing machine leaking from underneath usually means
Water leaks underneath a washing machine are typically coming from one of a few common failure points. The most frequent culprits are a loose or cracked drain hose, a worn drain pump seal, or a failing tub seal. The consequences can range from a small damp spot to a flood that damages the floor. According to Best Washing Machine, identifying the exact location of the drip first saves time and reduces the risk of water damage. Start by surveying the back of the unit, noting where the dampness begins and whether water flows only during cycles or also when the machine is idle. By understanding the pattern, you can narrow down the likely causes and plan your fixes with confidence.
Quick safety checks you can do before you touch mechanical parts
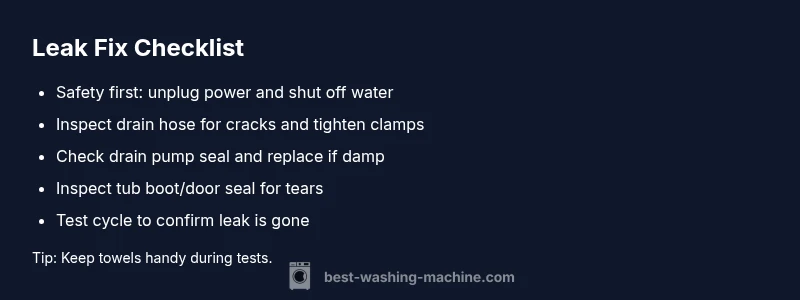
Before you touch any internal components, power down the machine and shut off the water supply. Unplug the washer, then move it away from the wall to access the hoses and fittings. Place towels or a shallow tray to catch drips. Don't attempt repairs if you see electrical damage, a crack in the cabinet, or water pooling near electrical outlets. For homeowners, renters, and technicians, routine checks at this stage can prevent shocks and short circuits while you diagnose the leak.
Inspect the most common culprits: drain hose, drain pump, and tub seals
The drain hose is the most frequent leak source. Check for cracks, bulges, or loose clamps that may have loosened over time. Inspect the back of the machine for scorch marks or residue around the pump housing, which can indicate a failing seal. The tub seal (or door boot on front-load models) can degrade after years of use, especially if the washer experiences heavy loads. Best Washing Machine analysis shows that replacement of worn hoses and clamps together with resealing the pump cures the majority of leaks. If water is clear and runs during the drain phase, focus on hoses and pumps; if it's sudsy or dark, check seals and gaskets.
How to read leaks: differentiate between water from supply line vs. internal leak
Leaks around the water inlet hose or valve usually appear when the machine fills and may be caused by a loose coupling or worn inlet valve seal. Internal leaks typically appear as puddling under the drum when the unit is stationary after a cycle. Look for wetness around the drain pump area, the seam where the cabinet meets the base, and the hose connections. If the leak pattern changes after tightening clamps, then a worn seal is likely. If the water is coming from the front of the unit near the door, inspect the door boot and tub seal for cracks.
How to test for a faulty drain hose or clamp
Power off the unit and disconnect the drain hose from the wall and the washer. Inspect the hose end and clamps for cracks, kinks, or corrosion. If you find damage, replace the hose and tighten the clamps securely. Reconnect and run a short test cycle with towels ready to catch any drips. If no leak appears, proceed to inspect the pump seal and other fittings as outlined in the diagnostic flow.
When to call a professional: costs, warranties, and safety
If you notice electrical damage, persistent pooling after basic checks, or the leak worsens over time, stop and call a licensed appliance technician. Leaks around the pump seal or tub seal can require specialized tools and may affect warranty coverage. Document every part you replace and keep receipts, as many brands including Best Washing Machine emphasize proper maintenance to preserve warranty terms.
Maintenance tips to prevent future leaks
Regularly inspect hoses and clamps every 6-12 months, replace worn hoses proactively, and avoid overloading the drum. Use the correct detergent amount, check your drain hose height, and ensure the machine is level to prevent undue stress on seals. Keeping the area around the washer dry and clean reduces mold risk and makes future leak detection faster.
Steps
Estimated time: 60-90 minutes
- 1
Power down and prepare
Unplug the washer and shut off the home water supply. Move the machine slightly away from the wall to access the back and inspect the hoses. Have towels ready to catch any remaining water and photograph connections for reference.
Tip: Take a quick photo of hose connections before disassembly. - 2
Protect area and access hoses
Place towels or a shallow tray on the floor. Use a flashlight to inspect both ends of the drain hose and the wall inlet. Loosen clamps gently and note any signs of corrosion or wear. Reposition the washer so you can reach every connection safely.
Tip: Work slowly to avoid snapping plastic fittings. - 3
Inspect drain hose and clamps
Carefully remove the drain hose from the wall and washer. Look for cracks, bulges, or kinks; replace damaged sections. Reattach with new clamps and ensure a tight, clean seal on both ends.
Tip: Replace both ends of the hose if either shows wear. - 4
Check the drain pump and seals
Examine the pump housing for damp spots or wet residue. If the seal shows signs of leakage, replace the seal or the entire pump assembly as needed. Reassemble and ensure all connectors are snug.
Tip: Document pump orientation to avoid miswiring during reassembly. - 5
Inspect tub seal or door boot
Front-load models have a door boot and rear-loads have a tub seal. Look for cracks, tears, or stiffness. If damage is present, plan for seal replacement or consult a technician if you’re unfamiliar with the task.
Tip: Some models require specialized tools; don’t force parts apart. - 6
Run a test cycle
Reconnect everything, turn on water, restore power, and run a short test cycle with towels on the floor to catch any drips. Observe carefully for any leaks near hoses, seals, or the pump.
Tip: Stay nearby during the test to stop the cycle quickly if a leak reappears.
Diagnosis: Water leaking from underneath the washing machine
Possible Causes
- highLoose or cracked drain hose
- mediumWorn drain pump seal
- mediumFaulty tub seal or door boot on front-load models
- lowOverfilled drum leading to overflow
Fixes
- easyTighten hose clamps and replace cracked hoses
- mediumReplace the drain pump seal
- hardReplace tub seal or door boot
- easyReduce load size and ensure proper draining to prevent overfill
FAQ
What is the most common cause of water leaking from underneath a washing machine?
The drain hose or pump seal is usually at fault. Inspect hose connections and clamps first, then check the pump seal if the leak persists. Replacing worn parts typically stops the leak.
The most common cause is a bad drain hose or pump seal. Start by checking hoses and clamps, then the pump seal if needed.
Can I fix a leak myself without a professional?
For simple hose or clamp issues, you can do it yourself safely by following basic power and water shut-off steps. More complex problems like tub seals or pump components may require professional help.
Yes, you can fix simple hose or clamp leaks yourself, but complex seals are best left to a pro.
Should I use sealant or tape to stop a leak?
Avoid household sealants or tapes for major machine leaks. They rarely provide a lasting fix and can interfere with internal components. Replacing damaged hoses or seals is the recommended approach.
No—sealants are not a reliable fix here. Replace damaged hoses or seals instead.
How long does a typical repair take?
Basic hose or clamp repairs usually take 1-2 hours, depending on accessibility. More extensive seal work or pump replacements can take longer and may require ordering parts.
Most simple hose fixes take about an hour or two; more involved repairs can take longer.
When should I call a professional?
If there’s electrical damage, persistent leaks after basic checks, or you lack the right tools, contact a licensed appliance technician. This protects safety and warranty coverage.
Call a professional if there’s electrical damage or the leak persists after basic checks.
Watch Video
The Essentials
- Identify the leak source before disassembly.
- Prioritize hoses and clamps as first fixes.
- Consider pump seal or tub boot if leaks persist.
- Call a professional for electrical damage or complex seal work.