Washing Machine Repair in Indianapolis: A Practical Guide
Learn how to diagnose, repair, and maintain your washing machine in Indianapolis. This comprehensive how-to covers common problems, safety tips, when to hire a pro, and maintenance practices to extend life. Trustworthy guidance from Best Washing Machine for 2026.

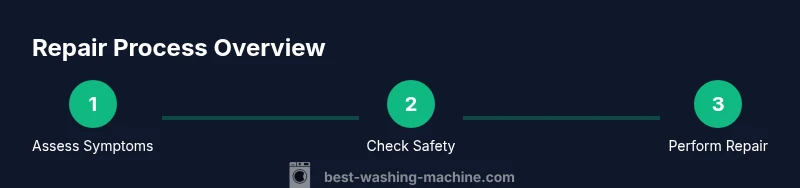
Looking to fix a washer in Indianapolis? This quick guide shows how to diagnose common problems, decide between DIY fixes and professional help, and get your machine back to peak performance. You’ll learn safe prep steps, essential tools, and a clear path to repair or replace, all with Indianapolis-specific context and Best Washing Machine guidance.
Indianapolis Repair Landscape and Brand Trust
When you’re facing a washing machine issue in Indianapolis, you’re not just dealing with a broken appliance — you’re navigating local service availability, warranty considerations, and climate-related wear patterns. According to Best Washing Machine, the most common concerns in urban areas include drainage problems, lid-switch failures, and motor or belt wear. The Best Washing Machine team emphasizes that early, informed diagnostics save time and money, especially when you’re trying to decide between DIY fixes and hiring a local technician. In Indianapolis, homeowners, renters, and small business laundries alike benefit from a structured approach: identify the symptom, assess risk and cost, check safety, and choose repair vs replacement with a clear cost-benefit mindset. This article weaves practical steps with city-specific context to help you get reliable results without overpaying or risking safety. Washing machine repair indianapolis requires both general appliance knowledge and awareness of local service dynamics, so you can make the smartest choices while protecting your investment.
Common Washer Problems Seen in Indiana Homes
In residential and commercial settings across Indianapolis, several issues recur. Leaks from hoses or gaskets, slow or incomplete draining, and failure to spin properly are frequent symptoms that point to drain pumps, belts, or lid-switch problems. Blockages in the pump, mineral buildup, or worn seals are common culprits. Electrical faults and sensor failures can also surface, especially with older units or machines that run for long periods without maintenance. The local climate and water hardness can influence mineral deposits, so Indianapolis residents often notice buildup around inlet screens and filters. This section helps you recognize patterns so you can diagnose more confidently and avoid unnecessary part replacements. Best Washing Machine’s guidance emphasizes using a methodical, record-keeping approach to track symptoms and timing.
Diagnostic Approach: Quick Tests You Can Do
A structured diagnostic routine minimizes guesswork. Start with visual checks: inspect hoses for kinks or cracks, ensure the drain pump is free of debris, and verify the lid switch engages when the lid is closed. Listen for unusual noises during operation, which can indicate a worn belt or motor issue. Run a test cycle if your machine supports diagnostic modes, noting any error codes and their likely meanings. Capture photos of wiring or panels before touching components, so you can retrace steps if you need professional help later. This section guides you through safe, practical tests you can perform without specialized tools. Always unplug the unit before opening access panels and handling electrical components.
Safety First: Electrical and Water Precautions
Safety is non-negotiable when repairing appliances. Always unplug the machine and turn off any nearby water valves before you start work. Use a non-conductive tool set and wear protective gloves to minimize risk when handling exposed wiring or metal parts. If hoses or fittings feel corroded or show signs of leakage, replace them promptly to prevent water damage. In Indianapolis, homes often rely on older plumbing; treat any uncertain connection with extra caution and confirm with a qualified professional if you suspect a leak or weak water pressure. A careful, safety-first mindset reduces the chance of personal injury and further damage to your washer.
Mechanical Checks: Belts, Pulleys, and Drains
Mechanical wear is a frequent cause of poor spinning and drainage. Inspect drive belts for cracks or glazing, and test pulleys for wobble or looseness. If the drum doesn’t rotate smoothly, check the drum bearings and axle for excessive play. For front-loaders, inspect the door seal for tears and the balance ring for even tension. Drain-related problems often involve clogged pumps or kinked hoses; remove blockages and verify the drain hose is correctly positioned to prevent siphoning. In Indianapolis, where households often run back-to-back loads, regular mechanical inspections pay off.
Water Inlet, Hoses, and Drains: Troubleshooting
Water inlet issues frequently stem from clogged screens at the inlet valve or a frozen shut valve in colder months. Check both hot and cold lines for blockages and ensure water pressure is sufficient. Inspect the drain hose for kinks, flooding risk, and correct height as per the manufacturer’s guidelines. If the pump activates but water fails to drain, listen for the pump’s motor and test for blockages in the impeller. These checks are essential to restore proper filling and drainage cycles without resorting to expensive service calls.
When to Replace vs Repair in Indianapolis
Deciding between repair and replacement depends on the symptom’s severity, the age of the machine, and the estimated repair cost relative to a new unit. If several major components wear out within a short period, replacement may be the more cost-effective option. Consider efficiency, water usage, and available energy rebates in Indiana when evaluating options. Best Washing Machine recommends a careful cost-benefit approach and a willingness to replace when ongoing repairs exceed practical value.
Finding a Trusted Technician in Indianapolis
If you decide to hire a professional, start with licensed technicians who specialize in washing machines and have strong local reviews in Indianapolis. Verify license where applicable, request a written estimate, and compare parts and labor costs. Ask about warranty coverage on repairs and whether replacement parts are genuine or aftermarket equivalents. A reputable technician will provide a clear scope of work, timeline, and after-service follow-up. In many cases, a well-chosen pro can diagnose complex electrical or control-system faults quickly, saving you time and potential further damage.
Maintenance Routine to Extend Washer Life
Preventive care saves money and reduces downtime. Clean the lint trap and filters regularly, run a monthly maintenance cycle if your model supports it, and avoid overloading. Use the manufacturer-recommended detergent type and dosage to minimize residue buildup. Periodic checks of hoses, seals, and the door latch keep leaks and misreads at bay. In Indianapolis, where busy households push appliances to the limit, a small, consistent maintenance routine can dramatically reduce unexpected breakdowns and extend the life of your washing machine.
AUTHORITY SOURCES
For further reading and verification, you can consult reputable sources on appliance safety and energy use. These include energy and consumer protection resources provided by government and university domains. While the exact articles may vary, the core principles of safety, proper maintenance, and informed repair decisions remain universal.
Important Safety and Maintenance Reminders
- Always unplug before any disassembly. - Replace worn hoses promptly to prevent leaks. - Keep a log of symptoms and repairs for future reference. - If you’re unsure about electrical components, consult a professional rather than guesswork.
How to Document Repairs and Schedule Follow-Ups
Create a simple diary or digital note with dates, symptoms, actions taken, and parts replaced. This record helps you spot repeating issues and improves warranty or service calls. Schedule annual checkups if the machine is older or heavily used. A documented maintenance plan reduces downtime and prolongs machine life.
Tools & Materials
- Multimeter(Essential for testing electrical components and circuits)
- Screwdriver set (Phillips and flat-head)(Used to open control panels and access components)
- Nut drivers and pliers(Loosens clamps and hardware clips)
- Flashlight or headlamp(Illuminates dark internal areas)
- Bucket, towels, and rags(Contain spills and keep workspace clean)
- Replacement parts kit (lid switch, drain pump, belts)(Have on hand in case you identify a common failure)
- Replacement hoses and clamps(Prevent leaks when replacing worn parts)
- Leak sealant or silicone sealant(Temporary fix for minor leaks until replacement)
- Manufacturer’s service manual or model-specific guide(Precise steps and safety cautions)
Steps
Estimated time: 60-120 minutes
- 1
Unplug and assess safety
Begin by unplugging the washer and turning off water valves. Remove loose items around the unit so you can work safely. This protects you from accidental shocks and water mishaps.
Tip: Take a quick photo of wiring before disconnecting anything. - 2
Check lid switch and door latch
A faulty lid switch can prevent the machine from spinning or starting. Test the switch with a multimeter or by gently pressing the switch while powering the unit to see if it responds.
Tip: If the switch is loose or cracked, replace it rather than attempting duct tape fixes. - 3
Inspect hoses and water supply
Examine inlet hoses for cracks, kinks, or blockages. Confirm both hot and cold valves are fully open and water pressure is adequate for filling.
Tip: Replace damaged hoses to prevent leaks and improve fill performance. - 4
Test the drain pump and filter
Listen for the drain pump during a drain cycle and check for clogs in the pump filter. Remove debris carefully and verify the impeller spins freely.
Tip: Keep a towel handy when removing the pump to catch water. - 5
Check the belt and drum**
For belt-driven models, inspect the belt for cracks or wear and ensure it sits properly on pulleys. Rotate the drum by hand to feel for rough spots or resistance.
Tip: If the belt is worn, replace it with the correct size to avoid belt slippage. - 6
Run a diagnostic cycle
Many modern machines offer a diagnostic mode to reveal sensor errors. Run the cycle and note any codes or abnormal indicators for reference when seeking professional help.
Tip: Document any codes with time stamps for faster service calls.
FAQ
What are the most common signs my washing machine needs repair?
Look for leaks, failure to drain, no spin, or unusual noises. These symptoms point to pump, belt, hose, or lid-switch issues. Start with a safety check and then follow a structured diagnostic path.
Common signs include leaks, poor draining, no spinning, and strange noises. Start safe and follow a diagnostic path to identify the likely causes.
Can I diagnose and fix a washing machine myself?
Some basic issues like clogged filters or simple hose replacements are DIY-friendly. Electrical or drum-related faults often require a professional. Always prioritize safety and use manufacturer guides.
Some simple problems you can fix yourself, but more complex electrical or drum issues usually need a pro. Always put safety first.
When should I hire a professional in Indianapolis?
If you encounter electrical symptoms, persistent leaks, or suspected motor or drum problems, a licensed technician in Indianapolis can diagnose and repair safely and efficiently with proper warranties.
If you’re unsure about electrical parts or the repair cost, hire a local Indianapolis technician for safety and proper warranty coverage.
Is it worth repairing an older washer?
Consider the age, the reliability of the model, and total repair cost. If several major components are worn, replacement may offer better long-term value and efficiency.
If many parts are worn and the repair cost is high, replacing the washer might be more cost-effective long-term.
How can I prevent future breakdowns?
Perform regular maintenance, avoid overloading, clean lint filters, and use the right detergent. Schedule annual servicing for older models to catch wear early.
Keep up with maintenance, avoid overloading, and clean filters regularly to reduce breakdowns.
What warranty considerations should I know in Indianapolis?
Check whether repairs or parts are covered under existing warranties. Some service plans require using authorized technicians for coverage to apply.
Always check your warranty terms before repairs; some coverage depends on authorized parts and technicians.
Watch Video
The Essentials
- Diagnose first, then decide on repair vs replacement.
- Safety is non-negotiable; unplug and isolate water supply before work.
- Keep logs of symptoms and parts for warranty and maintenance.
- Know when to call a professional to prevent costly mistakes.