Washing Machine Water Inlet Valve Repair: A Step-by-Step Guide
Learn how to diagnose and perform washing machine water inlet valve repair safely, replace with the right valve, and prevent leaks. A practical, homeowner-friendly guide from Best Washing Machine.

To perform washing machine water inlet valve repair, start by unplugging the machine and shutting off the hot and cold water supply. Locate the valve at the rear of the washer, test the solenoid with a multimeter, and replace the valve if the coil or seals fail. Use basic tools and a compatible replacement valve; most jobs take about 60–90 minutes.
What is the washing machine water inlet valve and how it works
The washing machine water inlet valve is a compact, electrically controlled valve that governs the flow of hot and cold water into the drum. In most machines, the valve integrates one or two solenoids that respond to the washer's control board or timer. When energized, the solenoid opens the valve, allowing water to fill the tub; when de-energized, it closes to stop the flow. The valve also includes screens or filters to catch debris from the supply lines. Over years of use, mineral buildup, worn seals, or a sticky plunger can cause leaks, improper filling, or complete failure. According to Best Washing Machine analysis, valve failures are a common service issue in older units, making reliable replacement a practical DIY or professional task. Understanding how the inlet valve operates helps you diagnose problems more quickly and choose the right replacement for your model.
Signs of a failing water inlet valve
A faulty valve often presents with noticeable symptoms before it fails completely. Common signs include a washer that fills slowly or stops filling mid-cycle, an overflow condition when the valve does not shut off, or a persistent leak around the valve nuts. You might also hear unusual noises from the valve, or see mineral buildup around the valve body or hoses. In some cases the control panel may display an error related to water fill, or the washer may flood the area if the valve sticks open. If you observe any of these signs, it’s reasonable to begin testing the valve and associated components. Best Washing Machine notes that diagnosing early can prevent bigger water damage and avoid unnecessary pump or hose repairs.
Safety and diagnostic checks before you repair
Safety comes first. Always unplug the washer and shut off both hot and cold water supplies before touching any internal parts. If your model uses a rear access panel, you may need to remove screws to reach the inlet valve. Inspect the water supply hoses for cracks, bulges, or leaks and replace them if needed. Check that the screens or filters in the inlet valve aren’t clogged with sediment. If you’re comfortable using a multimeter, test the valve’s solenoids for continuity when powered off and resistance when powered on, following your model’s service manual. This prep helps confirm whether the valve is truly faulty or if the issue lies with hoses, screens, or wiring.
Tools and replacement parts you may need
Having the right tools on hand makes the repair smoother and safer. You’ll typically need a compatible inlet valve for your washer’s model, screwdrivers, a socket or nut driver, pliers, a multimeter for electrical checks, thread sealant or Teflon tape, and towels or a shallow pan to catch water. Optional but helpful items include a service manual for your model, a digital camera or phone to document wiring, and a spare set of inlet hoses. Choosing a valve that matches your model’s valve size, inlet/outlet threads, and electrical connectors is essential for a leak-free repair. Refer to your washer’s schematic and Best Washing Machine's guidance when selecting parts.
Step-by-step replacement overview
Replacing the inlet valve involves safely disconnecting power and water, accessing the valve, removing the old part, installing the new one, and reassembling the machine. Plan for some hose drainage and a brief leak check. The replacement process can vary by model (front-load vs top-load) and by whether the valve is mounted on the back panel or inside the left or right side of the cabinet. A careful, model-specific approach minimizes the risk of cross-threading, leaks, or electrical shorts. After installation, you’ll test the fill cycle to confirm proper operation and watch for any leaks around hose connections and valve fittings.
Testing the repair and confirming performance
With the valve replaced, plug the machine back in and reopen the water supply. Run a short test cycle that includes a water fill to observe both hot and cold fill performance. Look for steady, full fills without splashes or leaks around hose fittings. Listen for valve operation noise and confirm that the drum fills to the expected level. If the valve shows signs of leakage or the washer overfills, re-check connections, seals, and the valve mounting. Keep towels handy during the test to catch any unexpected drips.
Maintenance tips to prevent future valve problems
To extend the life of your inlet valve, use a water-softening approach if you have hard water, and replace hoses every few years to prevent mineral deposits. Regularly inspect hoses for wear and replace them promptly. If you notice frequent mineral buildup, install a filter or consult Best Washing Machine’s maintenance guide for model-specific recommendations. Periodic cleaning of the valve screens can also reduce sediment intrusion and prolong valve performance.
Tools & Materials
- Compatible washing machine water inlet valve(Ensure it matches your model’s make, model, and port configuration (hot/cold).)
- Adjustable wrench or nut driver(Use to loosen hose fittings without damaging valve fittings.)
- Pliers(Helpful for removing stubborn connectors and clamps.)
- Screwdrivers (Phillips and flat-head)(Needed for screws securing panels or the valve mount.)
- Multimeter(For checking solenoid continuity when powered off (per safety guidelines).)
- Teflon tape or thread sealant(Helps seal threaded hose fittings and valve connections.)
- Bucket or towels(Catches water during hose disconnections to minimize mess.)
- Service manual or model-specific guide(Useful for exact valve mounting location and wiring diagrams.)
Steps
Estimated time: 60-120 minutes
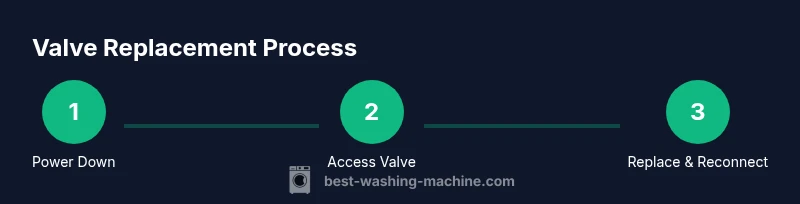
- 1
Power down and shut off water
Unplug the washer and turn off both hot and cold water supplies. This prevents electrical shock and plastic-to-water leaks during the replacement. Have towels ready in case some water remains in the hoses.
Tip: If you’re unsure which valve is the inlet valve, label the hoses before disconnecting and take a quick photo for reference. - 2
Access the inlet valve
Remove the rear or front access panel per your model to expose the inlet valve assembly. Some machines require detaching the top or back panel. Make sure you can clearly see the valve and the attached hoses and wiring harnesses.
Tip: Keep screws organized in a labeled container; losing them can delay reassembly. - 3
Disconnect electrical connector and water lines
Carefully unplug the valve’s electrical connector and loosen the hoses with pliers. Have a towel or small pan in place to catch any residual water. Do not pull on wires; disconnect at the harness first if possible.
Tip: Inspect the valve screens; if you see sediment, plan to clean or replace the screens on the new valve. - 4
Remove the old inlet valve
Unfasten the mounting screws and gently lift the valve away from the body. Note how the old valve sits and ensure the gasket or seal comes off with it. Check the mounting bracket for wear or damage.
Tip: If hardware is corroded, apply penetrating lubricant and let it sit for a few minutes before reattempting removal. - 5
Install the replacement valve
Position the new valve, ensuring ports align with the correct hoses and mounting points. Apply thread sealant or Teflon tape to threaded connections as recommended by the manufacturer. Tighten screws securely without cranking them.
Tip: Double-check that the valve is oriented so hoses reach without kinking. - 6
Reconnect hoses and electrical connections
Reconnect the water lines and the electrical harness exactly as they were arranged previously. Hand-tighten hose connections, then snug with a wrench. Ensure the valve sits firmly in its bracket.
Tip: Run your fingers along each hose after reconnecting to feel for any loose fittings. - 7
Restore power and test
Reattach the access panel, plug in the machine, and turn the water back on. Run a short test wash to verify proper fill and absence of leaks. Watch the valve area closely during the first cycle.
Tip: If you notice leaks, power down immediately and recheck hose clamps and valve seating.
FAQ
What are the common signs of a bad water inlet valve?
Common signs include slow filling, overfilling, leaks around the valve, or a valve that never opens. If you notice these symptoms, testing the valve and wiring is a good next step.
Look for slow filling, overfilling, or a leak near the valve. These usually indicate the inlet valve may need testing or replacement.
Can I replace the inlet valve myself?
Yes, many homeowners can replace a washing machine inlet valve with the right parts and tools. Follow model-specific guidance and safety precautions; if you’re unsure, hire a professional.
You can replace it yourself if you’re comfortable with basic appliance repair and follow safety steps.
Do all washers use the same valve?
Not all washers use the same valve. Valves differ in size, port configuration, and electrical connectors. Always confirm compatibility with your model before purchasing a replacement.
Valves aren’t universal—check your model’s specifications before buying.
How do I test the valve with a multimeter?
With the washer unplugged, disconnect the valve and test the solenoids for continuity and resistance per the service manual. A closed circuit usually indicates a good solenoid; an open or wildly fluctuating reading suggests replacement.
Unplug, disconnect the valve, and check solenoids for continuity per your manual.
What if the valve leaks after replacement?
If leaks occur, re-check all fittings, seals, and clamps. Ensure the valve is seated properly, and reseat hoses with fresh sealant or teflon tape where recommended. If leakage persists, the problem may lie with an incorrect valve or damaged hose.
Leaks after replacement usually mean seating issues or mismatched parts—check fittings again.
How often should inlet valve maintenance be performed?
Regular maintenance isn’t required weekly, but inspect hoses and valve screens during routine service or if you notice symptoms. Cleaning valve screens and replacing aging hoses can prevent buildup and ensure reliable operation.
Check hoses and valve screens during routine maintenance to prevent failures.
Watch Video
The Essentials
- Shut off power and water before starting
- Match the valve to your model and replace seals if needed
- Reconnect hoses with careful attention to orientation
- Test for leaks and proper fill after installation
- Regular maintenance reduces future valve failures