What Causes Washing Machine Leaks: Quick Troubleshooting
Learn what causes washing machine to leak and how to diagnose and fix common leaks. Urgent, practical steps, safety tips, and maintenance guidance from Best Washing Machine.

Leaking washers are usually caused by worn door seals, loose hoses, or a faulty inlet valve. Start by turning off the water supply, unplugging the machine, and checking all external hoses for tight connections. If the source isn’t obvious, follow our diagnostic flow to pinpoint the leak and apply the appropriate fix.
Common causes of washing machine leaks
If you're wondering what causes washing machine to leak, the answer often points to wear and tear on the door boot, loose water inlet hoses, or a failing pump seal. According to Best Washing Machine, leaks are seldom mysterious and usually traceable to accessible components. In front-load machines, the door seal (gasket) is a frequent culprit due to soap residue, stretching, or small tears. In top-load machines, loose or cracked hoses at the back can spray water during cycles. The inlet valve, located at the back where water connects, may fail to seal properly if the fittings are loose or corroded. Other common sources include drain hoses that aren’t clipped tightly, loose clamps, or detergent buildup narrowing the drain path. Cracked tub seals or bearings can drip slowly over time, while overloading the machine or using too much detergent creates excess suds that overflow the drum edge. Understanding these sources helps you prioritize checks without unnecessary repairs.
How to tell where the leak is coming from
Leaks can drip from multiple locations, and the origin often dictates the fix. Observing the water trail is key: water that appears at the front bottom usually points to the door boot, gasket, or drain hose; water around the back suggests inlet hoses, drain pump connections, or the inlet valve; water near the tub edge could indicate a tub seal issue. If you notice suds but little visible water, overflow from the detergent drawer or a blocked drain hose is a likely culprit. By tracing the water path and noting when the leak occurs (during fill, wash, or spin), you can narrow down the likely source and avoid guesswork. In many cases, a simple hose clamp or gasket replacement resolves the issue. Remember to consult the manual for your model’s specific components, since configurations vary by brand and type.
Quick checks you can do safely
Before you take things apart, perform these safe, low-effort checks. Unplug the machine and close the shutoff valve(s) for the water supply. Inspect external hoses for kinks, cracks, or loose connections and tighten or replace as needed. Look at the door boot or seal for tears or debris that could cause leaks, and wipe away soap residue that can mask real damage. Check the detergent drawer for excess foam and residue; switch to a high-efficiency, low-suds formula if necessary. Finally, check the drain hose connection at the back of the washer and ensure clamps are secure. Do not attempt any fixes beyond tightening and basic inspection if you’re unsure about your model or if water is spraying aggressively.
Diagnostic flow: symptom → diagnosis → fixes
A systematic approach helps you identify the exact leak source. Start with the symptom (where you see water) and the cycle stage that reveals it. If water appears during fill with a hiss of air, the inlet valve or connections are suspect. If water leaks during wash or spin, focus on door seals, tub seals, and the pump. If you notice water accumulating under the machine after a cycle ends, check the drain hose and pump seal. Each diagnosis leads to targeted fixes: tighten clamps, replace seals, or install a new hose. When a component failure is not obvious, broaden the inspection to include nearby connections and gaskets. If you’re uncomfortable at any point, stopping and seeking professional help is the safest course.
Step-by-step fixes for the most common leak sources
- Tighten exterior hoses and clamps: Start with the water inlet hoses connected to the back of the machine. Use pliers to snug clamps gently; avoid overtightening which can crush hoses. Pro-tip: take a photo of connections before loosening anything for reference.
- Replace worn door boot/seal: If the door gasket shows tears or gaps, replace it per your model’s procedure. Pro-tip: clean the seal and tub edge to ensure a proper seal after replacement.
- Secure or replace drain hose: Check for kinks and ensure the hose is firmly attached to the drain and the machine. Use hose clamps if needed. Pro-tip: position the hose so it doesn’t rest on the drain pump housing.
- Inspect the drain pump and seals: Look for cracks or loose fittings around the pump housing. If the pump seal is compromised, replacement is often required. Pro-tip: confirm model-specific part numbers before ordering.
- Check detergent drawer and suds: Excess foam can overpower seals and cause leakage around the top. Switch to low-suds detergent and run a cleaning cycle to flush buildup. Pro-tip: run with a smaller load first to confirm stability.
- Test after repairs: Plug in, turn on water, and run a short cycle to monitor for leaks. Pro-tip: place towels around the base to catch any residual drips during testing.
Safety tips and when to call a pro
Safety comes first. Always unplug the machine before inspecting, and shut off water at the supply valves. If you see water spraying or if you’re dealing with gas-powered appliances, stop and call a licensed technician. Avoid working on high-voltage components or attempting to disassemble the motor or complex seal assemblies unless you have model-specific training. If the leak recurs after basic fixes, or if you hear unusual noises or smell burning components, it’s time for professional service. A malfunctioning pump, cracked tub, or a compromised main seal often requires specialized tools and credentials.
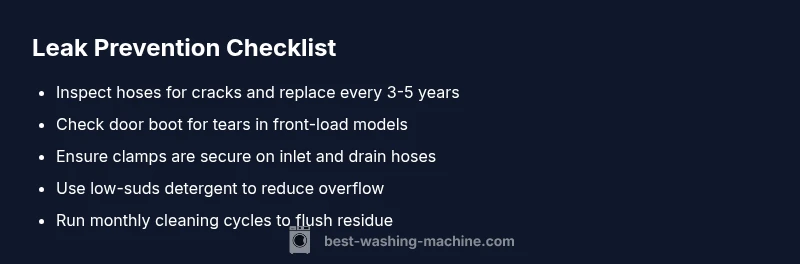
Prevention and maintenance to stop leaks
Regular maintenance reduces the risk of leaks and keeps your washer running efficiently. Clean lint and soap buildup from seals and hoses every few weeks. Replace worn hoses every 3–5 years or as soon as you notice cracks. Use only the recommended detergent type and amount for your machine to minimize suds and residue. Inspect connections after moving the washer or during renovations, and consider placing a shallow tray under the unit as a precaution for minor drips. Finally, perform a monthly leak check by running a short cycle with the access panels closed so you can observe any water escape paths early.
Steps
Estimated time: 60-120 minutes
- 1
Power down and isolate water
Unplug the machine and shut off water valves. This prevents accidental shocks and further leaks during inspection.
Tip: Take a photo of hose connections before you touch anything. - 2
Inspect external hoses
Check inlet hoses for cracks or bulges. If you find damage, replace the hose and reseal the connection with a fresh clamp.
Tip: Use the right size hose for your model to ensure a tight seal. - 3
Check the door boot/seal
Look for tears, holes, or obesity of residue on the door gasket. Clean it and replace if damaged.
Tip: Test the door to ensure it closes evenly and seals without striking the drum. - 4
Inspect the drain hose and clamps
Make sure the drain hose is firmly attached and free of kinks. Tighten clamps and replace if swollen.
Tip: Keep the hose elevated to prevent backflow. - 5
Review the detergent drawer
If you see excessive suds, switch to a low-suds detergent and run a cleaning cycle to flush residue.
Tip: Use the minimum recommended amount for your load size. - 6
Test run and observe
Restore power and water, run a short cycle, and watch for leaks. If leakage persists, schedule professional service.
Tip: Keep towels handy to catch any residual drips during testing.
Diagnosis: Machine leaks during or after a cycle
Possible Causes
- highWorn or damaged door boot/seal (front-load)
- highLoose or cracked water inlet hoses
- mediumPoorly secured drain hose or loose clamps
- mediumTub-to-pump or pump seal failure
- lowDetergent drawer overflow or soap residue
Fixes
- easyTighten or replace inlet hoses and clamps
- mediumReplace door boot/seal and clean surrounding area
- easySecure or replace drain hose and clamps
- hardReplace tub-to-pump seal or pump assembly
- easySwitch to low-suds detergent and clean drawer
FAQ
What are the most common causes of a washing machine leak?
The most common causes are worn door seals, loose hoses, and faulty inlet valves. Inspect each area starting with the door boot and water connections, then move to the pump and drain hose as needed.
Common leaks come from worn seals, loose hoses, or bad inlet valves. Start at the door boot and water connections, then inspect the pump and drain hose.
Can a leaking washing machine be fixed at home?
Many leaks can be fixed at home with basic tools and parts, such as hoses or door seals. However, some fixes—like pump or tub seal replacements—may require professional service.
Many leaks can be fixed at home, especially hoses or seals. For pump or tub seals, consider a pro.
How do I tell if the leak is coming from the door seal?
A door seal leak typically presents as water around the door frame or drum opening, often with trickles around the gasket. Check for tears or residue along the gasket.
Door seal leaks show water around the door gasket; inspect for tears or dirt on the seal.
What safety steps should I take before inspecting a leak?
Always unplug the washer and shut off the water supply before inspecting. If the room is wet or you see sparks, stop and call a pro.
Unplug the washer, shut water off, and avoid working if the area is wet or there are sparks.
How often should I inspect hoses to prevent leaks?
Check hoses every 6-12 months for signs of wear, cracks, or bulges, and replace as needed to prevent leaks.
Inspect hoses every 6 to 12 months and replace worn ones to prevent leaks.
When should I replace the entire washer due to leaks?
If leaks persist after multiple fixes or the drum seals fail repeatedly, it may be more cost-effective to replace the machine.
If leaks persist after fixes, consider replacing the washer.
Watch Video
The Essentials
- Identify the leak source before repairs
- Tighten or replace damaged hoses and seals
- Use low-suds detergent to avoid overflow
- Test after fixes and call a pro if leaks continue
- Regular maintenance prevents future leaks