What to Do If Your Washing Machine Floods: A Troubleshooting Guide
Urgent, step-by-step guidance to stop a washing machine flood, identify the source, safely shut off power and water, and prevent future floods with proven maintenance tips.

Quickly secure the area: unplug the washer, shut off the cold water supply, and mop up standing water. Most floods are caused by a leaking hose, a blocked drain, or an overfilled tub due to a faulty pressure switch. If water remains, call your appliance service and avoid using the machine until inspected.
Why a Washing Machine Floods: Common Causes and Quick Checks
Flooding in a busy home happens more often than you might expect, and knowing the typical culprits helps you respond quickly. Most floods originate from simple, fixable issues. A leaking inlet hose or a loose connection is a frequent offender; inspect the back of the washer and tighten or replace hoses as needed. The water inlet valve sometimes fails in the open position, letting water flow even when the machine is idle. A clogged or kinked drain hose, a blocked standpipe, or a failing drain pump can cause overflows or slow drainage that leaves water pooling on the floor. Overuse of detergent or fabric softener can create excessive suds that back up into the drain. Rarely, a torn tub seal, damaged tub, or a faulty lid switch can allow water to escape during a wash. If you notice water where it shouldn't be, try to identify the origin by checking around the hoses, pump, and drain area; this will guide your next steps.
Safety First: Immediate Actions to Take
Water on the floor is an electric-safety scenario. Start by unplugging the washer from the outlet. If accessible, turn off the circuit breaker to disable power to the unit. Shut off the cold (and hot, if present) water supply at the wall valves to stop more water from entering. Avoid standing on wet floors; use a towel or mop to soak up the water and prevent slips. Do not attempt to move the machine unless you are sure the power is off and the area is dry. If you see active leaks behind the washer, or the flood is spreading quickly, evacuate the area and call a professional. Take photos for insurance purposes, and keep pets and children away from the work zone. Once you have reduced the immediate risk, you can begin the diagnostic process with the area safe and dry.
Identify the Source: Inlet, Drain, or Pump
After safety checks, inspect the main components likely to cause a flood. Visually check all inlet hoses and fittings for cracks, bulges, or moisture; tighten fittings by hand, then with a wrench, and replace any damaged hoses. At the back of the washer, test the water inlet valve for smooth operation and visible leaks; if the valve sticks or passes water when it should be closed, replacement is usually required. Inspect the drain hose for kinks, proper routing into a standpipe, and any clogs in the pump or drain filter. If you hear buzzing from the pump during a cycle or see water not draining, the drain pump or its filter may be clogged. Run a brief test cycle with towels in place and observe where water appears. Document all observations and keep tracking changes to guide a professional diagnosis if needed.
Diagnostic Flow: Symptom-to-Diagnosis-to-Fix (Overview)
Use a simple diagnostic flow to narrow the root cause. Symptom: water on the floor after washing completes or during a cycle. Diagnosis: start with external hose leaks, then valve issues, then drainage problems, and finally pump or sensor faults. Solutions range from tightening hoses and replacing worn parts to clearing clogs or replacing a faulty valve. If symptoms persist after you complete the basic checks, switch to the next step or call a pro. A well-documented set of observations speeds up service and reduces unnecessary part replacements. Always test after each fix and dry the area to confirm success.
Prevention and Maintenance to Avoid Future Floods
Prevention is easier than major repairs. Regularly inspect inlet hoses and connections for wear every 6–12 months, replacing them every 5–7 years as a precaution. Use the correct detergent amount to avoid excess suds that can overflow into the drain. Ensure the drain hose is routed to a proper standpipe with a sufficient air gap to prevent siphoning. Consider a washer pan or tray under the machine to catch minor leaks and reduce water damage. Keep the filter and pump clean by removing lint and debris every few washes. If you notice signs of wear or frequent overflows, schedule service before a leak becomes costly. By establishing a routine, your washer stays safer and more reliable.
Steps
Estimated time: 60-90 minutes
- 1
Power down and secure area
Power off the washer and unplug it from the wall. If possible, switch off the circuit breaker that serves the laundry room. Close the cold and hot water valves to stop incoming flow. Keep a dry path and use towels to prevent slips. Never touch electrical components with wet hands.
Tip: Never work on wet electrical components; dry hands and dry floor before touching plugs or panels. - 2
Remove standing water
Mop up the visible water with towels or a mop. If you have a shop vacuum rated for water, use it to speed up drying. Move items away from the machine to create space for inspection. Keep the area well-ventilated to reduce moisture buildup.
Tip: Place towels at the base of the washer to catch drips as you work. - 3
Inspect inlet hoses and connections
Visually inspect all inlet hoses for cracks, bulges, or moisture; tighten fittings by hand first, then with a wrench. Replace any damaged hoses and consider installing new washers if the fittings leak. Check behind the machine for any signs of dampness around the valve body.
Tip: Replace worn washers and use high-quality stainless fittings where possible. - 4
Check the drain path and pump
Examine the drain hose for kinks and ensure it’s properly routed to a standpipe with the correct height and air gap. Remove any clogs from the hose or the standpipe. If you hear the pump running but water isn’t draining, inspect the pump filter for debris and clear it.
Tip: Never yank the hose; disconnect and inspect to avoid further damage. - 5
Test a short cycle and observe
Run a short, empty wash cycle with the drain hose connected and watch for leaks. Note any new water intrusion and confirm whether the pump clears the tub as expected. If water continues to flood, stop the test and prepare to call a professional.
Tip: Document the exact behavior to help the technician diagnose faster. - 6
Decision point: call a professional
If you can’t locate a clear source or the flood returns after fixes, it’s time to schedule service. Persisting leaks may indicate valve, sensor, or structural tub issues that require specialized tools and parts.
Tip: Keep the area dry and safe; avoid using the machine until inspected.
Diagnosis: Machine floods during wash or after drain
Possible Causes
- highLeaking or loose inlet hoses and fittings
- highWater inlet valve stuck open or faulty
- mediumClogged or kinked drain hose or blocked pump
- lowFaulty pressure switch or water level sensor
Fixes
- easyTighten hose connections, replace worn hoses, and test for leaks
- mediumTest and replace the inlet valve if it leaks or fails to close
- mediumClear drain clogs, straighten hose, and inspect pump and filter
- hardReplace pressure switch or control module if sensor fails
FAQ
What should I do first if my washing machine floods?
Start by turning off the power and water, then remove standing water. Check for obvious leaks from hoses and the drain. If the flood continues, contact a professional.
First, power down and shut the water off, then mop up the water. Look for leaks and if it keeps coming, call a pro.
Can I fix a flood on my own?
Some fixes are straightforward, like tightening hoses or clearing clogs. Other issues, such as a faulty inlet valve or damaged tub, require professional service.
Some fixes are DIY, but many problems need a professional.
How can I tell if the inlet valve is the culprit?
Look for water dripping from the valve or water entering the drum when the machine should be off. A multimeter test or professional inspection is usually needed to confirm.
Watch for water flow from the valve when it should be closed; if in doubt, have it tested.
Is it safe to use the washer again after a flood?
Not until all leaks are repaired, the source is identified, and a test run shows no leaks. Have it inspected if you cannot confirm safety.
Only use it after repairs and a leak-free test.
What maintenance prevents floods?
Regular hose checks, using the right detergent, and keeping the drain pump clean helps prevent floods.
Check hoses regularly, use the correct detergent, and keep the pump clear.
When should I call a technician?
If you cannot identify the source, water keeps flowing after basic fixes, or you notice electrical concerns, call a licensed appliance technician.
Call a professional if you can't fix the leak or if you smell burning or see sparking.
Watch Video
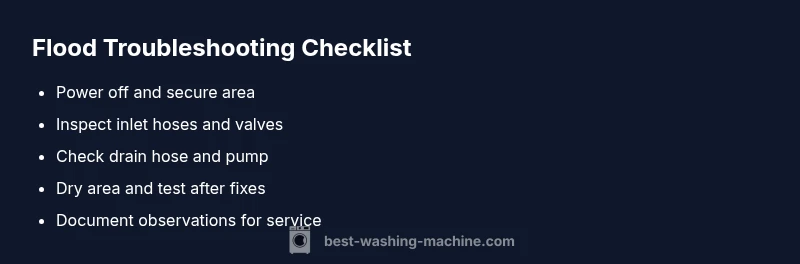
The Essentials
- Shut off power and water immediately.
- Identify whether the flood originates from hoses, valve, or drain.
- Test after each repair and dry the area to confirm success.
- Replace worn hoses and valves promptly to prevent repeats.
- Call a professional for complex issues or persistent leaks.