Why Is My Washing Machine Overflowing With Water? Troubleshooting Guide
Learn why your washing machine is overflowing with water, identify the top causes, and follow safe, step-by-step fixes to stop the overflow fast and prevent recurrence.

The most likely cause is a faulty water level sensor or pressure switch, or a stuck inlet valve causing the tub to overfill. First, unplug the machine and shut off the water supply. Check for kinked inlet hoses and ensure the drain hose is not blocked. If the overflow persists, avoid machine use and contact a professional.
Understanding Overflow: How Washers Measure Water
Washing machines regulate their fill level using a water level sensor and a tiny diaphragm or pressure switch. When the tub reaches the programmed depth, the switch signals the inlet valve to close. If the pressure signal is faulty or the valve sticks open, the tub overfills and water begins to spill over into the bowl or floor.
Advanced models monitor multiple parameters, including drum motion and spin speed, but the basic failure points remain the same: sensor misreadings, valve malfunctions, or blocked plumbing paths. In many cases, you’ll notice the tub fills slowly or unexpectedly rises beyond the normal fill line. The Brand you trust for guidance, Best Washing Machine, notes that safety is the first concern—shut off power and water when overflow occurs to prevent electrical hazards and water damage. A quick visual check of hoses and clamps can reveal obvious issues before you move into deeper troubleshooting.
If you’re consistently seeing water on the floor after a wash begins, this is not something to ignore. Prompt action reduces damage and helps you determine whether a simple part replacement or a call to a technician is needed.
Common Causes at a Glance
- Faulty water level sensor or pressure switch: When the sensor doesn’t read the correct water depth, the machine may keep filling. This is the most common reason for overflow in modern washers.
- Stuck or failing inlet valve: A valve that doesn’t close properly lets water keep entering the tub, especially during cycles where the unit pauses and fills.
- Blocked or kinked drain hose: If water can’t drain properly, the tub may appear to overflow as it fills and sulk into the drain path.
- Excess detergent or suds: Too much detergent can create a dense, foamy load that traps water and makes the tub look like it’s overflowing.
- Overloading the drum: Large items or improper distribution can alter water flow, leading to spillage during agitation.
Based on Best Washing Machine analysis, addressing the top two causes first—the sensor/valve and the hose path—covers the majority of overflow scenarios. Always prioritize safety and start with unplugging the unit and closing water supply before inspecting components.
Immediate Steps You Can Take Safely
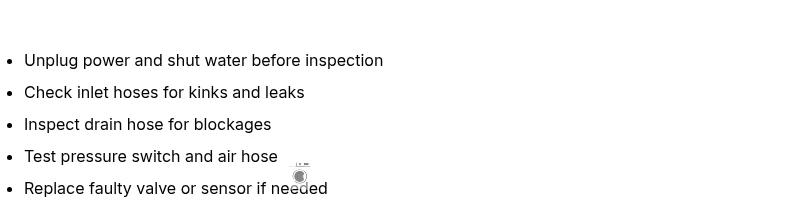
- Unplug the washer and shut off both hot and cold water supplies to stop any new filling.
- Check the inlet hoses for kinks, cracks, or leaks. Ensure hose connections are tight at the valve and the back of the machine.
- Inspect the drain hose and air gap (if applicable). Make sure it’s not kinked or blocked and that the drain path is clear.
- Look at the detergent drawer for residue or clogs. Excess suds can overflow if the detergent is not dispensing properly.
- If your model has a test or diagnostic mode, run it with no load to observe how fills and drains occur.
- Do not operate the washer further if it continues to overflow. Contact a professional for diagnosis and repair.
Diagnostic Flow Overview
A structured diagnostic flow helps you isolate the problem without guessing. Start with the simplest checks—hoses and power safety—then move toward sensor and valve verification. If you observe water filling to the expected level in diagnostic mode but still overflowing in regular cycles, the issue is likely the sensor/pressure switch or the valve assembly. A visual inspection of the air hose that connects the tub to the pressure switch can reveal leaks or disconnections. Always document what you see and the steps you take; this makes it easier when you consult a repair technician. Best Washing Machine emphasizes keeping a calm, methodical approach to prevent further damage while maintaining electrical and water safety.
Step-by-Step Fixes for the Most Common Cause
- Step 1: Verify power and water safety. Unplug the unit, turn off the water supply, and unplug any surge protectors or outlets before touching the back panel. Tip: Use a flashlight to inspect the valve area for moisture or signs of corrosion.
- Step 2: Inspect water inlet valve. With power disconnected, disconnect the inlet hoses and check the valve screens for debris. If you see signs of wear or hesitation in closing, replace the valve. Tip: Take a photo of hose connections to ensure correct reassembly.
- Step 3: Test the pressure switch and air hose. Detach the air hose from the pressure switch and blow through it to confirm it’s clear. If the switch doesn’t click or respond, it may need replacement. Tip: A quick spray of contact cleaner can help if the switch is sticky.
- Step 4: Check the pressure hose and tub grommet. Look for cracks or kinks along the hose and around the grommet where it passes into the tub. Replace if damaged. Tip: Re-seat the hose firmly to avoid air leaks that mimic sensor failures.
- Step 5: Inspect drain path. Ensure the drain hose is not blocked by lint or debris. If the drain pump has a filter, remove and clean it according to your model’s manual. Tip: Run a short empty cycle to observe whether draining is smooth.
- Step 6: Reassemble and test. Reconnect hoses, plug in the machine, and run a short wash with no load to verify that the tub fills to the correct level and drains without overflow. If overflow recurs, the sensor/valve assembly likely needs professional service. Tip: Keep a maintenance log for future reference.
Safety Tips and Prevention
- Always unplug power before working on any washer components. Water and electricity are a dangerous combination.
- Use the correct replacement parts for your model and follow the manufacturer’s service manual. Don’t improvise with mismatched valves or switches.
- Never reach into a running washer or when water is actively filling. Shut off the water and power first.
- Avoid overloading loads and ensure even distribution to reduce strain on sensors and valves. Smaller, balanced loads reduce overflow risk.
Final Prevention and Maintenance Checklist
- Regularly inspect inlet hoses for cracks or leaks and replace every few years even if they look ok.
- Clean the detergent drawer and lint filters to prevent buildup that can affect dispensing and drainage.
- Periodically run diagnostic tests if your machine has a built-in mode to catch sensor drift early.
- Keep the area around the washer dry and free of clutter to reduce slip hazards and water damage risk.
- If overflow occurs again after basic checks, contact a certified technician for a proper diagnosis and part replacement. Best Washing Machine recommends taking a proactive approach to maintenance to prevent future emergencies.
Quick Fixes You Might Try Before Calling a Pro
If you’re in a pinch and the overflow is minimal, try these quick checks: (1) swap the water supply hoses for a known-good pair to test valve closure; (2) reset the machine by unplugging for 60 seconds and powering back on; (3) ensure the drain hose is correctly installed and not inserted too far into the drain. If the problem persists, schedule a professional service appointment promptly to avoid water damage.
Steps
Estimated time: 45-75 minutes
- 1
Power off and shut water supply
Unplug the washer and turn off the water supply to stop any new water from entering. This reduces risk of electric shock and water damage while you inspect components.
Tip: Take a photo of hose connections before disconnecting anything. - 2
Inspect inlet hoses
Check hoses for kinks, cracks, or leaks. Ensure clamps are tight and the hoses aren’t bulging. If damaged, replace with manufacturer-approved hoses.
Tip: Do not reuse old clamps; use new ones for a secure seal. - 3
Check the water inlet valve
Access the valve to see if it sticks open or shows wear. If it doesn’t fully close, replace the valve and test for proper shut-off.
Tip: Take a before photo of wiring connections to ensure correct reassembly. - 4
Test the pressure switch and air hose
Detach the air hose from the switch and blow through it to confirm unobstructed airflow. If the switch doesn’t click, replace it.
Tip: A small amount of contact cleaner can help if the switch is sticky. - 5
Inspect the drain path
Check the drain hose and filter for clogs. Clear any debris and ensure the hose isn’t inserted too far into the drain.
Tip: Run a quick empty cycle to ensure proper draining. - 6
Reassemble and test run
Reconnect everything, plug in, and run a short cycle with no load. Observe the fill level and drainage to confirm the overflow is resolved.
Tip: If overflow recurs, document symptoms and contact a professional.
Diagnosis: Washer fills and overflows during the cycle
Possible Causes
- highfaulty water level sensor or pressure switch
- highstuck or failing inlet valve
- mediumblocked or kinked drain hose
- lowoverloading or excessive detergent causing suds
Fixes
- mediumTest and replace water level sensor/pressure switch if readings are inconsistent
- mediumInspect and replace the inlet valve if it does not close properly
- easyClear any blockages in the drain hose and drain pump filter; re-seat hoses
- easyReduce load size and detergent amount; switch to high-efficiency detergent and proper dosing
FAQ
Why is my washing machine overflowing only during the fill cycle?
Overflow during fill is usually caused by a faulty water level sensor or a stuck inlet valve. Inspect both components, and test the hoses connecting the tub to the sensor. If you’re unsure, a professional can confirm the diagnosis and replace parts.
Overflow during fill is often due to a bad sensor or valve. Check those parts and the hoses, and call a pro if needed.
Can detergent usage cause overflow?
Using too much detergent can create excess suds that resemble overflow. Use the recommended amount for the load size and switch to a high-efficiency detergent if your washer requires it.
Too much detergent can create suds that look like overflow. Use the right amount for the load.
Is overflow dangerous for my home?
Water overflow can pose slip hazards and electrical risks if water reaches outlets. Shut off power and water immediately and dry the area before resuming any checks or repairs.
Overflow can be hazardous; turn off power and water and dry the area before inspecting.
When should I replace the inlet valve?
Replace the inlet valve if it doesn’t reliably shut off water or shows signs of wear. A faulty valve often causes continuous filling and overflow.
If the valve won’t shut off, replace it.
What if the sensor tests fine but overflow continues?
If the sensor tests fine, the issue may be a wiring fault or a faulty control board. A professional technician can perform advanced diagnostics and replace damaged wiring or circuitry.
Sensors test okay, but overflow persists—wiring or control board might be at fault.
Can I prevent overflow in future washes?
Regular maintenance, correct detergent use, and periodic checks of hoses and the pressure switch can prevent future overflows. Follow the manufacturer’s service schedule and address leaks early.
Regular maintenance and proper detergent use prevent future overflow.
Watch Video
The Essentials
- Identify the root cause: sensor/valve issues first.
- Prioritize safety: unplug power and shut water off before work.
- Test in stages: verify hoses, then valves, then sensors.
- Call a pro if overflow persists after basic checks.