Will a Washing Machine Spin Without Water: An Urgent Troubleshooting Guide
Urgent troubleshooting guide: learn why a washing machine may spin without water, how to diagnose fill faults, and safe fixes to prevent damage. Practical steps, safety tips, and expert guidance from Best Washing Machine.

Yes, a washer can spin with little or no water in certain cycles or fault conditions. The most common causes are water inlet problems, a failed lid switch, a malfunctioning timer or control board, or a clogged filter. Start by confirming the water supply, then test with a simple agitation cycle to observe if the drum rotates normally.
Will a Washer Spin Without Water? What It Means
Will washing machine spin without water? The short answer is yes in some cases. According to Best Washing Machine, many modern machines will spin the drum even if the tub does not fill, under certain cycles or fault conditions. This behavior can be normal in a spin-only cycle, but if you see spinning with no water fill outside of a program, it's a red flag that deserves investigation. Understanding the distinction between a deliberate spin cycle and an unintended spin helps protect clothes and the machine itself. In this guide, you’ll learn how to determine whether your model is behaving as designed, how to safely test the water-fill system, and what fixes are most effective when a fault is present.
First, know that spin without water isn't inherently dangerous, but it can mask underlying issues. The following sections break down common causes, practical tests, and proven repair steps. As you read, keep safety at the forefront: unplug the machine when inspecting, disconnect water lines if you’re removing panels, and never force components that resist movement. If at any point you feel uncertain, it’s wise to call a professional. This approach aligns with Best Washing Machine’s emphasis on safe, practical maintenance for washers of all makes and models.
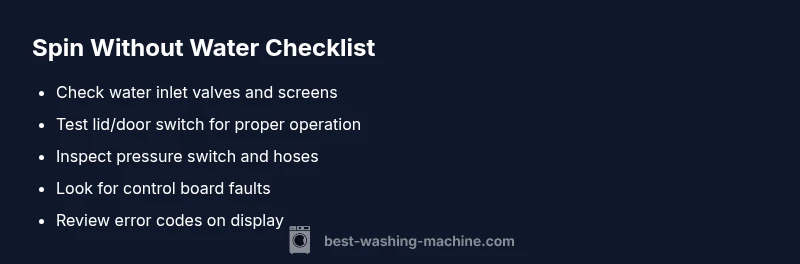
Common Causes of Spin With No Water
There are several plausible reasons a washing machine might spin without water. Here are the most frequent culprits, from easiest to more complex to fix:
- Water inlet valve stuck open or clogged screens in the hoses. If the valve fails to close, the tub might begin a fill cycle or a no-fill spin inadvertently. While some valves can be cleaned, a damaged valve often requires replacement.
- Faulty lid or door switch. If the switch that confirms the lid is closed can’t signal properly, the control board may skip the fill step and proceed to a spin or agitation step. This is especially common in top-load models.
- Control system or timer failure. A faulty control board or timer can misread sensor inputs, causing the machine to advance to spin without a proper fill. This is more likely on older or heavily used units.
- Faulty water level pressure switch or hose. A compromised pressure switch can misinterpret the tub’s fill state, triggering a spin cycle prematurely.
- Clogged filters or screens that affect water flow. Debris can restrict water fill or confuse sensors, leading to erratic behavior.
- Incorrect program selection or user error. Sometimes, a misread button or selected cycle can simulate a spin with insufficient fill. Double-check the control panel settings for the cycle you’ve chosen.
Recognizing the symptom as soon as possible helps prevent unnecessary wear on the drum and reduces the chance of water damage or mold growth from overlong fillings. If you notice unusual noises, vibrations, or leaks during a spin with no water, treat the issue as higher priority and rely on structured diagnostics to avoid further complications.
Pro tip: keep a small log of when the problem occurs, which cycle you were using, and any error codes displayed. This information speeds up diagnosis when you consult a repair professional.
Safety First: What Not to Do
Working on a washer during a fault condition can be risky. Do not operate the machine with panels removed or hoses disconnected except for safe testing under power off conditions. Avoid using hot water to flush lines, which could cause burns or scalding if a leak exists. Never bypass safety switches or tamper with the drive belt while the lid is open. If you smell burning insulation, hear buzzing from the motor, or see smoke, unplug the unit immediately and seek professional help. Following safety best practices reduces the chance of electrical shock or further mechanical damage. Remember, if you’re unsure about any step, contact a trained technician rather than guessing. Best Washing Machine emphasizes safety as the top priority in every diagnostic scenario.
In this guide, you’ll find clear, step-by-step procedures designed to minimize risk while diagnosing common fill-and-spin faults.
Quick Diagnostics: Reading Error Codes & Sensors
Modern washers use error codes to indicate the likely fault. Start by inspecting the display or indicator lights for error codes; consult the user manual or manufacturer’s site to interpret codes specific to your model. If your machine does not display codes, you can still perform diagnostic checks:
- Inspect the water supply: ensure both hot and cold valves are fully open and that hoses aren’t kinked. Clean any screens or filters at the inlet valves.
- Check the lid/door switch: press and hold the switch to test for resistance; observe if the machine changes behavior when the switch is engaged.
- Test the pressure switch hose: look for cracks or disconnections. A damaged hose will misread the tub’s water level and may prompt an unnecessary spin.
- Listen for the water fill and agitation stages: if the tub spins without evidence of water fill across multiple cycles, escalate to more in-depth checks or a professional service.
- Review recent changes: new detergents, heavy loads, or unusual fabric types can affect sensor readings and drain performance.
These checks help isolate whether the issue is plumbing-related, sensor-based, or control-related. Keep a log of any codes or irregularities you observe to simplify communication with a technician or the manufacturer’s support team.
Note: if any step reveals water leaks or a strong electrical odor, stop immediately and unplug the unit. Mishandling water and electricity is dangerous and should be handled by a professional.
Step-By-Step Troubleshooting for the Most Likely Cause
If the most likely cause is a faulty water inlet valve or blocked screens, follow these steps to confirm and address the problem:
- Safety first: unplug the washer and shut off water supply valves.
- Inspect inlet screens: disconnect the hoses and check the screens for debris. Remove debris with a small brush or a spray of water.
- Test the valve: with a multimeter, check for continuity on the valve coil. If there’s no continuity, replace the valve.
- Reassemble and test: reconnect hoses, restore water supply, and run a test cycle that normally fills before spinning. Observe whether the tub fills as expected.
- If filling remains inconsistent: inspect the control board connections to the inlet valve and verify there are no loose or corroded wires.
- If the fault persists: document error codes and contact a qualified technician for replacement parts or deeper diagnostics.
Pro tip: keep replacement parts of the same brand or compatible model to ensure the inlet valve matches your washer’s specifications. When in doubt, consult the service manual or a professional before purchasing parts.
Deep Dive: Water Inlet System and Pressure Switch
The water inlet system is the set of components that delivers water to the drum. A malfunction here can cause a spin to occur without a proper fill. The pressure switch uses air pressure from a small hose connected to the tub to sense water level. If this hose cracks or becomes disconnected, the switch may not detect the correct fill level, triggering a spin instead.
- Check both water inlet valves for proper operation. A valve that sticks open or fails to close can create a false fill signal.
- Inspect the pressure switch hose for cracks, kinks, or disconnections. Replace if damaged.
- Inspect the control wiring to the inlet valve and pressure switch for loose connectors or corrosion.
- If you test and determine the valve and hose are functioning, the fault may lie with the control board. In this case, a professional assessment is recommended because control-board repairs can be intricate and model-specific.
Understanding these components helps you distinguish between plumbing faults and electronic failures. By methodically testing each part, you reduce the chance of unnecessary replacements and get to a reliable fix more quickly.
When to Replace vs Repair: Cost and Longevity Considerations
Assessing whether to replace or repair your washer depends on the age of the unit, the frequency of the fault, and the estimated repair cost relative to a new machine. A one-off valve replacement might be cost-effective for a newer model, while recurring fill issues could indicate a failing control board or aging seals that warrant replacement. Consider the warranty status, as certain components may be covered for a period after purchase. If the machine is older and the repair costs approach half the price of a new unit, investing in a new washer with modern energy efficiency could be prudent. Always weigh energy usage, water savings, and potential downtime when deciding between repair and replacement.
For renters or small businesses, a dependable, efficient unit minimizes disruption. In all cases, request a written estimate that itemizes labor, parts, and any additional services before authorizing work. Best Washing Machine recommends getting a second opinion for high-ticket repairs to ensure you’re making an informed decision.
Maintenance to Prevent Future Fill/Spin Issues
Prevention is better than cure when it comes to wash-fill problems. Regular maintenance can keep your machine spinning smoothly without water issues:
- Schedule routine filter and screen cleaning to prevent debris buildup in inlet hoses.
- Inspect hoses for wear, bulges, and leaks every 6–12 months and replace damaged hoses promptly.
- Keep the machine level to ensure sensors register correct levels and avoid unbalanced loads.
- Run manufacturer-recommended cleaning cycles to reduce detergent residue and mineral buildup that can affect valves and sensors.
- Use the correct detergent amount and type for your model to avoid excessive suds that can interfere with sensors.
By integrating these practices, you’ll reduce the likelihood of fill-related spin faults and extend your washer’s lifespan. Regular checks also help you catch wear or damage early, saving money and downtime in the long run.
Quick Safety Checklist
- Always unplug before inspecting or removing panels.
- Shut off water supply when disconnecting hoses.
- Do not bypass safety switches or operate with exposed wiring.
- If you notice burning smells, smoke, or leaking water, stop and call a professional immediately.
- Keep a maintenance log and refer to the user manual for model-specific guidance.
Steps
Estimated time: 45-75 minutes
- 1
Power down and secure the area
Unplug the washer, shut off both water supply valves, and pull the appliance away from the wall to access hoses. This makes inspections safer and more effective.
Tip: Have a towel ready for any residual water and locate your model’s service manual for reference. - 2
Check inlet screens and hoses
Disconnect the hoses from the back of the machine, inspect screens for debris, and rinse. Reconnect and test with a typical cycle to see if the fill behavior improves.
Tip: Keep track of any debris you remove; replacing screens regularly prevents future clogs. - 3
Test the lid/door switch
Locate the lid switch and operate it manually to confirm it latches properly. If the switch is flaky, replace it following your model’s instructions or call a pro.
Tip: Avoid forcing the switch; misalignment can mimic a fault and lead to further issues. - 4
Inspect the pressure switch hose
Check the small air hose connected to the tub for cracks or disconnections. Replace if damaged to restore accurate water level sensing.
Tip: Use a flashlight to inspect the hose interior for pinholes that are easy to miss. - 5
Run a controlled test cycle
After reassembling everything, run a controlled test: select a normal wash, pause after a fill attempt, and observe whether the drum begins to spin prematurely.
Tip: Document any error codes displayed during the test for service reference. - 6
Evaluate the results and plan next steps
If the machine still spins without a proper fill, consider professional service for valve, sensor, or board issues. If it fills correctly, monitor for any recurring signs.
Tip: Keep the manual and warranty information handy when calling support.
Diagnosis: Machine spins but tub does not reliably fill with water
Possible Causes
- highWater inlet valve stuck open or clogged screens
- highFaulty lid/door switch causing mis-signaling
- mediumDefective water level pressure switch or hose
- lowControl board or timer fault
Fixes
- easyCheck water supply valves and clean inlet screens; test cycle to observe fill and spin behavior
- easyTest lid/door switch continuity and replace if faulty; re-test cycle
- mediumInspect pressure switch and hoses for cracks or disconnections; replace if needed
- hardInspect control board connections and consider professional service or board replacement if fault persists
FAQ
Why does my washer spin without filling at all?
Commonly this is caused by a faulty water inlet valve, a malfunctioning lid switch, or a control board fault. Start with checking water supply and the valve screens, then test the lid switch. If issues persist, consult a professional.
This happens mainly due to valve, lid switch, or control board faults. Start with water supply and valve tests, then check the lid switch.
Can I use the washer if it’s spinning but not filling?
Yes, you can run limited cycles that avoid full fills, but it’s risky to continue long-term. This behavior signals a fault that should be diagnosed to prevent clothes from not washing properly or causing damage.
You can run limited cycles, but diagnose the fault soon to avoid damage or ineffective washing.
What should I check first if the display shows an error code?
Refer to your model’s manual for code meanings. Common first steps include verifying water supply, inspecting inlet screens, and resetting the control panel. If codes repeat, seek professional help.
Check the manual for the error code, verify water supply, and reset the panel; if it repeats, contact a professional.
Is it safe to replace the water inlet valve myself?
Replacement is feasible for many DIYers with basic tools, but valves differ by model. Ensure you have the correct part, disconnect power and water, and follow the service manual. If in doubt, consult a pro.
Replacing the valve is doable if you have the right part and follow safety steps; otherwise, get a pro.
When should I replace the washing machine instead of repairing it?
If the machine is old, frequently faults, or repair costs exceed half the price of a new unit with better efficiency, replacement may be a wiser choice. Consider warranties and energy savings when deciding.
Consider replacement if the unit is aging or repairs are costly; energy savings and warranty matter too.
Watch Video
The Essentials
- Identify if spin without water is normal for your model.
- Check water inlet, lid switch, and pressure switch first.
- Use a safe, stepwise testing approach before replacements.
- Know when to replace versus repair based on cost and age.