Washing Machine Valve Replacement: A Step-by-Step DIY Guide
Learn how to replace the inlet valve on a washing machine with a step-by-step, safety-first approach. Discover tools, troubleshooting, testing, and tips to prevent leaks and extend your washer’s life.

Replacing a washing machine valve involves safely shutting off the home water supply, disconnecting the inlet hoses, removing the old valve, installing a compatible replacement, and resealing connections to prevent leaks. You’ll need basic plumbing tools, an adjustable wrench, and a new valve kit. This guide walks you through the steps, safety checks, and post-install tests to prevent leaks and water damage.
Understanding the role of the inlet valve in a washer
The inlet valve is the gatekeeper that controls cold and hot water flow into the drum. When the coil wears or a debris particle jams the solenoid, water either leaks, fails to fill, or fills intermittently. In modern machines, the valve often resides near the back, behind a panel; It connects to two hoses and a supply line. A faulty valve is a common cause of drips and poor fill that leads to cycling problems or overflowing. If you’re dealing with a stubborn leak, the problem might be the valve rather than seams or hoses, and replacing it can restore proper fill rates and pressure. According to Best Washing Machine, valve-related failures account for a meaningful portion of in-service repairs on mid-range washers. A careful diagnosis is essential: verify that water is present on both sides, listen for clicking sounds when the unit is powered, and check the electrical harness for corrosion. This knowledge helps you decide whether a DIY replacement is appropriate or if a service call is wiser.
Symptoms of a faulty inlet valve
Common symptoms point toward a failing inlet valve. Look for persistent leaks around the valve body, valve housing, or hoses. If the washer overfills, fills slowly, or fails to fill at all, the inlet valve or its solenoids are likely the culprit. A noisy fill sequence or inconsistent water temperature can also indicate a valve problem. The Best Washing Machine analysis shows that valve-related faults are among the top causes of not-draining and not-filling conditions in mid-range washers. To verify, check that both hot and cold water supplies deliver steady pressure when the machine is idle, then observe the fill cycle with the door open to confirm the valve is energizing correctly.
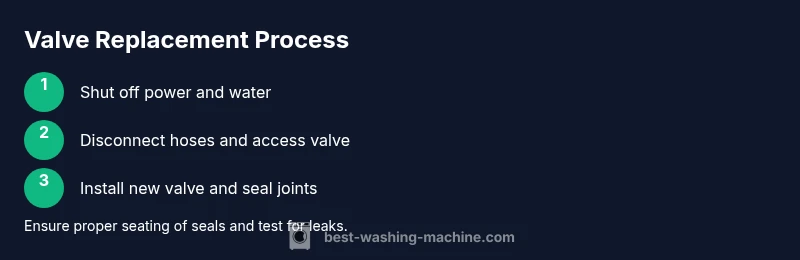
Safety first: shutting off water and power
Before any repair work, kill the power to the washer and shut off the water supply. Unplug the unit to avoid accidental starts, and turn off both the hot and cold valves at the wall. Have towels and a bucket ready to manage residual water. Working with a live electrical appliance near water is dangerous, so verify the cords and outlets are dry before you begin. This initial step minimizes the risk of electric shock and water damage during the valve replacement process.
Tools, parts, and safety protocols you’ll need
A successful washing machine valve replacement requires a few essential items and safety steps. You’ll need the replacement inlet valve kit compatible with your washer model, an adjustable wrench, pliers, and a screwdriver set. Teflon tape or thread sealant helps seal threaded connections, and a drain pan or bucket catches any remaining water. Use towels to protect the floor, and keep a flashlight handy for low-light access areas. Ensure you work in a dry area to reduce slip hazards and keep small parts organized to prevent loss. Following a clear checklist reduces mistakes and speeds up the job.
Preparation and access: gaining valve access
Most washing machines conceal their inlet valve behind the rear panel or a service access panel. Remove the back panel carefully, exposing the valve block and hose connections. Note how hoses are connected before disconnecting anything so you can reassemble them in the correct order. If your model has a locking or quick-connect feature, release it gently to avoid damaging fittings. Take photos or label hoses and electrical connectors to simplify reassembly. When in doubt, pause and double-check: incorrect hose orientation can cause leaks or improper filling.
The replacement workflow (overview)
With the valve exposed, you will disconnect the supply lines, remove the old valve, and install the new unit. Key steps include disconnecting hoses from the valve ports, removing mounting screws, detaching electrical connectors, and sealing all threaded joints. Install the new valve in the reverse order, ensuring proper alignment and securing fittings without over-tightening. Use thread sealant or Teflon tape on threads where applicable and verify the gasket seats correctly. Reconnect hoses, reassemble the panel, and restore power and water to test the unit.
Post-install testing and leak checks
Power up the washer and run a short cycle with no load to observe the inlet valve operation. Watch for leaks around hose connections and valve fittings; if you see water seeping, tighten fittings a quarter-turn at a time and recheck. Check both hot and cold sides and verify that the drum fills smoothly and stops at the correct level. Document any abnormal behavior and consult the valve kit instructions if the model is not responding as expected. A successful test confirms a leak-free installation and proper water flow.
Maintenance tips and common mistakes to avoid
After replacement, periodically inspect the inlet valve area for signs of wear or leaks, and replace worn hoses promptly. Avoid overtightening fittings, which can crack plastic housings or strip threads. Do not use harsh cleaners near the valve; residue can degrade seals. Keep the area clean and dry to help identify leaks early. Regular maintenance and mindful installation reduce emergency calls and extend valve life.
Tools & Materials
- Replacement inlet valve kit(Ensure compatibility with the washer's make/model)
- Adjustable wrench(Prefer 6-12 inch range)
- Screwdriver set(Flathead and Phillips)
- Pliers(Needle-nose for clips and clamps)
- Teflon tape or thread sealant(Seal threaded connections)
- Drain pan or shallow bucket(Catch water during hose removal)
- Towels or rags(Protect floor and wipe spills)
- Flashlight(Improve visibility in tight spaces)
Steps
Estimated time: 60-90 minutes
- 1
Shut off power and water supply
Unplug the washing machine and turn off both hot and cold water valves at the wall. Open a nearby faucet to relieve pressure and drain residual water into a pan. This first step protects you from electric shock and minimizes water spillage during valve replacement.
Tip: Have towels ready and keep a bucket handy to catch drips. - 2
Disconnect inlet hoses
Place a bucket under the hose connections and loosen the fittings with an adjustable wrench. Remove the hoses one at a time, keeping track of which hose goes to hot or cold. Cap or seal hoses to prevent debris from entering the fill lines.
Tip: Take a quick photo of hose routing before detaching to ensure correct reassembly. - 3
Access the valve housing
Remove the rear service panel to access the inlet valve. Identify the valve block, two supply lines, and the electrical connector. If your model has locking clips, release them gently to avoid breaking plastic housings.
Tip: Use a flashlight to inspect the valve mount and confirm there are no hidden screws. - 4
Remove the old valve
Disconnect the electrical connector, then unfasten the mounting screws securing the valve. Gently pull the valve away from the body, keeping hoses aligned to avoid kinks. Note the orientation of seals and gaskets for the new valve.
Tip: Label or photograph each connector before removal to prevent confusion during reassembly. - 5
Install the replacement valve
Position the new valve, align ports with hoses, and tighten mounting screws evenly. Reattach the electrical connector and apply thread sealant or Teflon tape to threaded joints as needed. Reconnect supply hoses, ensuring hot and cold lines go to their correct ports.
Tip: Do not overtighten fittings; snug is usually sufficient to prevent leaks without damaging parts. - 6
Test for leaks and function
Reinstall the rear panel, plug in the machine, and restore water supply. Run a short cycle with a small load to observe the inlet valves in action. Check all connections for leaks; tighten gradually if needed and recheck after a warm cycle.
Tip: Monitor for several minutes after the test to ensure no slow leaks develop as fittings seat.
FAQ
Do I need a professional to replace a washing machine valve?
You can replace the inlet valve yourself if you’re comfortable with basic plumbing and electrical safety. Ensure you shut off all power and water, follow the replacement steps carefully, and test for leaks. If you encounter stubborn corrosion, complex valve assemblies, or warranty concerns, consider hiring a technician.
You can DIY if you’re comfortable with basic plumbing and safety checks. If you hit stubborn corrosion or warranty issues, call a professional.
What tools are essential for valve replacement?
You’ll need a replacement inlet valve kit, an adjustable wrench, pliers, a screwdriver set, Teflon tape or thread sealant, a drain pan, and towels. Having a flashlight helps with tight spaces.
Tools include a valve kit, wrench, pliers, screwdriver, tape or sealant, pan, and towels.
How long does valve replacement typically take?
Most installations take about one to two hours, depending on access and model complexity. If you’re working with tight spaces or old hardware, allocate extra time and plan breaks.
Typically about one to two hours; plan extra time for difficult access.
What are signs a valve replacement is unnecessary?
If the problem is water leakage from hoses, seals, or the drum, you may need to inspect other components first before replacing the valve. Worn hoses, a faulty pump, or a clogged filter could mimic valve symptoms.
Leaks from hoses or seals, or drum issues may point to other parts, not the valve.
Will valve replacement affect warranty?
Replacing the valve yourself can affect warranty coverage if the manufacturer requires professional service. Check your warranty terms and consider documenting the repair or consulting the brand’s support before proceeding.
Check warranty terms before replacing; some manufacturers require professional service.
Watch Video
The Essentials
- Power down and isolate water before starting.
- Use the correct valve kit and sealant for your model.
- Test the installation with a controlled cycle before full use.
- Best Washing Machine's verdict: weigh warranty, DIY risk, and cost before replacing the valve.