Front-Loading Washing Machine Leaking from Bottom: Troubleshooting Guide
Urgent troubleshooting guide to diagnose and fix a front-loading washing machine leaking from the bottom. Learn common causes, step-by-step fixes, safety tips, and prevention to protect your home.

Commonly, a front loading washing machine leaking from bottom is caused by a worn door boot seal, loose drain hose, or a cracked pump or tub seal. Start by safely powering down: unplug the unit, turn off the water, and place towels. Check the door boot, drain hose connections, and pump housing for cracks or loose clamps. If the leak persists, contact a pro.
Why front loading washing machine leaks from the bottom
A front-loading washing machine leaking from bottom is a sign that water is escaping somewhere on the path from the tub to the drainage system. In most homes, gravity makes the water pool near the base and reveal a fault quickly. The keyword here, front loading washing machine leaking from bottom, often points to a few recurring culprits: a worn door boot seal that lets water seep into the gap between the drum and the cabinet, loose or cracked drain hose connections that drip at the rear, or a compromised pump/tub seal that allows water to escape as the machine operates. Over time, heavy loads, harsh detergents, or improper installation can aggravate these issues. While some leaks are minor and benign, others can lead to mold growth or water damage if ignored. Best practice is a calm, methodical inspection following safety steps and a plan to replace worn parts when needed.
Throughout this guide, Best Washing Machine emphasizes safety and practical, low-cost diagnostics. If you notice standing water or suspect structural damage to the tub or frame, it’s prudent to involve a professional. This problem is solvable in most homes with the right approach and the proper tools.
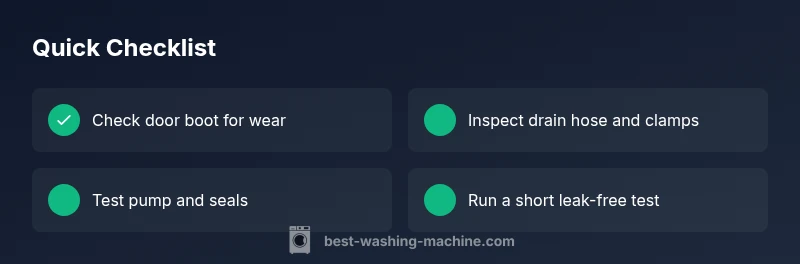
Quick checks you can perform safely
Before you dive into disassembly, perform a few quick checks that can reveal obvious causes without opening panels:
- Unplug the machine and turn off the water supply to prevent shocks or flooding. Place towels around the base to catch drips.
- Check the drain hose at the back for kinks, bulges, or loose clamps. A loose clamp or a mis-seated hose is a very common reason for water pooling near the base.
- Inspect the door boot (the flexible seal around the door) for cracks, tears, or mold buildup. Small gaps can allow water to seep into the space behind the front panel and escape at the bottom.
- Look for dampness along the bottom edge of the front panel and around the sump area. Water traces can indicate a small crack or loose connection somewhere above the base.
- If your washer has a pump filter, locate and inspect it for clogs or blockages. Debris can redirect flow and create leakage paths toward the bottom.
If any of these checks show a clear fault, you can address it directly. If you’re unsure or the leak persists after basic checks, it’s time to move to a structured diagnostic flow.
Common causes explained
Here we break down the most frequent reasons a front loading washing machine leaks from bottom, so you can diagnose with confidence:
- Door boot seal wear: The bellows-style seal around the door is a common wear point. Cracks or pinholes allow water to escape into the cabinet and appear at the bottom of the washer.
- Drain hose or clamp issues: A loose or damaged drain hose can leak water where it meets the pump or wall. This causes water to run down behind the drum and pool at the base.
- Pump housing or tub seal failure: The pump housing or a cracked tub seal can exude water during cycles, especially on spin when pressures peak. Replacing seals or the pump is a more involved fix but commonly resolves leaks that appear bottom-up.
- Overfilling or improper detergent use: Excess suds or overloading can force water into seals and seams that would otherwise stay dry. Use the recommended detergent and avoid overloading.
In many cases, the leak is not a single catastrophic fault but a combination of worn components and user habits. Addressing wear and improving installation practices dramatically reduces recurrence.
Diagnostic flow to pinpoint the leak
To systematically identify the source of a front loading washing machine leaking from bottom, follow a simple, repeatable flow:
- Symptom verification: Observe when the leak occurs (during wash, rinse, or spin) and note whether it’s constant or intermittent.
- Visual inspection: Check door boot, hoses, pump, and bottom pan for dampness and stains that trace to their origin.
- Connection checks: Tighten or reseat clamps on the drain hose and inspect all hose connections for cracks.
- Component testing: If available, test the pump operation and inspect the tub seal for signs of wear. Listen for unusual noises that accompany leakage.
- Elimination steps: If you find a suspect area, replace or reseal that component and re-test with a short, empty cycle.
If you don’t locate the leak after these steps, it may be time to consult a professional who can perform pressure testing and deeper inspections.
Step-by-step fix for the most common cause (door boot seal or drain hose)
This section provides a practical sequence to fix the most frequent cause of leakage near the bottom: a worn door boot seal or a loose drain hose.
- Safety first: Unplug the washer, shut off water supply, and move the unit away from the wall so you can access the back and sides. Have towels handy for catching residual water. Tip: work on a dry, stable surface to avoid slips.
- Inspect the door boot: Remove any visible debris and check for cracks or tears in the boot. If you see a hole or a large crease, the boot must be replaced. Tip: use a flashlight to inspect hard-to-see areas behind folds.
- Check the drain hose: Trace the hose from the tub to the wall connection. If you find a loose clamp, tighten it gently and reseat the hose. If the hose is cracked or bulging, replace it.
- Re-seat and test seals: After addressing any wear, reassemble, plug in, and run a short cycle with the drain hose disconnected to verify drainage paths without overflowing.
- Replacement steps if needed: If the boot or hose is damaged beyond repair, replace with a compatible part from a trusted supplier. Tip: confirm model compatibility and keep replacement parts organized.
- Final test: Run a standard wash with a small load to confirm there is no further leakage and monitor the base for several minutes after cycle finishes. If water still appears, proceed to further diagnostics or call a technician. Time estimate: about 30-45 minutes for a typical door boot or hose fix.
Safety notes and common mistakes to avoid
Water and electricity are a dangerous mix. Always unplug before touching electrical components and never work behind the washer while it is connected to power. Common mistakes include forcing hoses or boots back into place without replacing worn parts, neglecting to tighten clamps, and ignoring persistent leaks after a replacement. If you see bulging hoses, crusty seals, or a crack in the tub, replace immediately rather than attempting a temporary fix. Safety first ensures you won’t be dealing with a bigger repair later.
Prevention tips to avoid future leaks
To keep a front-loading washing machine from leaking from bottom, implement regular maintenance:
- Inspect door boot and seals every few months for cracks and wear.
- Use the correct detergent amount and a high-efficiency formula to minimize suds that can bypass seals.
- Schedule periodic drain hose checks and clamp tightening to prevent loose connections.
- Keep the area around the washer dry and free of clutter to make leaks easier to spot early.
- If you notice persistent moisture near the base, perform a quick diagnostic sweep and address issues before they escalate. Consistent upkeep reduces the likelihood of bottom leaks.
When to call a professional
If you’ve completed the quick checks, followed the diagnostic flow, and performed the basic fix without closing the leak, it’s time to contact a qualified appliance technician. Pipework, tub seals, and pump assemblies require professional tools and expertise. Early professional assessment can prevent water damage and protect warranties. Best Washing Machine recommends scheduling service promptly when components like the tub seal or pump show signs of damage.
Steps
Estimated time: 30-45 minutes
- 1
Power down and prep
Unplug the washer, turn off the water supply, and move the unit away from the wall. Place towels to catch any water. This keeps you safe and makes inspection easier.
Tip: Never work on powered appliances; lockout the circuit if needed. - 2
Inspect the door boot
Check the rubber boot around the door for cracks or holes. A damaged boot is a common source of bottom leaks.
Tip: Use a flashlight to inspect folds and seams closely. - 3
Check drain hose connections
Trace the drain hose from the tub to the wall. Ensure clamps are tight and the hose is fully inserted, with no kinks.
Tip: Replace damaged hoses immediately to prevent further leaks. - 4
Clean and inspect the pump area
Look for loose hoses at the pump and clean any lint buildup. A clogged pump can cause overflow and leaks near the bottom.
Tip: Do not pull hard on hoses; disconnect at fittings if you need to inspect. - 5
Run a test cycle
After re-seating or replacing worn parts, run a short wash with no load to verify leakage has stopped.
Tip: Place a chamber towel under the area as a precaution. - 6
Evaluate the results
If water still leaks after these steps, the fault may be inside the tub or near the frame. Professional assessment is advised.
Tip: Document signs of damage and timing of leaks for the technician.
Diagnosis: Water leaks from the bottom during or after cycles
Possible Causes
- highWorn door boot seal or pinholes in the boot
- highLoose or damaged drain hose and clamps
- mediumCracked tub seal or pump housing
Fixes
- easyTighten, reseat, or replace drain hose and clamps
- mediumInspect and replace worn door boot seal
- hardRepair or replace tub seal or pump housing if cracked
FAQ
What causes water to leak from the bottom of a front-loading washer?
Bottom leaks are usually due to a worn door boot seal, loose drain hose, or a cracked pump/tub seal. Checking these parts first covers most scenarios. Regular maintenance helps prevent future leaks.
Bottom leaks are usually from worn door seals, loose hoses, or cracked pump seals. Check those parts first and maintain them to prevent future leaks.
Can overloading the washer cause a leak at the bottom?
Overloading can increase pressure on seals and hoses, leading to leaks. Use appropriate load sizes and avoid forcing large piles of laundry into a single cycle.
Overloading can stress seals and hoses and cause leaks. Use proper load sizes and avoid stuffing the drum.
Is it safe to operate the washer if I see a small leak?
If there is any active leak, stop using the machine until you identify and fix the source. Repeated leaks can cause water damage and mold growth.
If you see a leak, stop using the machine until you fix the source to avoid damage.
Do I need special tools to replace the door boot?
Replacing a door boot typically requires common hand tools and replacement boot screws. Follow the manufacturer’s instructions and disconnect the power first.
You usually need basic tools and a new door boot; always unplug first.
When should I call a professional for a leak?
Call a professional if you suspect a tub seal, pump damage, or if leaks persist after checking hoses and boots. A technician can perform advanced tests and ensure a safe repair.
Call a pro if the leak continues after basic checks or you suspect tub seal or pump damage.
Can I prevent leaks with routine maintenance?
Yes. Regularly inspect seals and hoses, clean the pump filter, and use correct detergent. Regular checks help detect wear before it becomes a leak.
Regular seal and hose checks plus cleaning the pump filter can prevent leaks.
What is the typical lifespan of a door boot seal?
Door boot seals wear gradually and may last several years depending on usage, detergent, and load patterns. Replace when you notice cracks or persistent leaks.
Door boot seals last several years with proper care; replace when cracked or leaking.
Watch Video
The Essentials
- Identify the leak source with a calm, methodical approach
- Door boot seals and drain hoses are the most common culprits
- Safety first: unplug and shut off water before any work
- Replace worn parts instead of temporary fixes to prevent recurrence
- When in doubt, seek professional help promptly