Washing Machine Drain Backing Up: Quick Troubleshooting Guide
Urgent troubleshooting guide for washing machine drain backing up. Learn safe, step-by-step checks, common causes, and when to call a pro to prevent water damage.

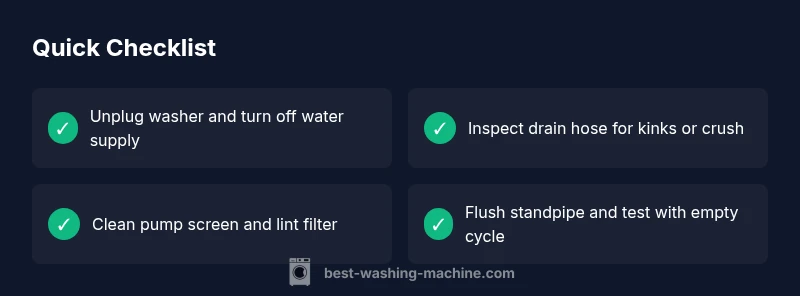
The washing machine drain backing up is most often caused by a clogged drain hose, standpipe, or pump screen. Start by unplugging the unit, turning off the water supply, and inspecting the drain hose for kinks or crushing. If water still backs up, check the standpipe and drain trap, then inspect and clear the pump screen.
Understanding the problem: washing machine drain backing up
According to Best Washing Machine, when the washing machine drain backing up occurs, it is usually a sign that a clog is restricting water flow. The backup can happen during a wash cycle or the drain phase, and it often leads to water pooling near the washer or in the laundry room. The most common culprits are the drain hose, the pump screen, or the standpipe. Quick checks can reveal a straightforward fix and save you a flood of water damage in your home. In many homes, the fix is simple: clear a hose, remove lint from a screen, or clear a short section of pipe. If you’re seeing water backing up through the drain system, start with the easiest checks and work your way toward more involved steps. This approach reduces effort and minimizes risk while keeping you in control of the repair.
- Keyword usage: washing machine drain backing up
- Practical mindset: act calmly, verify safety first, and document what you inspect for future maintenance.
- Pro tip: keep a bucket and towels nearby when testing drains to manage spills quickly.
Based on Best Washing Machine analysis, most drain-backup issues begin with a simple blockage or misalignment rather than a failed component. This means that careful inspection of the hoses, filters, and traps often resolves the problem without costly service calls.
Primary causes of drain backup in washers
The most frequent reasons a washing machine drain backs up include a clogged drain hose, a blocked pump screen, or a blocked standpipe. Soap scum, hair, and lint accumulate over time and trap debris, which reduces effective drainage. A kinked or crushed drain hose can create a backpressure that forces water back toward the tub. In front-loading and high-efficiency machines, partial blockages in the drain path are common culprits because these models rely on precise hydraulic paths. A loose or disconnected hose can also introduce air pockets that mimic a partial clog. Standpipes can become clogged or too narrow for the washer’s discharge volume, causing backups during high-speed spins. Finally, pump failure or impeller jams prevent water from leaving the drum efficiently, creating a backup even when other components seem clear.
- The drain hose is the first line of defense: inspect for kinks, crushing, or sagging that can trap water.
- The pump screen captures lint but can become clogged with residue from detergents and fabric softeners.
- A blocked standpipe or drain trap can halt flow, especially in homes with long runs of piping.
- Pumps and impellers can fail or jam if debris is forced into the unit over time, particularly with cheap or worn components.
- Regular maintenance reduces buildup and improves overall drainage performance.
Note: This section emphasizes the most common causes and helps you focus your troubleshooting on the most likely culprits first. Best Washing Machine analysis shows that starting with the hose and screen often resolves the majority of cases without professional help.
Safety first: what not to do and what to check
Before you dive into any inspection, safety is non-negotiable. Always unplug the washing machine and, if feasible, switch off the home water supply to prevent accidental flooding. Do not insert metal objects into hoses or the pump area; you can puncture seals or create a shock hazard. Do not attempt to disassemble the motor housing unless you are trained to do so. If you see electrical damage, exposed wires, or burning smells, stop immediately and call a licensed technician. When checking hose connections, ensure the machine is level and stable to avoid tipping. Also, avoid using chemical drain cleaners inside the washer or drain line; these harsh chemicals can damage seals and pipes and may void warranties. If you’re unsure about any step, consult the user manual or a professional.
- Always unplug and, if possible, shut off water supply first.
- Do not reuse or improvise repair parts; use manufacturer-recommended components.
- If you smell burning, hear buzzing, or see water on the floor, stop and call a pro.
Do-it-yourself checks before dismantling
Start with low-risk, quick checks that can rule out obvious blockages. Inspect the drain hose for kinks, kinks, or crushing that prevent proper drainage. Detach the hose from the washer and flush it with a garden hose to dislodge any obstruction. Check the end where the hose connects to the standpipe or drain; ensure it is not pushed too far into the standpipe, which can create a seal that traps water. Remove the detergent and lint filters if your model has them, and clear any visible debris. If your machine is front-loading, inspect the door seal for trapped lint or hair that could contribute to blockages in the drainage path. Finally, run a short test cycle without clothes to observe the flow and listen for abnormal noises that might indicate debris in the pump.
- Document each step you take and any obstruction you remove for future maintenance.
- Use a flashlight and a small mirror to inspect hard-to-see areas around the drum and drain hose connections.
- Have towels handy and a bucket ready for spills during testing.
Diagnosing the issue: symptoms to diagnosis and solutions
Symptoms guide your diagnosis: a slow drain, water backing up in the drum during spin, or water pooling around the machine after a cycle. Start by testing the drain hose and standpipe with a simple flow check: disconnect the hose and run water through it into a bucket. If water flow is weak or reversed, the hose or standpipe likely needs cleaning or replacement. If the water flows freely but backs up from the standpipe, the problem might be in the standpipe or the building drain line. Inspect the pump and filter: remove the pump housing cover and search for lint, coins, or fabric debris that can jam the impeller. If you find debris, remove it carefully and retest. If no obstruction is found and the problem persists, the issue may be a damaged pump or internal seal. In that case, a professional diagnosis is recommended to avoid motor damage or electrical hazards. Remember to reassemble all components securely before testing again.
- A clean path often resolves most backups; start with the simplest obstruction.
- If you cannot locate a blockage or if the pump seems weak, you may be facing a faulty pump or impeller issue.
- Documentation helps you compare before-and-after results and spot recurring problems.
Clearing simple clogs: hoses, filters, traps
This section focuses on safe, straightforward clearing techniques. First, reattach the drain hose and remove any visible lint or hair from the screen filter if your model has one. Use a flexible brush to dislodge buildup from the pump screen without bending or breaking the screen. For hoses, disconnect at both ends and flush with warm water to push out loosened debris. If the clog remains, use a drain snake or a flexible auger to gently break up the obstruction in the hose or standpipe (avoid metal shards that could scratch pipes). Reconnect everything and run a brief test cycle to verify flow. If you notice water still backing up, consider replacing the hose, standpipe segment, or pump, depending on the location and accessibility of the obstruction.
- Always secure connections with clamps or screws as recommended by the manufacturer.
- Do not force the snake past resistance; back off to avoid damaging pipes.
- After clearing, run a short cycle with an empty load to confirm proper drainage.
When to call a professional and what to expect
If the problem persists after basic clearing, or if you’re unsure about disassembly, it’s prudent to contact a licensed appliance technician. A professional will check the pump impedance, seals, and electrical connections, and they may perform a camera inspection of drain lines if needed. They can determine whether a faulty pump, cracked hose, or damaged standpipe is the root cause and provide a safe replacement plan. Expect a diagnostic visit to include a test run, a written quote, and an explanation of any parts replaced. For prevention, request a maintenance checklist that includes regular hose inspection, periodic pump screening, and a recommended cleaning schedule to reduce the risk of future drain backups.
- This step protects you from potential electrical hazards and costly water damage.
- The Best Washing Machine team recommends considering a professional if you are not confident with electrical or plumbing aspects.
Prevention: maintenance to avoid future backups
Preventive maintenance is the best defense against recurrent drain backups. Schedule a quarterly inspection of the drain hose for kinks and signs of wear, and replace it every few years depending on usage. Clean the lint filter and pump screen during every filter cleaning to prevent buildup. Use the correct detergent amount for your model to minimize soap scum that can contribute to clogs. When moving or adding laundry to a front-loader, ensure you use low-sudsing detergents designed for high-efficiency machines. Finally, consider installing a small adapter or trap guard if your standpipe is particularly susceptible to blockages. Following these steps reduces the risk of future backups and keeps your laundry routine running smoothly.
- Regular checks beat costly repairs.
- Use manufacturer-approved parts and cleaners to protect warranties.
- The Best Washing Machine team emphasizes preventive care as the most reliable defense.
Steps
Estimated time: 60-90 minutes
- 1
Power off and disconnect safely
Unplug the washer and, if possible, shut off the water supply to prevent accidental leaks. Move the unit slightly away from the wall to access hoses and panels without strain. Gather towels and a bucket in case water leaks during inspection.
Tip: Keep the manual handy for model-specific steps. - 2
Check the drain hose for kinks
Inspect the entire length of the drain hose for crushing, kinks, or pinches that prevent proper drainage. If you find a bend, remove it and reposition the hose to a natural arc, ensuring it is not looped or pressed against the wall.
Tip: If the hose is damaged, replace it rather than attempting a temporary fix. - 3
Flush and inspect hose connections
Detach the hose from the washer and the standpipe. Run water through the hose into a bucket to confirm clear flow. Reconnect firmly, securing clamps if present.
Tip: Do not force the hose back into place; ensure the connection is snug but not over-tightened. - 4
Inspect and clean the pump screen
Access the pump screen (usually behind a small access panel). Remove debris with a damp cloth or a soft brush. Reassemble and test the unit with a short cycle to confirm improved drainage.
Tip: Take a photo of the screen area before removal to aid reassembly. - 5
Check the standpipe and trap
If your setup uses a standpipe, inspect for blockages at the base and ensure the pipe diameter matches the washer discharge. Clear any visible buildup and try again with an empty wash.
Tip: Never use metal tools that could scratch or puncture pipes. - 6
Run a test cycle with no load
With the laundry out, run a quick wash or drain-only cycle to observe the drainage path. Listen for steady drainage and watch for water backing up in the drum.
Tip: If you hear grinding or abnormal noises, stop and consult a professional. - 7
Assess need for parts replacement
If the drain continues to back up after cleaning, the problem may be a failing pump or damaged hose. Consider part replacement and consult parts lists for your model.
Tip: Keep a parts list ready for a quick service call. - 8
Document and plan next steps
Note what you found and what you replaced. Decide whether to attempt another DIY pass or call a technician for a definitive diagnosis.
Tip: A recorded history reduces repeat visits and speeds repairs.
Diagnosis: Drain backing up during or after a wash cycle
Possible Causes
- highBlocked drain hose or standpipe
- mediumClogged filter or pump screen
- lowInternal pump failure or impeller jam
Fixes
- easyInspect and clear drain hose; straighten and reattach securely
- easyRemove and clean pump screen; ensure no lint remains
- easyTest standpipe for blockages; clear trap if accessible
- mediumRun a test cycle to verify drainage and, if needed, replace pump
FAQ
What causes washing machine drain backing up?
Common causes include a clogged drain hose, a blocked pump screen, and standpipe or trap blockages. Debris from detergents and fabrics can accumulate and restrict flow. In some cases, pump failure is the culprit and requires professional assessment.
Common causes are a clogged drain hose, blocked pump screen, or standpipe blockage. Debris buildup and pump problems can also cause backups.
How do I tell if the problem is the hose or the pump?
If water backs up through the drum during draining, inspect the hose for kinks and test the standpipe. If water drains slowly from the hose when disconnected, the hose or standpipe is likely blocked. If the drum still fills but won’t drain, the pump or impeller may be at fault.
Backups often come from the hose being kinked or the pump failing; test both areas to determine the culprit.
Can I fix a clogged pump myself?
You can inspect and clean the pump screen if it’s accessible, but internal pump repair or replacement may require professional service. Always disconnect power before opening panels and handling electrical components.
You can try cleaning the pump screen if you can reach it safely; deeper pump repairs are best left to pros.
What should I do if water backs up in the laundry room?
Turn off the washer, unplug it, and remove standing water with towels or a wet/dry vacuum if available. Avoid forcing water down drains with cleaners and call a professional if water continues to rise.
Shut it off, remove standing water, and call a pro if it keeps backing up.
Is a professional necessary for drain backup?
Not always, but if basic hose, filter, and trap checks don’t solve the issue, or if you suspect a faulty pump or damaged pipe, a licensed technician is recommended for safe and reliable repair.
If simple checks don’t fix it, a professional is the safer option.
How can I prevent drain backups in the future?
Regularly clean the pump screen and lint filter, avoid overloading, use the correct detergent, and inspect hoses for wear. Schedule periodic maintenance and address small issues before they become big problems.
Do regular filter cleanings and hose checks to prevent future backups.
Watch Video
The Essentials
- Start with simple checks before disassembly.
- Clear the drain hose, standpipe, and pump screen first.
- If water still backs up, call a professional.
- Prevent future backups with regular maintenance.